How to Request Read Receipts in Outlook? Simple Steps to Know Who Read Your Email!
Outlook has become a significant means of sending day-to-day work and personal emails. Sometimes the information in an email is so important that you need to make sure that the recipient read it, and that you receive the confirmation that the email has been read. But, the question is, how can you ensure that with Outlook?
Well, you can request a read receipt in Outlook from the recipients, as a confirmation that the receiver has read the email. This receipt is an auto-generated email. However, you will only receive this Outlook read receipt when the recipient consent to send it by selecting the appropriate option in the pop-up that he/she will see on opening the email you have sent.
Keeping that in mind, let’s see the steps for requesting a read receipt in Outlook, how to turn on read receipts, and much more!
- Requesting Read Recipients on Outlook for an Individual Email
- Requesting Read Receipts on Outlook for All Emails by Default
- How to Request Read Receipts on Outlook.com or Outlook Web App?
- Creating a Rule for Requesting Read Receipts in Outlook
- Where to View Read Receipts in Outlook?
- How to Send a Read Receipt in Outlook?
Requesting Read Recipients on Outlook for an Individual Email
As discussed above, Outlook has a feature that lets you know if the recipient has read the email. Now, in order to know how to request read receipt Outlook, refer to the steps given below:
In Outlook for Windows:
- Open the Outlook app on your Windows computer.
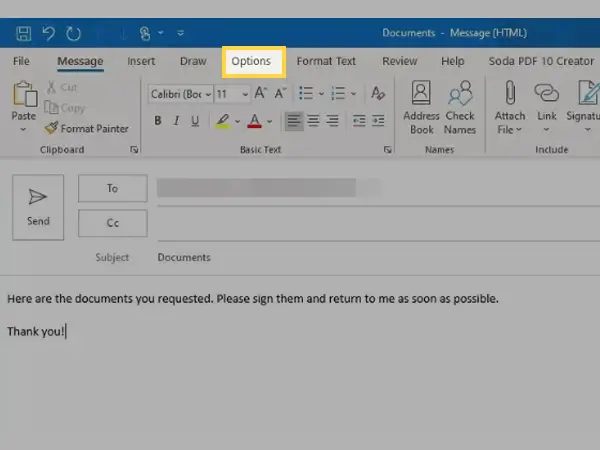
- After opening it, compose an email.
- From the top menu bar of the email composing window, click on Options.
- After that, from the options that will appear, select the checkbox next to the Request a Read Receipt option.
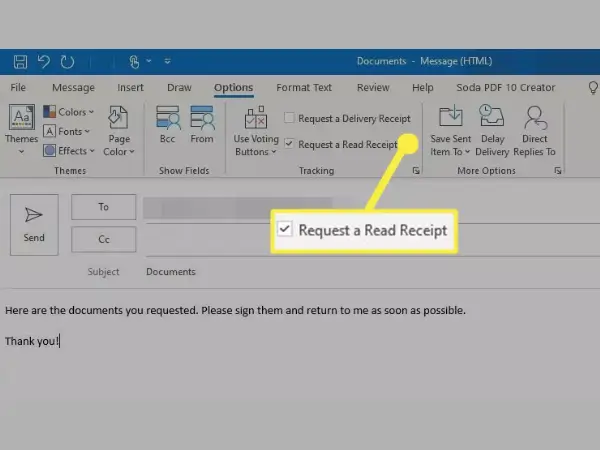
- With that done, write your email and click on the Send button.
In Outlook for Mac:
- Launch the Outlook app on your Mac.
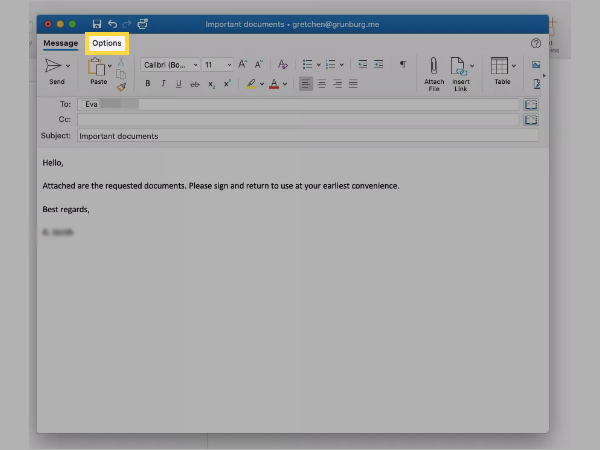
- Compose a new email by clicking on the New Email option in the top right corner.
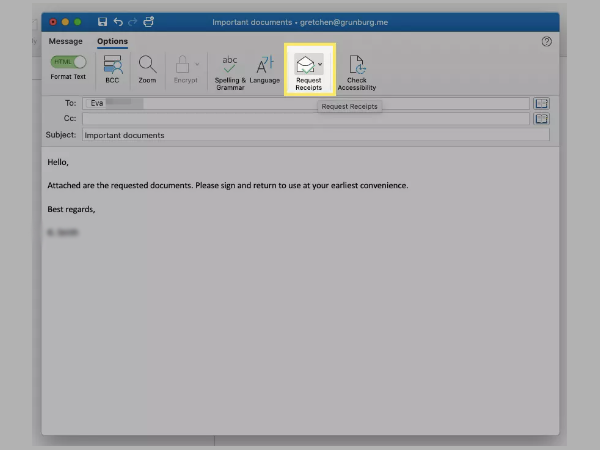
- Click on Options in the top right corner of the email composing window.
- Thereafter, select the Request Receipts menu from the options that will appear next.
- Next, select the Request a Read Receipt option from the menu.
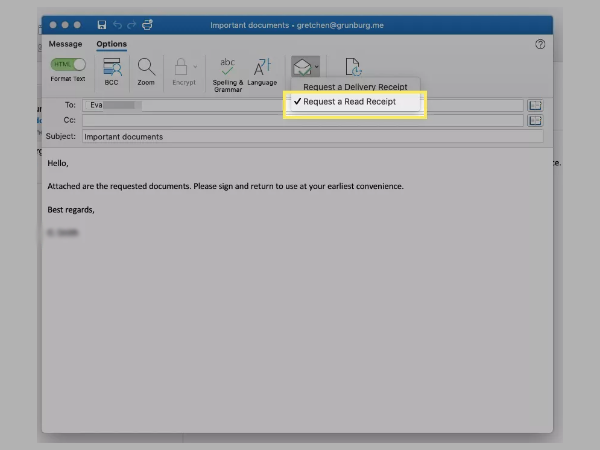
- Finally, type in your email and click on Send.
If you follow these processes, respectively for Windows and Mac, and send the email to the recipient, they will see a pop-up to send the read receipt to you. If they respond positively to it, then you will receive the auto-generated confirmation email, that the recipient has read the email, otherwise, you won’t receive the read receipt Outlook.
NOTE: With Outlook for Mac, some additional restrictions on requesting the read receipt are applied, like, it can only be used individually with an Exchange Server or Microsoft 365 account. Additionally, IMAP and POP email accounts, like Gmail accounts, do not offer read receipts.
Requesting Read Receipts on Outlook for All Emails by Default
The above is the process to request read receipts in Outlook for an individual email. However, if you want to receive the read receipt for all the emails you send, then there is another method for it that will automate the above process.
NOTE: This method only works in Outlook for Windows. In Outlook for Mac, you cannot set it to receive the read receipt for all the emails by default. You have to manually enable the option to request a read receipt every time you send an email in Outlook, the steps for which are stated in the previous section of this article.
Now, without further ado, let’s automate this process:
- Launch the Outlook app on your system.
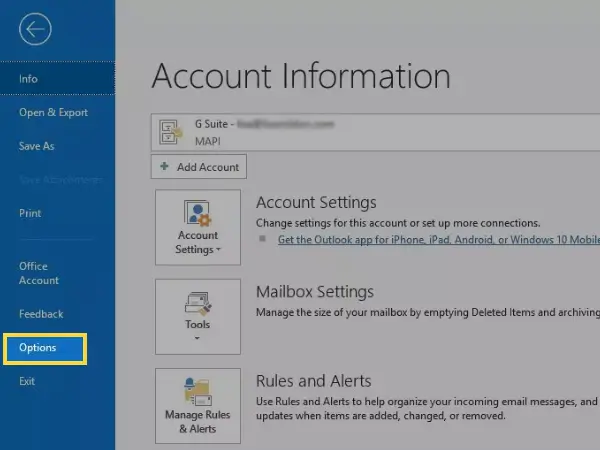
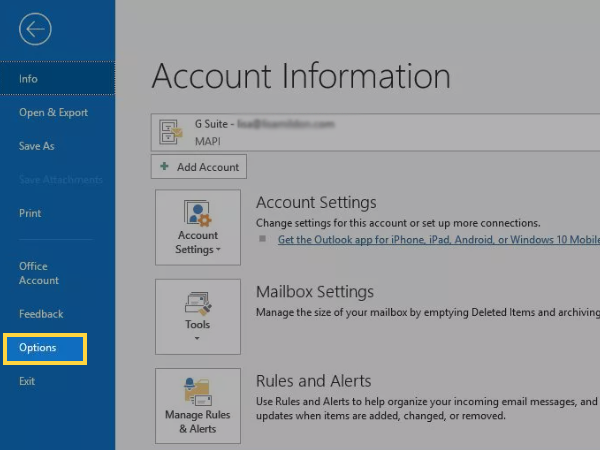
- Click on the File menu option in the top left corner of the Outlook dashboard.
- Next, Click on Options from the left sidebar of the following screen.
- Then, select the Mail option present on the left side pane of the next screen.
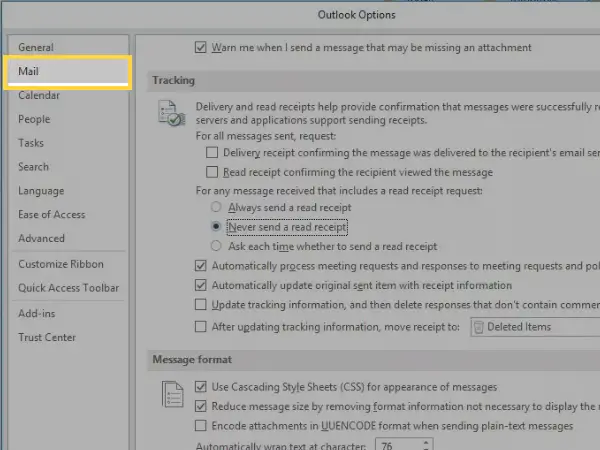
- Thereafter, scroll down to the next page to the Tracking section. There, locate the For all Messages Sent, Request option.
- Now, under the aforementioned section, select the checkbox of the Read Receipt Confirming the Recipient Viewed the Message option.

- Once done, click on the OK button to apply the changes.
After enabling this option, every recipient to whom you will send the email will receive the request for sending a read receipt to you by default.
NOTE: You might not always receive read receipts even with this configuration. Not all email clients offer read receipts, and your email recipient can choose either to send or not send one. Thus, request read receipts for specific emails only when necessary for better outcomes.
How to Request Read Receipts on Outlook.com or Outlook Web App?
The free webmail version of Microsoft Outlook is Outlook.com. In a standard Outlook.com account or through an individual Microsoft 365 account, there is no possibility or option to automatically or manually request a read receipt.
However, if you have an Exchange server account as part of your Microsoft 365 configuration and access Outlook online, you can ask for read receipts. This is how:
- Open the Outlook web app on your system.
- Compose a new email by clicking on the New Email option.
- In the email composing window, click on the more menu icon (three dots).
- From the menu, select Show Message Options.
- Then, choose the Request a Read Receipt option.
- Finally, type in your email and send it.
After this, the receiver will see the request to send the read receipt to you when they will open the email.
Creating a Rule for Requesting Read Receipts in Outlook
You can create a specific rule to receive read receipts in Outlook. It implies that if specific criteria are satisfied, you will receive notifications for the same. The steps listed below will help you create a rule that suits your needs:
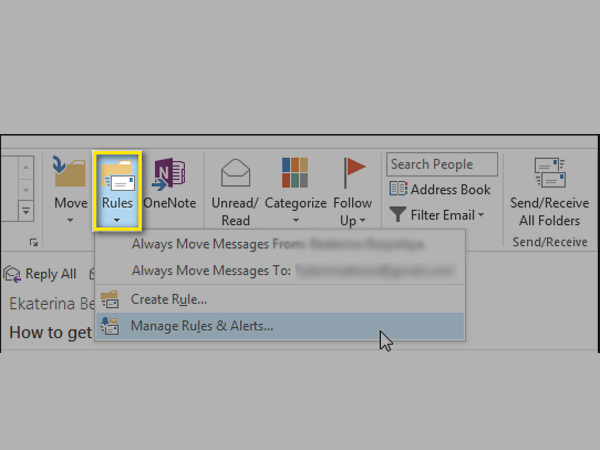
- Launch Outlook on your system and switch to the Home tab.
- In the Move group, click on the Rules menu and select the Manage Rules and Alters option.
- In the next window that will appear on the screen, switch to the Email Rules tab.
- Thereafter, click on the New Rule button to open the Rules Wizard.
- Now, from the Start From a Blank Rule section, select either ‘Apply Rules on Messages I Receive’ or ‘Apply Rule on Messages I Send’, and click on the Next button.
Note: To get the read receipt, select the Apply Rule on Messages I Send.
- Next, select the conditions to apply in the rule from the suggested list.
- To update the rule description, click the link (the highlighted value) in the area beneath the list of conditions.
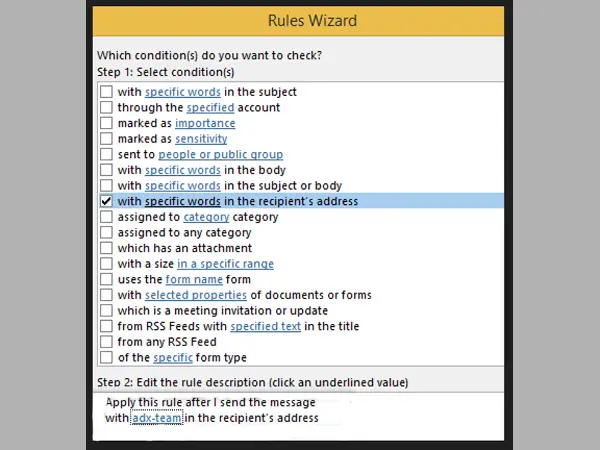
- Now, to apply the rule for specific words in the recipient’s address, type the address to search. Click Add for the word to appear in the search list and then, click OK to save changes.
- Again, the Rules Wizard will open and in the field below the conditions list, the complete rule will appear.
- Then, click on the Next button.
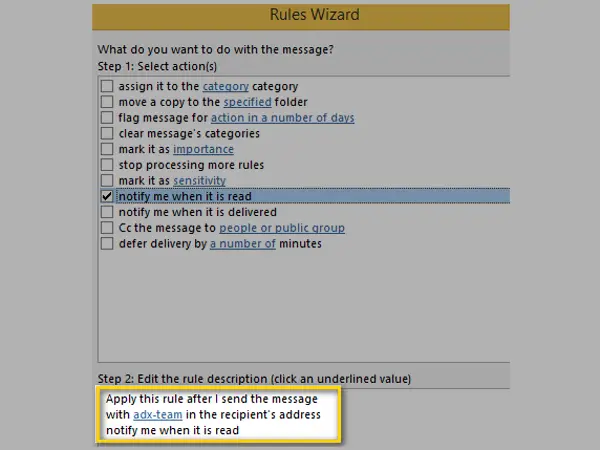
- Thereafter, in the Select Action list, select the ‘Notify Me When it is Read’ option and click Next. The formed rule will appear at the bottom of the window.
- If you want to add any expectations to the rule, insert them in the next window and then click Next.
- Verify the precision of your rule description. Additionally, you can define the rule’s options and give it a name.
- Click on the Finish button.
- Finally, in the Rules and Alters window, click on Apply and then OK to save and apply the newly formed rule for getting read receipts in Outlook.
The rule for seeking a read receipt has now been established! As a result, you will only receive read receipts for emails that you send to addresses that contain certain words as specified in the rule.
Where to View Read Receipts in Outlook?
Now you know how to request an Outlook read receipt, but do you know where you can find it? Don’t worry. If you are not aware of it. Here are the steps to get your read receipt:
- In your Outlook app, open the Sent folder.
- There, look for the email you send with the read receipt request and open it. It usually appears with a special icon or symbol.
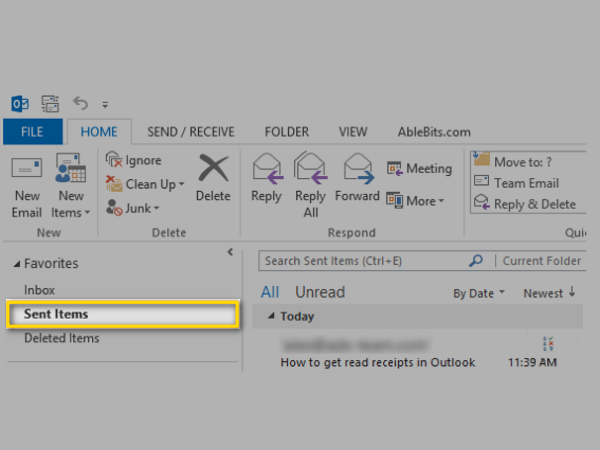
- Now, in the email tab, click on the Tracking option under the Show group to view if you have received any read receipts in your Outlook.
If you haven’t got any read receipts in your Outlook yet, then you won’t see the Tracking option. Further, if you have received a receipt, it can take several minutes for the Tracking option to become visible. If after several minutes, you still don’t see Tracking, then try refreshing your Outlook or see if the Outlook app is disconnected.
How to Send a Read Receipt in Outlook?
Now that you know how to request a receipt in Outlook and where to find one when you receive it, now you should know how you can send one in Outlook when someone requests you to do so.
Here are the steps for enabling the settings to send read receipts or to know how to add read receipt in Outlook with an email:
- First off, open the Outlook app on your system.
- Click on the File option present in the top left corner of the Outlook dashboard.
- From the left sidebar of the following window, click on Options.
- Select Mail from the sidebar of the next screen.
- Scroll down to the Tracking section on the next page, which will open.
- Now, under the For Any Message Received That Includes a Read Receipt Request, select one of the following options that suit you best:
- Always Send a Read Receipt: Outlook automatically sends a read receipt when you view an email.
- Never Send a Read Receipt: Outlook will never send a read receipt if you do not want to send it at all.
- Ask Each Time Whether to Send a Read Receipt: After you read an email in Outlook, a dialog box appears. You have the option of sending the read receipt or rejecting the request for that email.
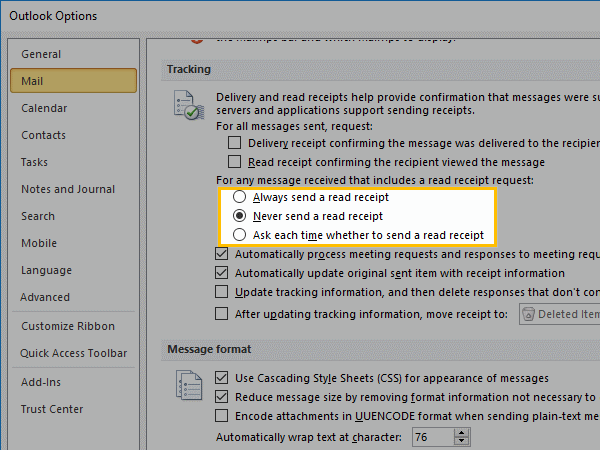
Note: Preferably select the Ask Each Time Whether to Send a Read Receipt option.
- Once done, click on the OK button for the changes to apply.
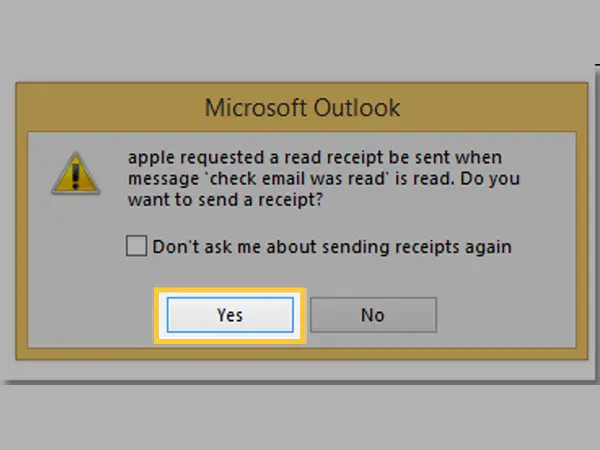
Now, if you have selected the appropriate option to send the read receipts, you will get a pop-up for sending it when you open an email by double-clicking on it (only in the emails in which the recipients have requested to send the same). In that pop-up, you have to select Yes.

After selecting Yes, an auto-generated read receipt email will be sent, which will look like this:
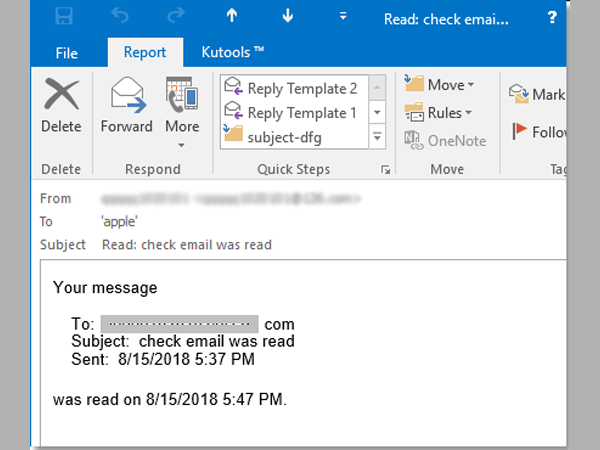
Now, you know how to send read receipt in outlook, however, if you don’t want the sender to be aware that you read and opened this specific email, choose No in the pop-up. You may still get the request when you open that email again. Select the “Don’t ask me about sending receipts again” option in the pop-up if you don’t want it to happen.
With that, I take your leave and I hope I have answered your question, ‘How to see who opened my email on Outlook?’
Read More:
- Cannot Attach Files to Email in Both Outlook Website and App? Here are the 9 Solutions to Try!
- How to Sync Gmail Contacts With Outlook in Just a Few Simple Steps?
- How to Recover Permanently or Temporarily Deleted Outlook Emails
- Having a Bad Day With Outlook Crashes? Here’s Your [Easy-Peasy] Help Book with 100% Safe Solutions
Share