How to Create an Email Group in Outlook? All that you Need to Know!
Since you are here, you might already know what an email group is. Still…
Email group, Contact group, and Distribution list — are all the same — which refers to a bunch of people to whom the same email is sent at once, time and again.
With that said, let’s discuss the matter at hand, “How to create an email group in Outlook?” Yes, I won’t bore you by telling you that contact groups are extremely helpful in sending emails to numerous people at once, which saves a lot of time!
Well, the process for forming a distribution list/email group is a pretty simple and straightforward process in Outlook. Described in the write-up below are the ways for doing so and some information that will help you in managing them.
Now, without talking much, let’s see what we have in here!
- Steps to Create an Email Group in Outlook
- Creating a Contact Group in Outlook using Email
- How to Create a Distribution List in Outlook by Importing Contacts?
- Sending an Email to a Contact Group
- Adding and Removing Contacts from the Email Group
- How to Send Emails to Outlook Group without People Knowing?
Steps to Create an Email Group in Outlook
Email groups are useful in saving time as they provide a fast means of broadcasting a message to a larger group of people at the same time. Now, in order to know how to create group email in Outlook, let’s just jump right into the process:
Note: Along with individual contacts, the Contact folder in Outlook also includes email groups. The symbols that show up to the left of the names of contacts in the Contact folder will help you distinguish between the two. The people icon represents contact groups, whereas the card icon represents a distinct person.
For Outlook Windows:
- Launch the Outlook you have downloaded for your Windows.
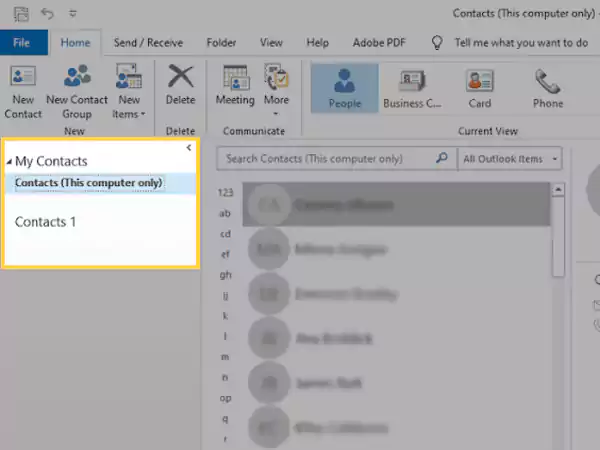
- Click on the People icon present at the bottom of the screen in the left navigation pane.
- Now, under My Contacts, select the folder where you want to save the contact group.
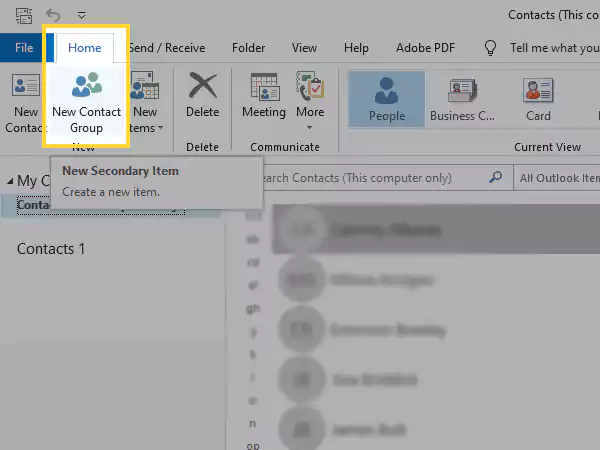
- After that, click on the Home tab from the top menu bar and click on the New Contact Group option.
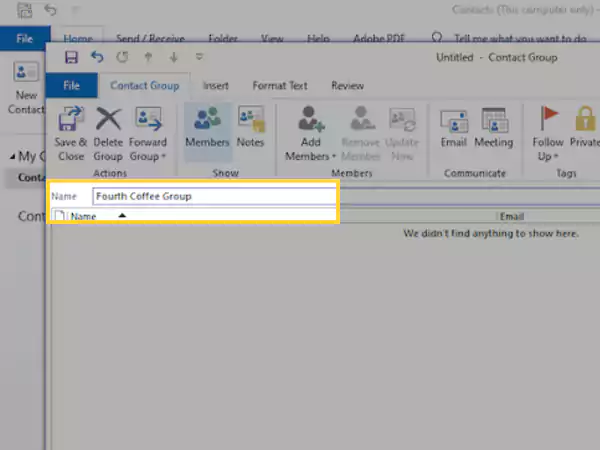
- Thereafter, a new window for creating the email group will open, where you first have to type the name of the group in the Name field.
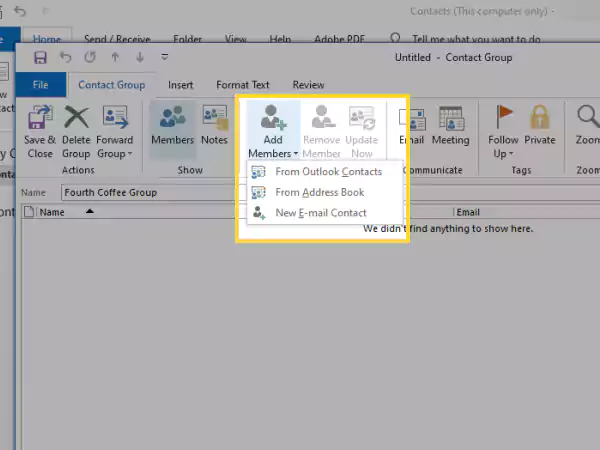
- Next, click on the Add Members option, and select any of the following options to add people to your group:
- From Address Book: Here you will find all the email addresses of the employees that work in your organization.
- Outlook Contact List: From here you can choose the contacts that you have exclusively saved on your Outlook.
- Make a New Contact: By choosing this option, you will be able to create a new contact that doesn’t already exist in the above two options.
- Once you are done selecting the members, click on the Save and Close option in the top left corner of the window, and you have your email group in Outlook.

For Outlook Mac:
- Launch Outlook for Mac on your system.
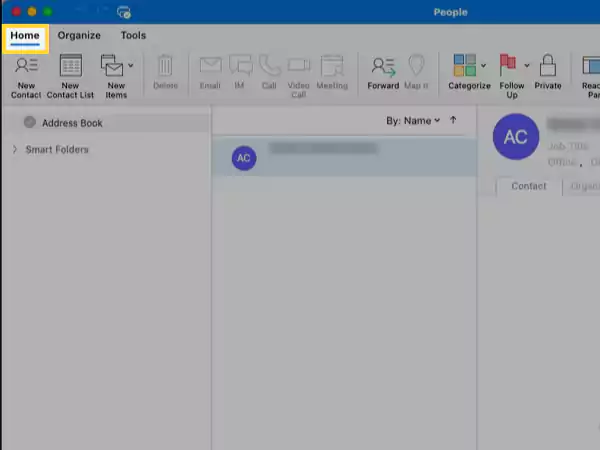
- Click on the People icon present at the bottom of the left side pane.
- Next, click on the Home tab from the top of the Outlook window and select the New Contact List option from the menu bar.
Note: You can also select Fine > New > Contact List.
- Thereafter, the window for creating the email group on Outlook will open, where you have to type the group’s name in the designated field.
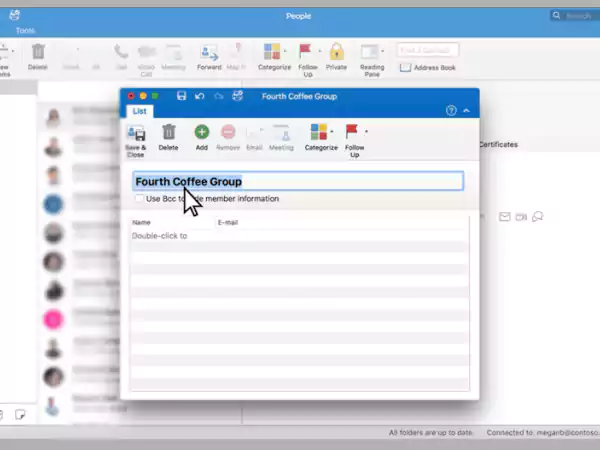
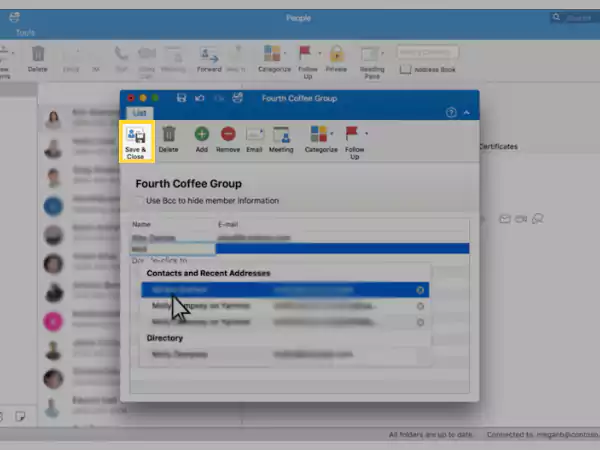
- After that, to add people to your group, click on the Add option, and choose the members using their email addresses to add them. You can add all the contacts you want by choosing them all at once from the Member’s box.
- Once you have added all the contacts to your email group, click on the Save and Close option in the top left corner, and your group will be created in your Outlook.
Note: Sometimes it happens that your File option isn’t available. Nevertheless, you can enable that option by refreshing your Outlook program.
For Outlook Web App:
- Open your browser and log into your Outlook Web App.
- Once you are in your Outlook, click on the People icon present in the left navigation bar of the screen.
- On the following page, click on the down arrow present next to the New Contact button, and select the New Group option from the drop-down menu.
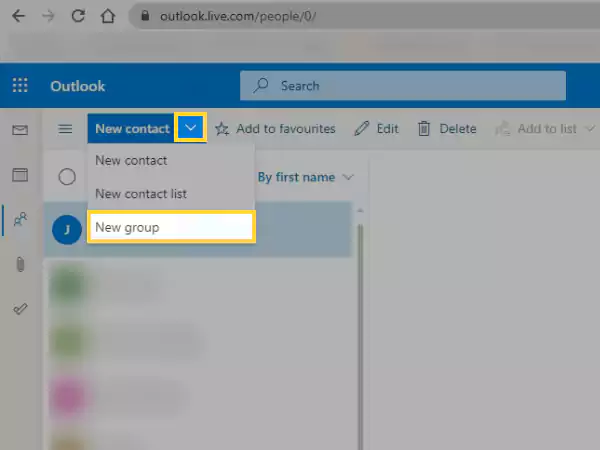
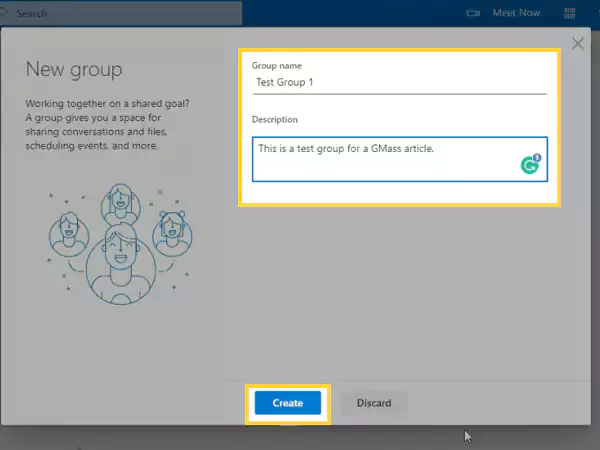
- Thereafter, the window for creating the email group in Outlook Web App will appear, where you can enter your group’s name and its description in their respective fields. When that is done, click on the Create button.
- Now, in the Add Members field, type in the name of the person or this email address to add them to the group.
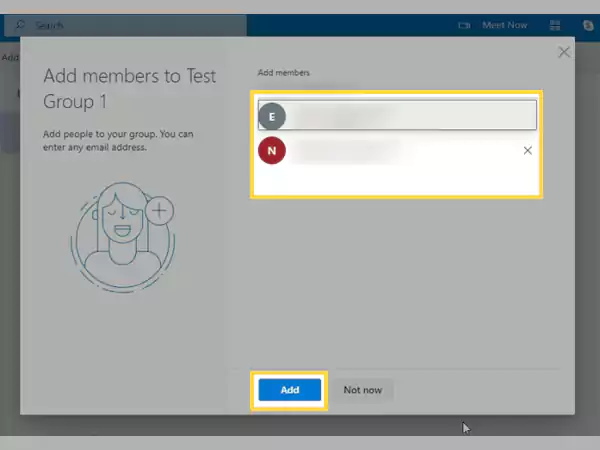
- Finally, When you have selected all the contacts, click on the Add button, and you are done!
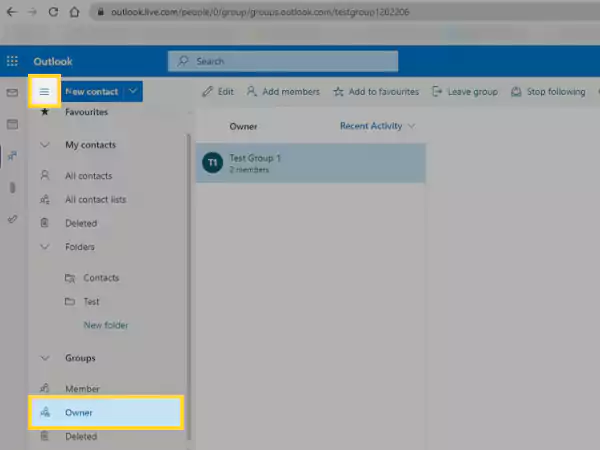
Once your email group is created in Outlook Web App, you can easily find it by clicking on the hamburger menu icon (three horizontal lines) next to the New Contacts button on the People’s page. Expand the Groups option in the menu pane that will appear, and select the Owner option. With this, you will be able to see all the groups that you own (that you created).
Creating a Contact Group in Outlook using Email
Well, stated above was one way of creating an email group in Outlook, in this section we are going to see how to create an email group in Outlook using previously sent emails.
This is a simpler means of forming a group email as you do not need to select each member one by one. You can pick them all at once from the email that you have previously sent to the same bunch of people with whom you want to create the group.
Listed below are the steps for the same:
- Open Outlook on any of your devices.
- Now, in the Sent folder, look for the email that you have sent to the same group of people whom you want to add to your group email.
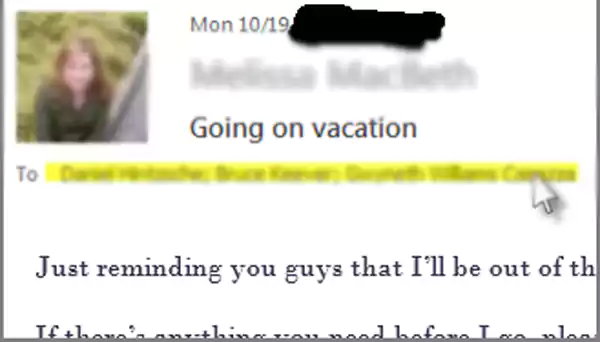
- Open that email, and copy all the contacts from the To or Cc field.
- Now, click on the People icon from the bottom of the left sidebar.
- Then, click on the New Contact Group option from the Home tab.
- After that, the window for creating the email group will open. There, type in the name of the group.
- Next, click on Add Member and select the From Outlook Contacts option.
- A new window will open. Now, paste all the copied contact lists in the Members box, and once done, click OK. With that, all the contacts from the email will be added to your email group.
- Finally, click on the Save & Close option, and your group will be created.
See how easy the process is! However, if you couldn’t find any of your old emails, don’t worry you can visit How to Back Up Outlook Emails: A Guide on Native Microsoft Tools and Email Backups to know the process to back up your emails for future use.
Also Read: How to Request for Read Recipient in Outlook?
How to Create a Distribution List in Outlook by Importing Contacts?
If you have numerous business or personal contacts, which you have saved in a spreadsheet, and want to make an email group with them in Outlook, then this method is for you.
In this section, you will see how to create a distribution list in Outlook by importing contacts from a spreadsheet. However, before moving forward, you need to save your contacts file in the .CSV (Comma Separated Values) format, as it is supported by Outlook.
Once you have the file in the right format, follow the process stated below to create your distribution list/email group in Outlook:
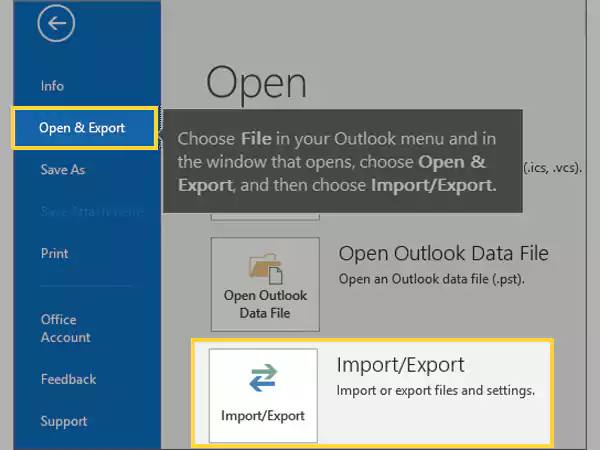
- Open Outlook on your system, and click on the File option in the top left corner of the screen.

- From the next page, switch to the Open & Export tab, and select the Import/Export option.
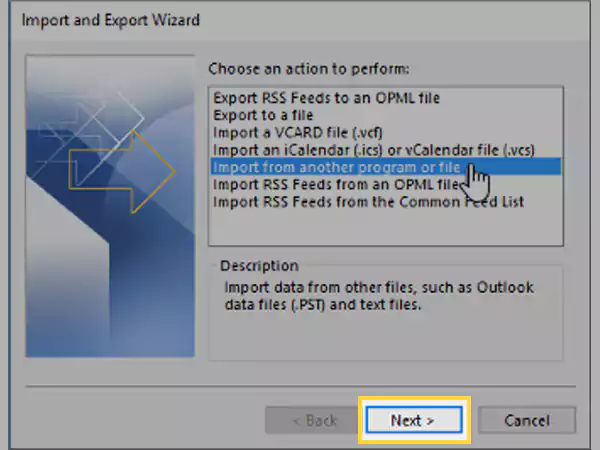
- Now, select the Import From Another Program or File option from the window that will appear and click on the Next button.
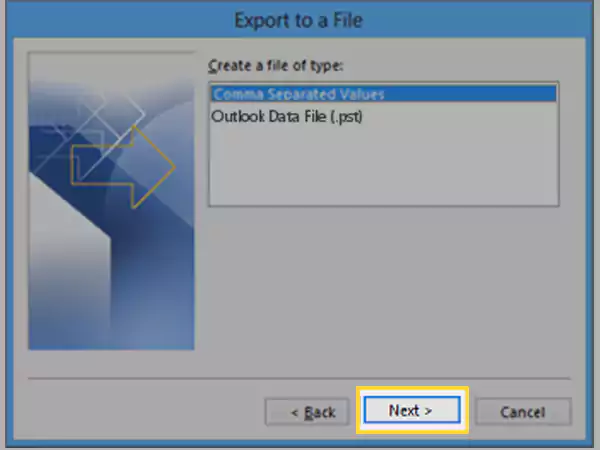
- Thereafter, select Comma Separated Values and click on Next.
- After that, Import a File prompt will pop up, where you have to give the location of your file by clicking on the Browse button. Once done, click on Next.
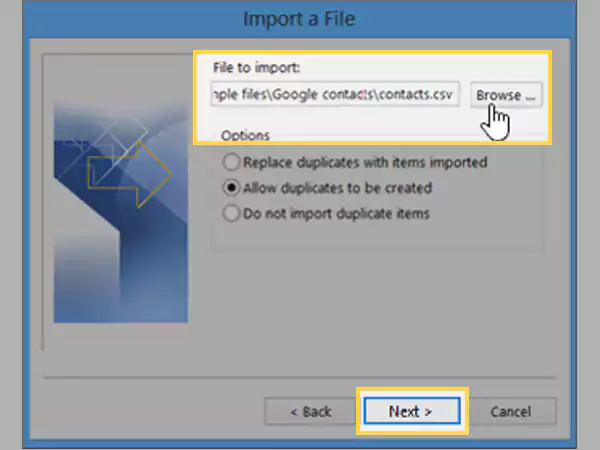
- Next, you will be shown three options to handle duplicate contacts. Choose any of the following and then click Next:
- Replace Duplicates with Items Imported
- Allow Duplicates to be Created
- Do not Import Duplicate Items
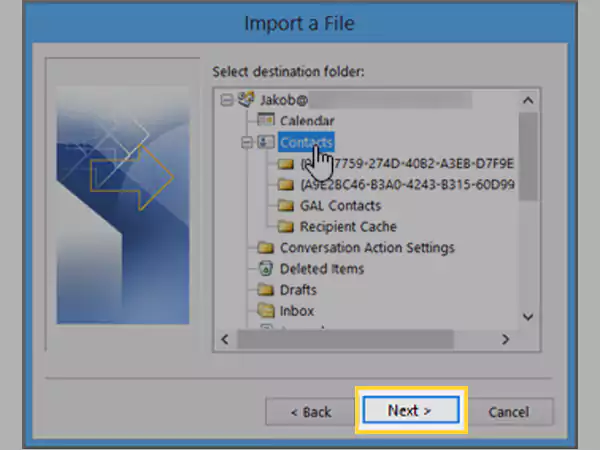
- You have to select the folder in Outlook where you want to save the contacts from the file under Select Destination Folder, and then, click Next. If you have numerous email accounts added to your Outlook, then choose the folder that is under the account for which you wanted to create the distribution list.
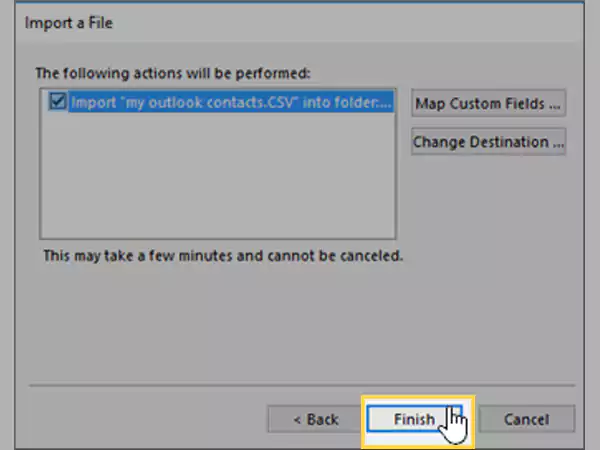
- Lastly, click on the Finish button.
Now that you have imported all the contacts that you need for creating your email group, you can refer to the “Steps to Create an Email Group in Outlook” section, above in the article, and follow the same steps to create your distribution list.
Further, if you want to know how you can import your Gmail contacts to Outlook for creating the distribution list, then visit this simple guide: How to Sync Gmail Contacts With Outlook in Just a Few Simple Steps?
Sending an Email to a Contact Group
Now that you know how to create an email group in Outlook, the next thing to learn is how to send an email to that group. Well, that’s pretty simple, and the steps stated below will let you know just how to do that:
- Open the Outlook app on whatever device you are using it.
- Next, in your Outlook dashboard, click on the New Mail button to compose a mail.
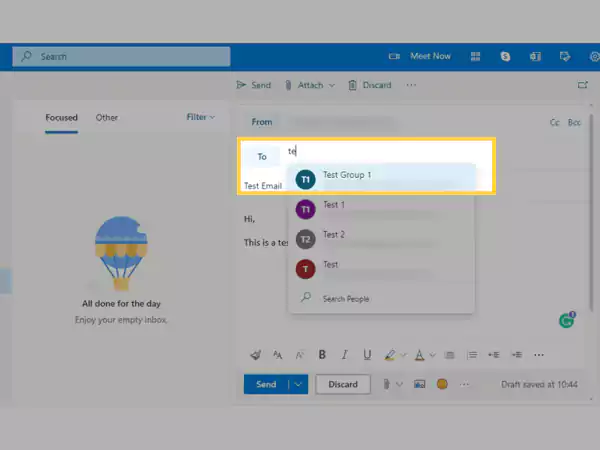
- Now, in its To field, instead of typing the email address of each individual you want to send the email to, just start typing the name of the email group, and when the suggestion shows up, select it. All the contacts added to that email group will be added in the “To” field.
- Type in your email body, and click on the Send button. Voilà, you have just sent your first email to your contact group in Outlook.
Adding and Removing Contacts from the Email Group
Over the course of time, you may need to edit your group by adding or removing contacts from it. Well, don’t worry, there’s a function for that too in Outlook, which is described below:
- Open Outlook on any of your devices, and compose a new email.
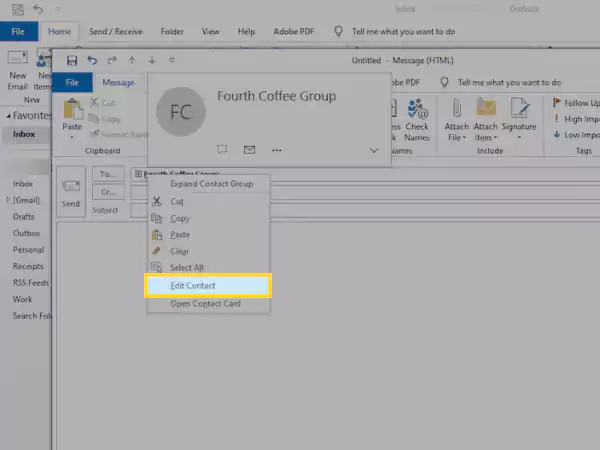
- In the To field, type the name of the email group you want to edit.
- Now, right-click on the distribution list/email group name, and from the menu that will appear, select the Edit Contact option.
- Finally, the contact group window will open where you can easily add or remove the contacts. Once done, click on the Save & Close option.
There’s one other way of editing the group, in which you need not create an email every time you want to do that. Jotted below are the steps for the same:
- First off, click on the People icon present in the bottom left corner.
- Then select the Contacts folder, as all the email groups you create in Outlook are located there, unless you have another folder where you have saved your group.
- In the list of contacts, search for the email group name you created, and click on it.
- A new window with some of the group information will open. Now, click on the three dots (menu icon) present below the group icon, and select the Edit Outlook Contact option.
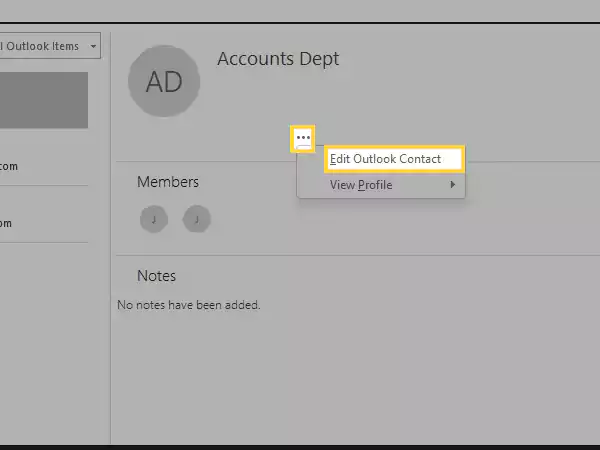
- Finally, you will be directed to the window where you can edit (add or remove) your email group.
How to Send Emails to Outlook Group without People Knowing?
If you want to send an email to an email group in Outlook, but don’t want the individuals to know to whom the same email has been sent, then you can simply use Bcc!
If you add your email group in the Bcc field, instead of To or Cc, then the individuals won’t know to whom the email is sent. Further, the receivers of the To and Cc fields also cannot see the email addresses in the Bcc field.
So, to send the receiver a copy of the email that shouldn’t be seen by other recipients, use the Bcc option in the Outlook message composing window.
Hope with this guide you are able to form your email group in Outlook. Further, if you want to know how you can create the same email group in Gmail, then refer to the following article: All You Need to Know to Create and Manage an Email Group In Gmail
Share