How to Send Delayed Emails in Outlook? Simple Steps for Scheduling Emails
You must have had times in your life when you regretted pressing the “Send” button too quickly. Sending emails without a final read can be embarrassing. Nevertheless, Outlook provides you with a way to avoid such discomforting situations.
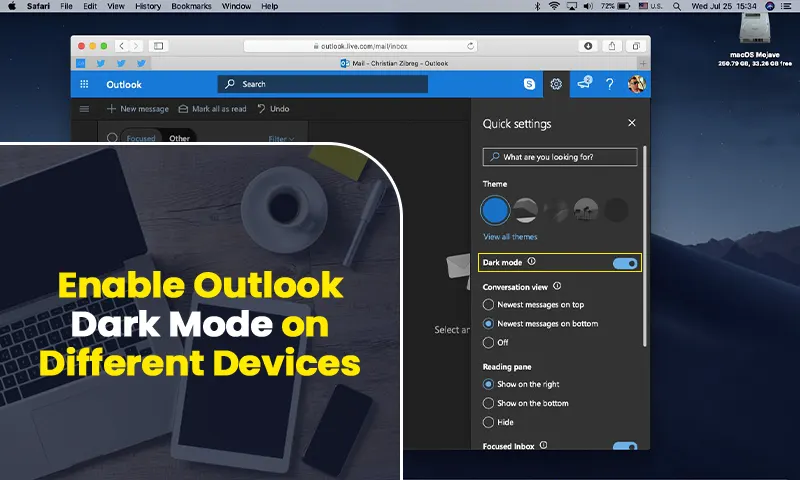
Very few people know that you can delay sending an email in Outlook. Of course, not only will you have time to cross-check your email for typos and missing information when delayed delivery is enabled in Outlook, but also this feature is extremely advantageous while emailing to recipients in different time zones.
Additionally, Outlook’s ability to schedule emails for later delivery might be quite helpful if you wrote an email while running high on emotions. With the delayed email delivery option enabled, you will have more time to think about your tone and adjust it as necessary.
With that said and without giving more time to talk, let’s get into doing it! Read through the information given below to know how to send a delayed email in Outlook and how you can create a rule for that to avoid repeating the process.
Delaying Email Delivery in Outlook By Scheduling a Specific Time
Want to know how to send a delayed email in Outlook? Then, the process listed under this section is all that you need to know and do. Following the steps given below, you will be able to send an email at a specific scheduled date and time. It’s needless to say that this functionality of Outlook is of great use to prevent forgetting to send emails that are important.
So, without further ado, let’s jump right into the steps to delay sending an email in Outlook:
On Outlook for Windows
- Start by launching Outlook on your system.
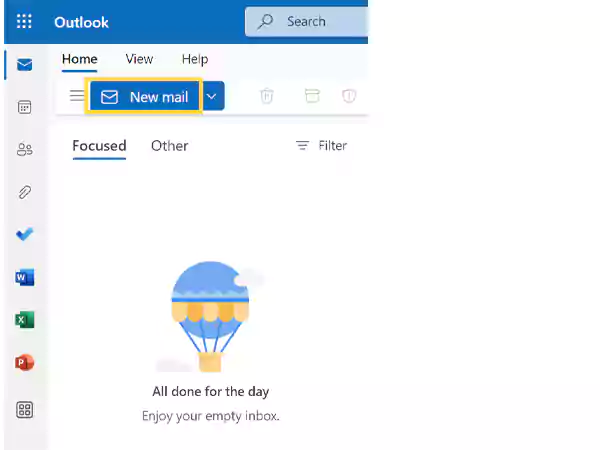
- In your Outlook dashboard, click on the New Email button from the top left corner. If you want to send a delayed email as a reply to a previously received email, then click on the Reply or Reply All option; you can also set email delayed delivery in Outlook by clicking on the Forward option.
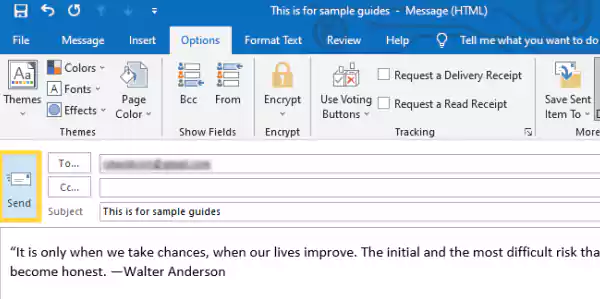
- Now, compose your email body, enter the recipient/s email addresses, and do all that you need to do.
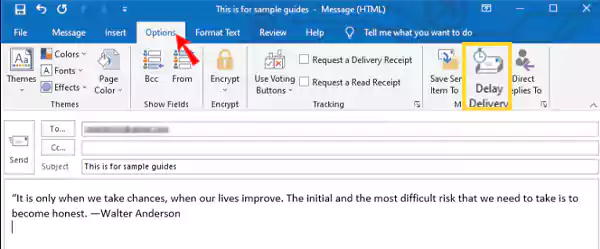
- After that, click on the Options tap in the top menu ribbon of the email composing window, and then click on the Delay Delivery option.
- Then, a Properties dialog box will open, where you have to check the Do Not Deliver Before option under the Delivery Options section.
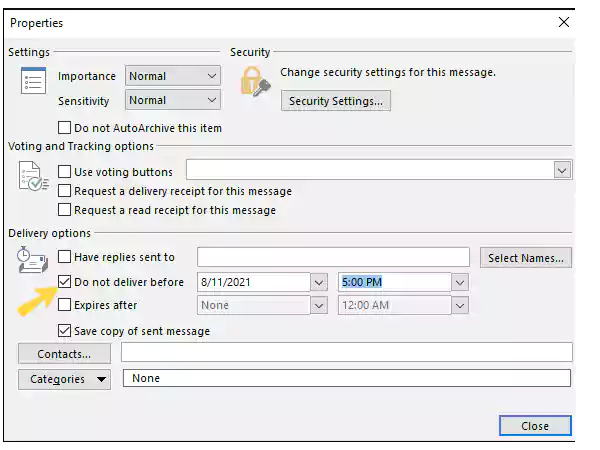
- Next, you have to set the date and time at which you want to send the delayed email from your Outlook. And, once that’s done, click on the Close button.
- Finally, click on the Send button in the email window, and don’t worry this won’t immediately send the email, it will only be sent at the scheduled date and time.
On Outlook Web
- First, open the browser on your system, and log into your Outlook account by visiting outlook.com.
- Once your Outlook Web dashboard opens, click on the New Email button in the top left corner to create an email and schedule it for delayed delivery. However, you can also open an existing email, click on the Reply, Reply All, or Forward options to reply/forward an email and apply the steps given further, for scheduling email in Outlook.
- After that, a new email window will open where you will have to first fill in the recipient email address, compose an email body, and do other needful things.
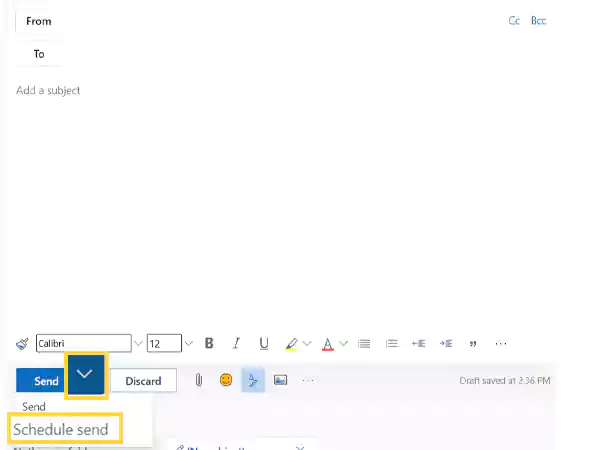
- Now, to schedule delayed email sending in your Outlook Web, you have to click on the down arrow present next to the Send button at the bottom of the window. A small menu will appear then, from where you have to select the Schedule Send option.
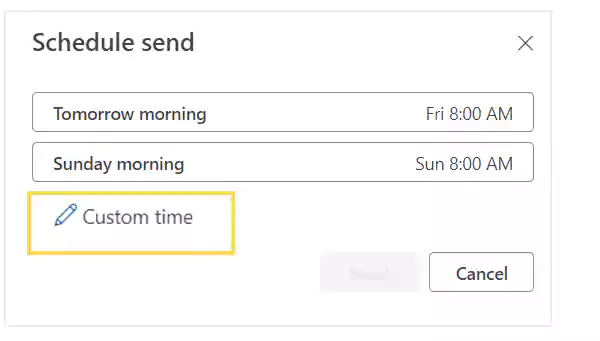
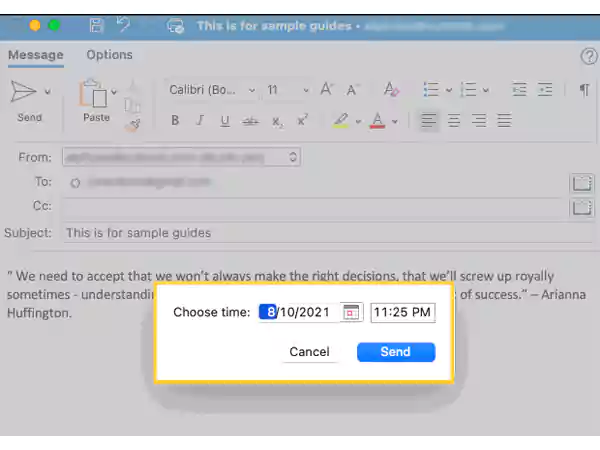
- Next, the window for selecting the time and date for delayed email delivery will appear, where you can either select one of the existing options (if suitable) or click on the Custom Time option to set the email sending time yourself.
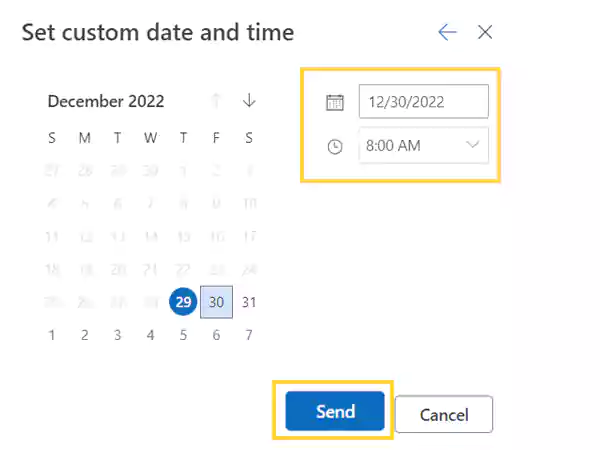
- Finally, set the date and time from the respective columns given, and click on the Send button.
On Outlook for Mac
- In order to know how to delay emails in Outlook on Mac, begin with launching the Outlook app on your machine.
- After your Outlook app opens, click on the New Email or New Message button displayed in the top left corner of the screen. Alternatively, you can also delay sending by scheduling emails in Outlook for email replies and forwards as well, by clicking on Reply, Reply All, or Forward.
- Then, write in your email’s body, add recipients in the ‘To’ field, and do other required things.
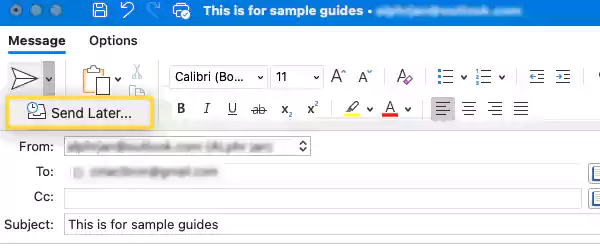
- Once your email is ready to send, click on the down arrow icon present next to the Send button in the top right corner of the message window. After that, click on the Send Later/Schedule Send option (depending on your version).
- Finally, a small screen will appear where you can choose the date and time for sending the email. After you have selected those, click on the Send button, and your email will be ready for delayed email sending in your Outlook on Mac!
After this, the scheduled email will be saved in the Draft or Outbox folder of your Outlook application. So, in order to know how to see scheduled emails in Outlook, you just have to open the Draft/Outbox folder, and there you will find all the emails that you have scheduled for delayed delivery.
Also, you can make changes to your email at any time you please before their scheduled sending time.
IMPORTANT: Only while Outlook is open can scheduled emails be sent and received. The message will be sent the next time you open Outlook if it is closed at the time of delivery that you’ve specified. Similarly, if the recipient’s Outlook is closed at the time of delayed email delivery, they will see your message when Outlook opens again.
Note: If your scheduled email couldn’t be sent, it can be because your Outlook email might not be working. In such a situation, follow the troubleshooting guide to resolve the issue.
Editing the Scheduled Date and Time for Delayed Email Delivery
Now that you know how to delay sending an email in Outlook, it will be useful for you to know how you can edit the scheduled date and time for the delayed email. Well, it will be advantageous in situations when you have mistakenly entered the wrong timings for sending the email or in general you need to change the delivery time.
Jotted below are the steps for doing so:
- First off, launch the Outlook app on your computer, and open its Outbox or Draft folder, that’s where you can see your scheduled emails for delayed sending.
- Now, find the email in the folder, for which you want to edit the scheduled date and time.
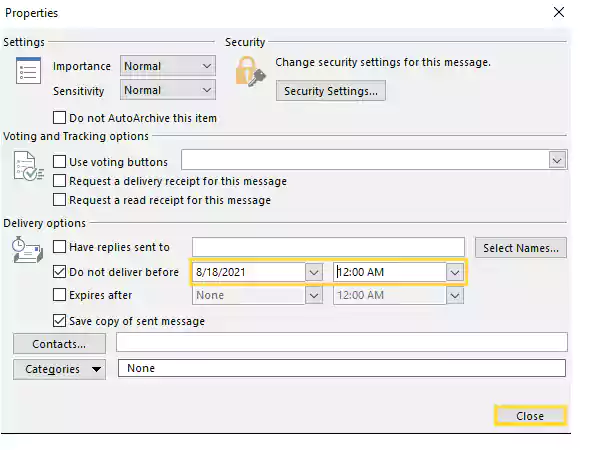
- Then, the email window will open, where you have to switch to the Options tab from the top menu ribbon. After that, click on the Delay Delivery option.
- This will open the Properties window in which you had earlier set the schedule for sending delayed emails in your Outlook.
- Now, change the date and time for sending the delayed email by clicking on the respective columns present next to the ‘Do Not Deliver Before’ option.
- Finally, click on the Send button in the email window. With this done, the time for sending the email from your Outlook will be rescheduled.
Note: If you immediately want to send an email that you have scheduled to send at another time, then you just have to uncheck the ‘Do Not Deliver Before’ option in the Properties window and hit the Close button to save the changes. And, to finally send the email, click on the Send button in the email window.
Creating a ‘Delay Sending Email’ Rule for All Emails in Outlook
Setting all your emails for delayed delivery in Outlook can be a tedious task, but it will be useful if you seldom make mistakes while sending an email, and have to re-send the corrected ones thereafter.
Scheduling the delayed delivery time for all emails will provide you with a time window within which you can make changes to your email that you remember, later on, thereby preventing you from the embarrassment of re-sending the same email again.
Listed below are the steps that you can follow to create a default rule that will apply to all your emails, sending them after the specified delayed time:
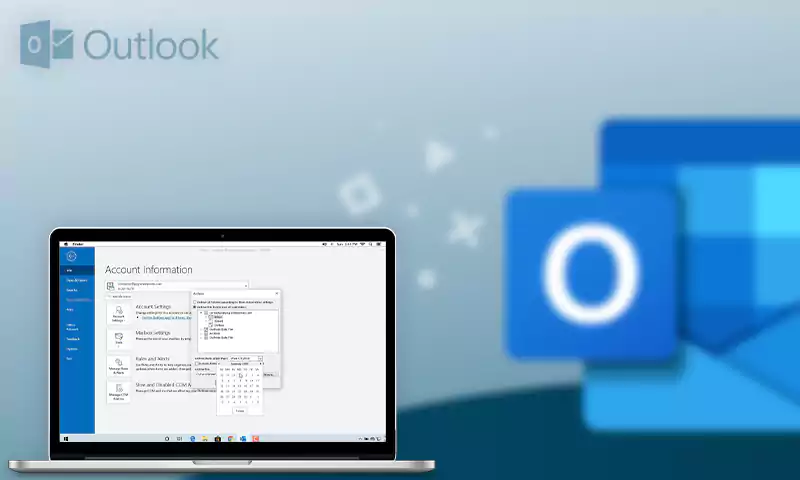
- To begin with, open the Outlook app and click on the File option from the top menu bar.
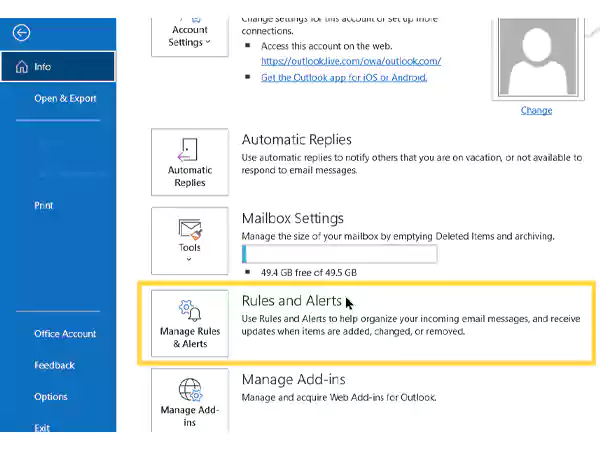
- Now, in the Info tab of the following screen, click on the Manage Rules and Alters option present under the Rules and Alerts section.
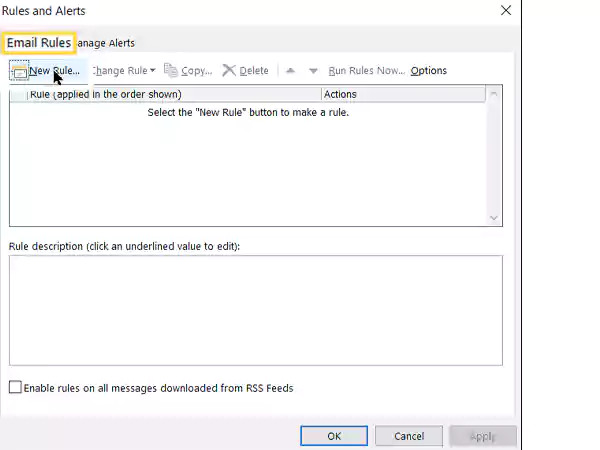
- After that, a Rules and Alerts window will open, where you have to switch to the Email Rules tab and click on the New Rule option to create a rule to schedule a specific time for sending delayed emails in Outlook.
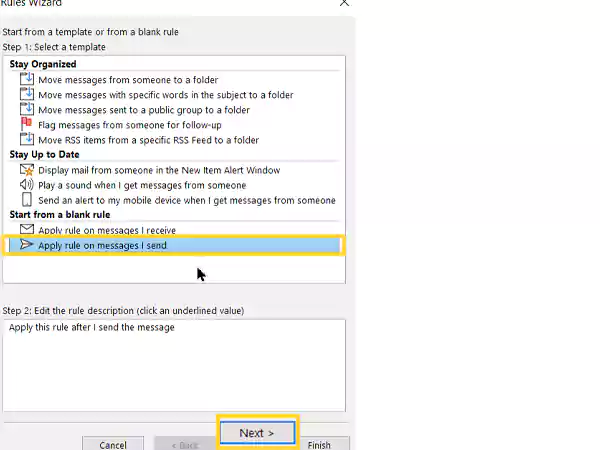
- Next, the Rule Wizard dialog box will open. There, click on the Apply Rule On Messages I Send option present under the Start From a Blank Rule section, and then click on the Next button.
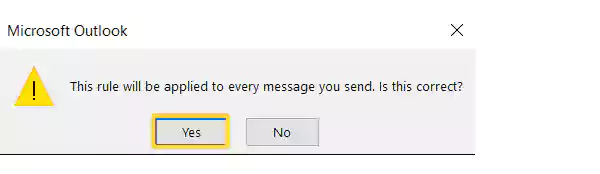
- Then, a Select Conditions list will open, where you can select the conditions you want to apply to your email. However, in order to schedule emails in Outlook for delayed delivery, you have to uncheck all the selected conditions, if any, and then click on the Next button.
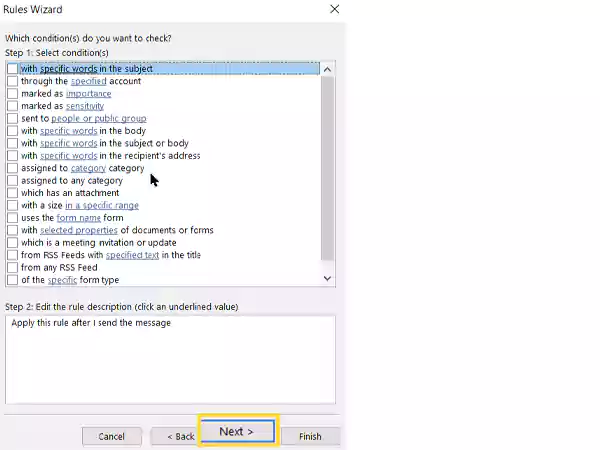
- A confirmation pop-up will appear on your screen next, where you have to click on Yes to apply the rule to all the emails you will send via your Outlook.
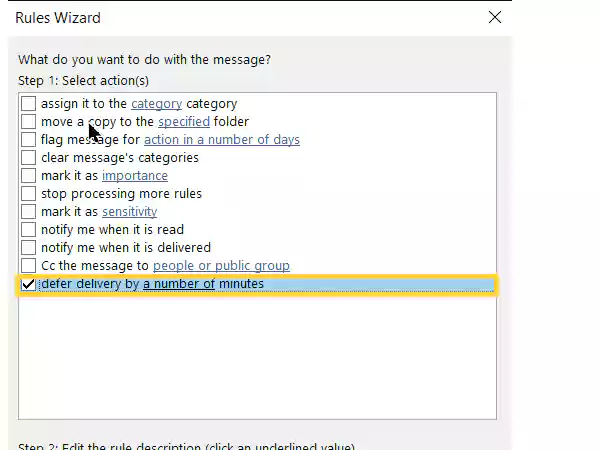
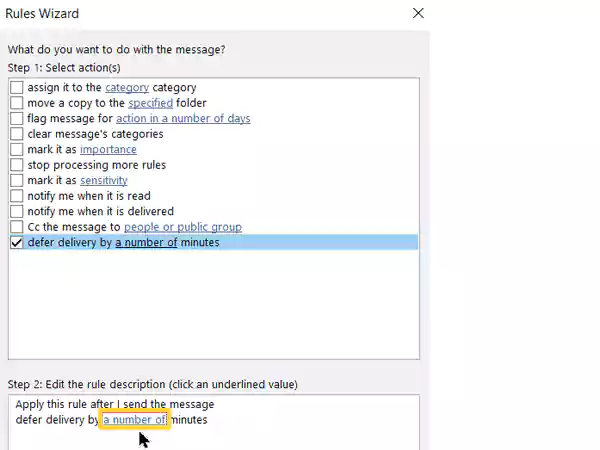
- Thereafter, you will see a Select Actions list, in which you have to select the Defer Delivery By a Number of Minutes option.
- Next, click on the A Number Of link (in blue color), under the Edit The Rule Description section.
- This will open a Deferred Delivery dialog box, where you can enter the minutes by which you can delay the sending of your emails in Outlook. However, the maximum time you can set here is 120 minutes. Once you are done, click on OK.
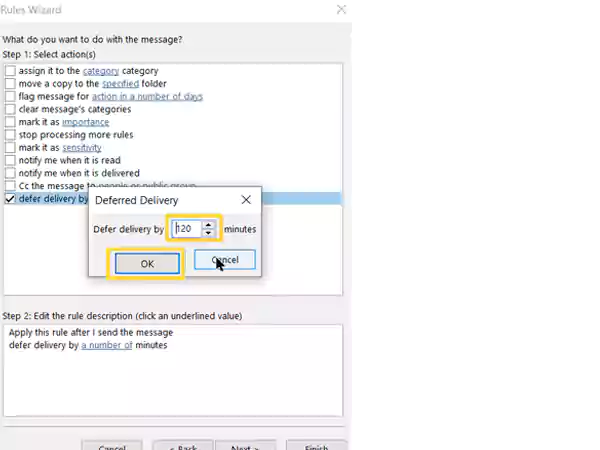
- Click on the Next button in the Rule Wizard window.

- You can select if you want any expectations from the rule, and then again, click on Next. You need to keep in mind that if you select any expectations here, then the delayed delivery rule will not be applied to the emails exempted from the rule.

- Next, type out the name of the rule, like the ‘Delayed Email Delivery Rule’ in the Specify a Name For This Rule column, check the Turn On This Rule option on the next screen, and hit the Finish button.
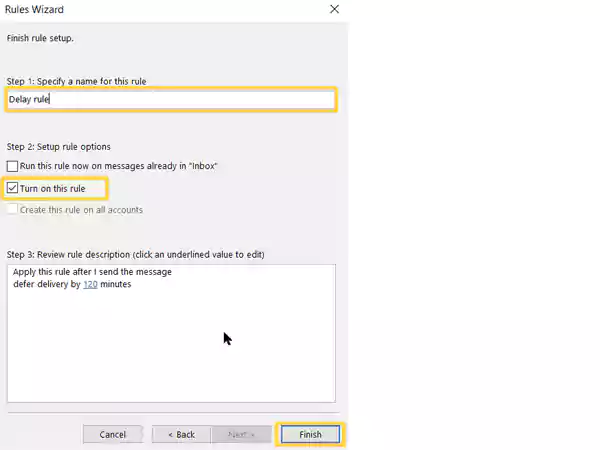
- Finally, click on OK on the dialog box that appears, at last, asking you to apply the rule.

After the rule is applied, any email you send from your Outlook (except for the ones exempted from the rules, if any) will not be sent immediately, rather they will be stored in your Outbox or Draft folder and sent after the specified delayed delivery time.
Tip: Like above, you can create a rule for requesting read receipts in Outlook, so that every time you send an email you receive an auto-generated email, whether the person has read it or not.
FAQs
Nevertheless, when the account used for sending the delayed message is back online, Outlook will send a message even if it is set to operate in offline mode at the time of delivery.
Read More:
- How to Create an Email Group in Outlook? All that you Need to Know!
- An Extensive Guide to Refresh Outlook Smoothly
- How to Back Up Outlook Emails: A Guide on Native Microsoft Tools and Email Backups
- How to Migrate Lotus Notes Calendar to Outlook
Share