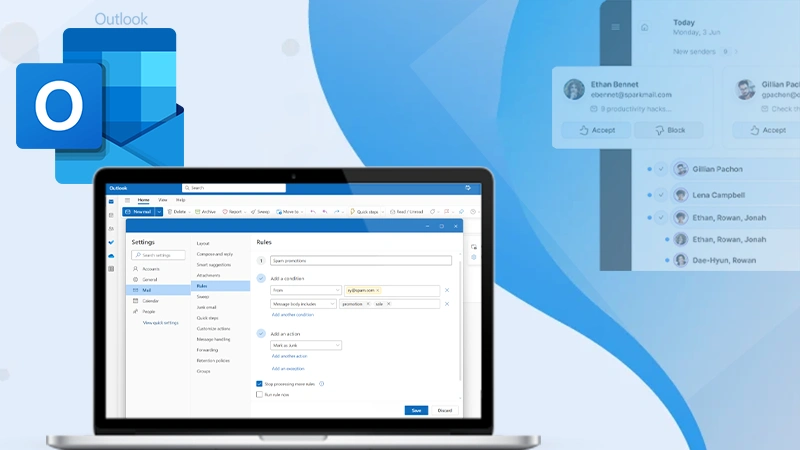
5 Simple Steps to Create a Distribution List in Outlook | Tried and Tested Method
Are you tired of individually adding the same names to CC, BCC, or To fields on a regular basis?
It’s time for you to create a distribution list in Outlook!
Outlook distribution groups and lists come in very handy when you are required to send the same message or email to the same people regularly. In today’s article, we will exclusively focus on methods to create an Outlook distribution list on different devices.
So get along with us till the end to see how you can email people without meddling with their privacy by creating a distribution list in Outlook.
About Outlook Distribution Lists
Outlook distribution lists are like email groups where multiple email recipients are addressed as a single recipient. They eliminate the need to manually enter every single email address while sending mail to a group of people.
This may sound something simple, but it’s a big deal when you are running a big organization or an email marketing campaign on your own. The Outlook distribution lists are customizable lists of mail addresses, which facilitates mailing a group of people without showing the recipients. Similar to Gmail read receipts, you can also request read receipts in Outlook.
The Outlook list has been available since the launch of Office 2007, but if you heard about it today and don’t know how it works, don’t worry, it’s better to be late than never.
Key Differences Between Distribution Lists, Groups, and Contact Groups in Outlook
Distribution lists, distribution groups, and contact groups are often used interchangeably when people refer to the Outlook ecosystem. The distribution groups on Outlook can be easily synced with Gmail, and you can even insert emojis in Outlook emails. The Outlook lists and groups can be used synonymously, but contact groups are completely different.
- Contact group is a recent development of Microsoft and is newer than Outlook lists.
- Generally, these lists are managed centrally for an organization, and emails sent to these lists are usually sent from an email address owned by the internal communications or the human resources department.
- However, contact groups on the other hand can be created in an individual email account in Outlook to create custom contact groups.
Outlook lists play a significant role in centrally teleporting urgent information. It prevents miscommunication as everyone on the list will receive the email. Let’s see how to create such a list and use this exemplary feature of Outlook.
How to Create Distribution List in Outlook?
Outlook lists have made internal communication within an organization easy and speedy. They are more like email groups in Outlook, that allow you to send emails to a specific set of people at once. Creating a distribution list can be very time-saving, especially when you run a business.
So here’s how to make a distribution list in Outlook on different devices!
Create Outlook Distribution List on Windows
The following steps will guide you toward creating a distribution list on Windows: –
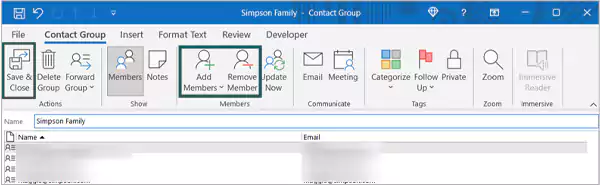
- Open the Outlook mail and tap on the People icon present at the bottom.
- Now, select the New Contact Group option available on the top-right side of the screen.
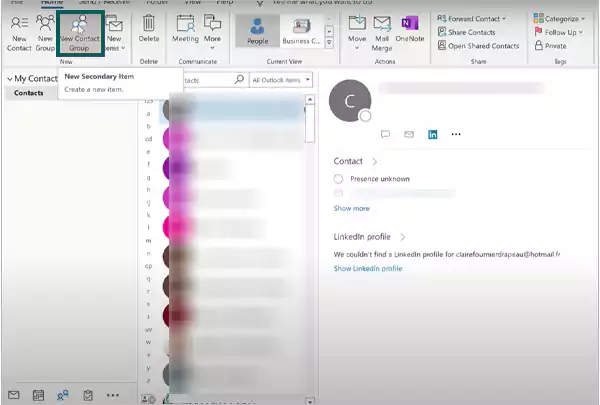
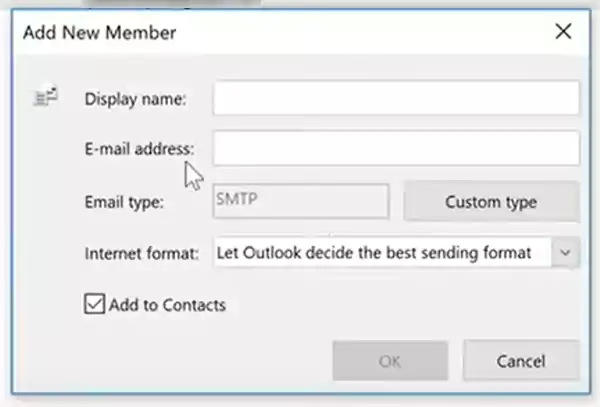
- Name the Contact Group and click on the Add Members option present at the top. You can add members from Outlook contacts, address book, and even create new contacts for the group.
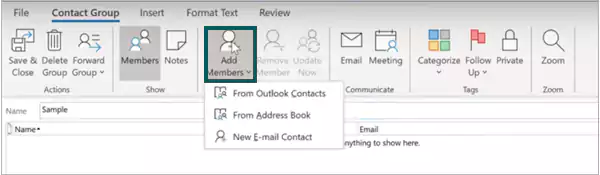
- To add a new member, enter the display name, email address, and email type.
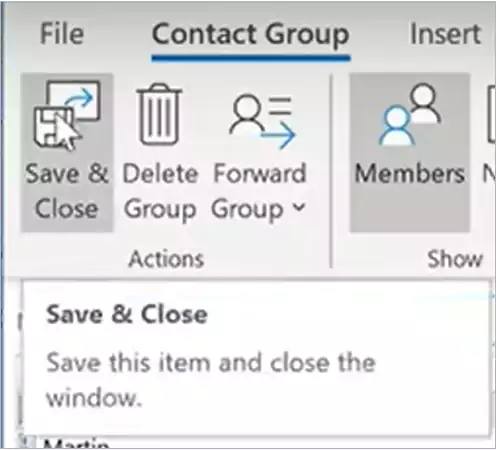
- Lastly, click on the Save and Close option, and you are all set to send mail to the contacts in your Outlook list.
That’s it now you can mail to a bunch of people with just one click, that too without individually entering their names in the To section. For easy access to this list, you can download Outlook mail and create folders in Outlook on mobile.
Tip – You can hide the recipients in emails you send via Outlook list from each other by inserting the list name in the BCC section instead of To.
Creating a distribution list on Windows is easy-peasy, let’s see how it’s done on Mac.
Also Read: 4 Simple Steps to Archive Emails in Outlook
Create Outlook Distribution List on Mac
Note – The New Outlook for Mac is currently unavailable, so you have to create the Outlook list on the older version.
To create a distribution list on Mac, you have to launch Outlook on your Mac and follow the below-listed steps: –
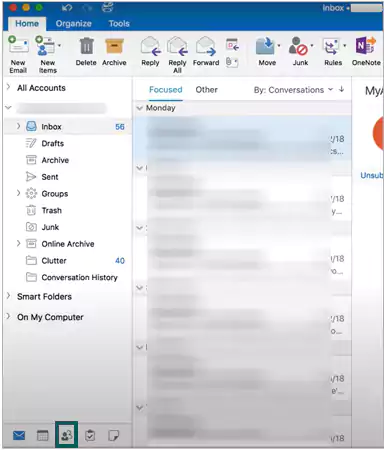
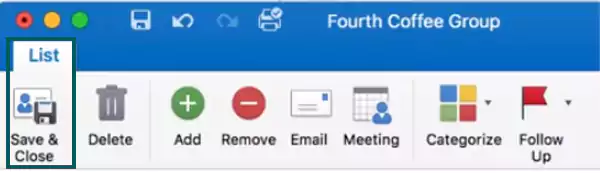
- Tap on the People icon at the bottom left of the corner.
- Click on the New Contact List option at the top.

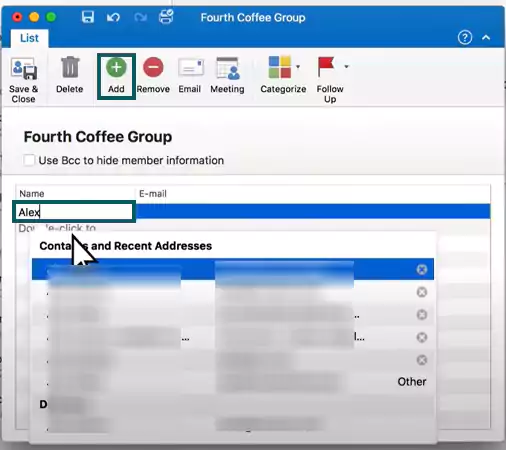
- Enter a name for the Contact List, click on the Add +icon, and type the email address of the person you want to add.
- Lastly, tap on the Save and Close option when you are done with adding members to the list.
Bingo! Your list is created, you can send mail to test it. Sending mail to the Outlook list is easy. However, if you cannot start Outlook, you should wait for a while and launch Outlook in safe mode.
Also Read: Top 10 Tips For Your MacBook
Create Outlook Distribution List on Outlook for Web
Follow these instructions to create a distribution list on Outlook for Web: –
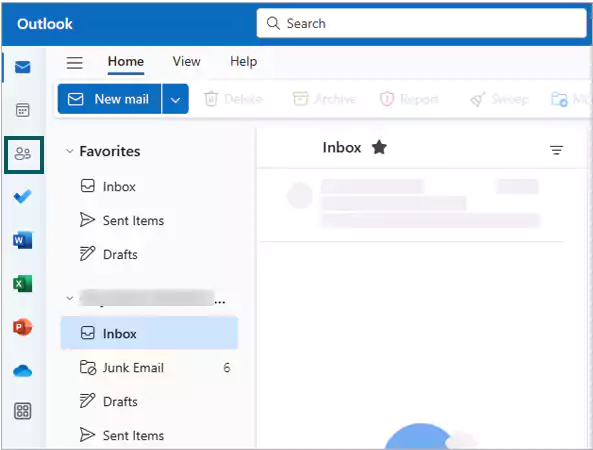
- Log into your Outlook email and tap on the People icon option present on the left side.
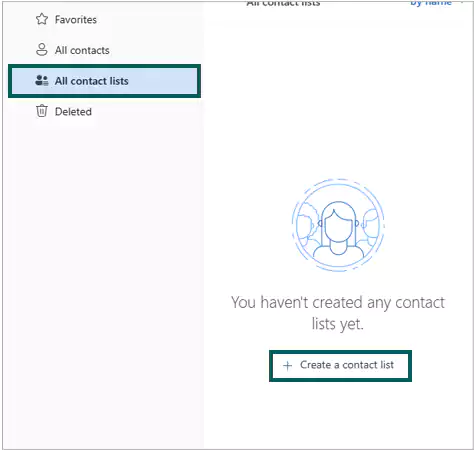
- Now tap on the “All contacts list” and select the “Create a contact list” option. A new Window will open prompting you to enter details for creating a contact list.
- Now, enter the contact list “Name, Email Addresses, and Description” in the required columns and hit the Create option.
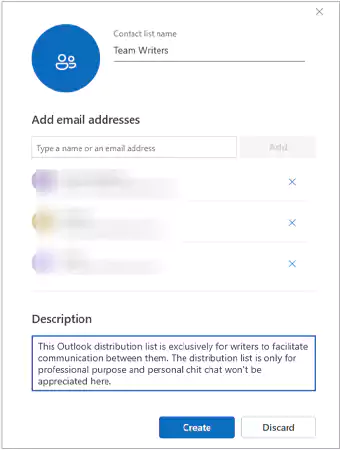
- Hurray! Your Outlook list is created now. You can email everyone on the list by tapping on the “Send email” option present below.

These were some of the easiest methods to create a distribution list on different devices. If you are using lists for business organizations, we suggest you add a signature in Outlook emails to make them more authentic. Moving on, let’s see how to keep the Outlook list updated in the subsequent section.
How to Update a Distribution List Outlook?
Outlook mail is dedicated to enhancing the user experience. Seriously, you can send delayed emails and even automatically forward the mail to another address with Outlook. So as a part of upscaling user experience, Outlook mail provides the facility of updating the list.
The upcoming sections will give you a fair idea of how you can keep your Outlook list updated.
Add a Member
The following instructions will help you edit and add members to your list: –
- Start with logging into your Outlook account and move to the Settings option.
- Tap on the ‘View all Outlook’.
- Select the Distribution Groups option under General Settings.
- Then, move to the Distribution Groups I Own and tap on the pen (edit) option.
- Now a new Window will open on your Desktop. Move to the Ownership section and select the +icon.
- Tap on the My Contacts to access your contact list.
- Finally, tap on the +icon or Add Members to add members to your Outlook distribution list.
- Lastly, hit the Save option and the selected member will get added to your list.
Remove a Member
Similar to the process of adding members, move to your Outlook 365 Settings, select the ‘View All Outlook Settings’ option, and then follow the following steps: –
- Navigate to the General settings and tap on the Distribution Groups option.
- Hit the edit option.
- Move to the Ownership section and highlight the name you want to remove.
- Tap on the —icon or Remove Member option to remove the owner from your list.
- Finally, Save the changes made in the list, and you are good to go.
However, if you don’t want to make permanent changes in your Outlook distribution list and want to add someone for a particular mail only, you can use the below alternative method.
Alternative Method of Editing the Distribution List
This is one of the easiest methods to update (add) the Outlook list, especially when you want to make temporary changes. This method comes in really handy when you want to add someone for a particular mail or period of time. Here’s how to update the Outlook list in the easiest way possible.
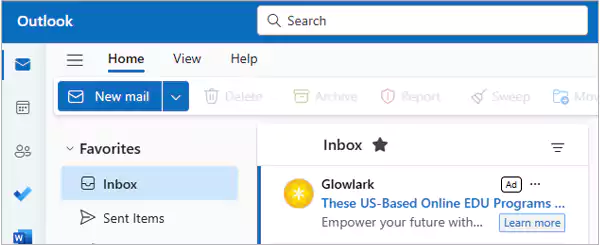
- First, tap on the New Mail option present at the top.
- Insert the list name in the To section and then right-click.
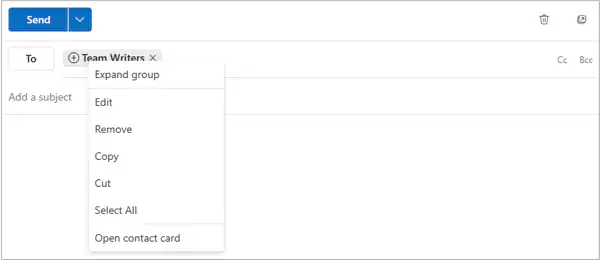
- That’s it now you can easily add someone to the list by tapping on the Expand option.
Updating the Outlook distribution list is easy and will hardly take a minute. Now let’s move forward and quickly take a look at some of the Outlook list management tips.
Tips to Efficiently Manage a Distribution List Outlook
Emails are hard to manage, and so are Outlook lists, that’s why we bring to you some essential Outlook distribution list management tips.
- Keep your Outlook list up to date by eliminating the people who have left the organization and adding new ones.
- Establish the purpose and method of using lists across your organization. Create Outlook distribution lists for every relevant department, team, and business unit, then draft rules and protocols of when one should use the Outlook list. It will prevent unnecessary conversations in the list.
- Decide and clarify the ownership of the lists, it will take some burden off your shoulders and facilitate the update of the list.
- If you don’t want to clog your inbox with replies from all the staff on your mail, consider setting up moderation rules.
These are some essential Outlook distribution list management tips that will ensure smooth communication and flow of information across your organization.
Strengths and Limitations of Using Outlook Distribution Lists
Creating internal Outlook distribution lists is the best way to ensure communication and speed up the flow of information across your organization. However, they are the best for channeling information, it’s best to know their strengths and limitations before depending on Outlook lists for conveying important messages.
Here’s a quick sneak peek into the strengths and limitations of the Outlook distribution list for employee communication!
| Strengths | Limitations |
|---|---|
| Outlook distribution lists are the easiest and quickest way to broadcast information to multiple recipients. | Outlook lists are inefficient as a collaboration tool, as every member needs to use their personal mailboxes to reply to messages. |
| Excellent for one-way communication. | The Outlook lists need regular updates. |
| Ensures easy and centralized management. | Emails sent through these lists are likely to be marked as spam because emails with a lot of recipients are generally marked spam. |
| Best for email marketing. |
Creating a distribution list in Outlook can significantly boost your marketing campaign. Imagine, you’ll be able to be in regular contact with your target audience with the bare minimum effort.
Frequently Asked Questions
Ans: Distribution lists allow you to bundle up email recipients into one single place. They are very useful if you are required to email the same people on a daily basis.
Ans: The sole purpose of the distribution list is to send a message to a group of people. It is used as an email address to mail a group of recipients.
Ans: The distribution list and Microsoft 365 Group have the same purpose, but the group has a shared mailbox and calendar, which is not present in the distribution list. Unlike the distribution list, the emails in groups are not sent separately but also stored in a separate mailbox.
Sources
- Create a contact group or distribution list in Outlook for PC by Microsoft Support
- Create a contact list or distribution list in Outlook for Mac by Microsoft Support
Share