Cannot Start Microsoft Outlook? These 7 Fixes will Help you Start it Again
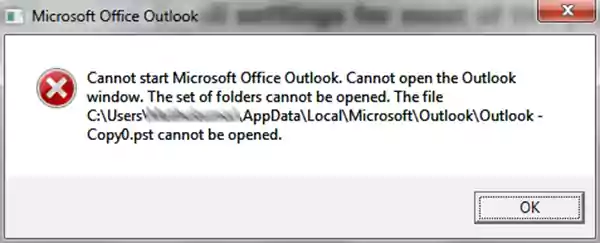
When you click the Outlook icon, the processing starts and hangs for a while before the error message “Cannot start Microsoft Outlook” appears. If you are suffering the same, you have landed in the right place.
The reason why you cannot start Microsoft Outlook can be any. However, Microsoft claims that the profilename.xml file, where “profile name” is the name of your Outlook profile, is the primary culprit behind this problem. If it is so, then you will find the size of this file 0 KB.
Further, other possible causes include running Outlook in compatibility mode or accidentally deleting or damaging the Outlook data file (.pst or. ost) while updating or reinstalling the Outlook program.
Whatever the reason behind this difficulty, the result is the same – You cannot open the Outlook window. However, you don’t have to worry about it now, as stated further are the most effective solutions that are most likely to get your Outlook running seamlessly again.
Launch Outlook in Safe Mode
When you cannot start Microsoft Outlook, the first thing to do is launch it in Safe Mode. Doing so will open Outlook without any add-ins, and if it starts, that means the problem lies with the add-ins.
Here’s how to do this:
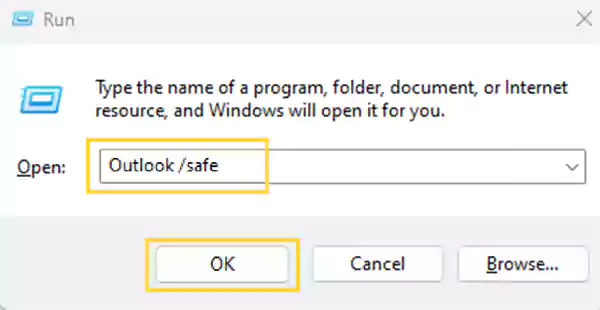
- From your keyboard, press the Windows logo + R key at the same time.
- This will open the Run window where you have to type Outlook /safe (Take note of the single space between Outlook and /safe) in the text field and hit OK.
- Thereafter, you will see the option to choose your profile. However, it is recommended to go with Profile Name: Outlook if you don’t have numerous profiles. Then, click OK.
- Next, you may be prompted to enter your Outlook password. Do what is required and click on the Accept button.
If, after following the above steps, your Outlook has opened in Safe Mode, the next step is to disable all the add-ins in your Outlook manually and then restart it.
Listed below are the steps to be followed:
- First off, click on the File menu option.
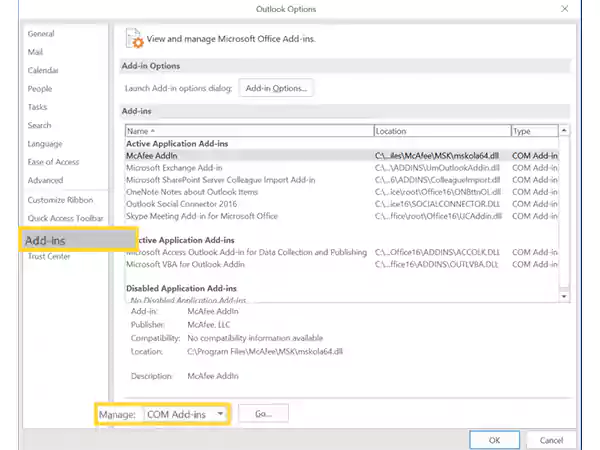
- Go to the Options tab on the next window and select the Add-ins option from the left sidebar.
- After that, under the View and Manage Office Add-ins sections, ensure that COM Add-ins are selected in the Manage option, and then click on the Go button.
- Next, the list of COM Add-ins will appear on your screen. Now, before proceeding to the next step, as a precaution, take note of all the add-ins enabled in your outlook. You can do so either by manually writing them down or taking a screenshot.
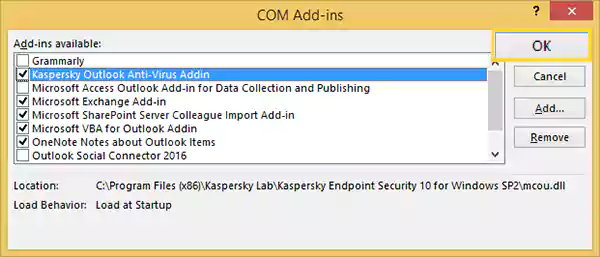
- Once you have noted which all add-ins are enabled, uncheck them all by clicking on their checkboxes, and then, click OK.
- Finally, close Outlook.
IMPORTANT: To deselect a checkbox, click on it. Don’t select the Remove option after choosing an add-in. By doing so, you will end up permanently removing the add-in if you have administrator permissions. You should deactivate an add-in for this troubleshooting exercise and not remove it.
Now that you have disabled all the add-ins, the next step is to find the culprit because of which you cannot start Microsoft Outlook. For this, you will have to again turn on the add-ins, one at a time, and subsequently close the Outlook app and open it again to see if you can start Outlook or not.
Follow the steps given below for doing so:
- Open Outlook again and click on the File menu.
- Then, go to the Options tab and click on Add-ins.
- Now, from the list of add-ins that were previously enabled, select any one of them and check its checkbox to enable it, and click on OK.
- Thereafter, close the Outlook app and open it again. If it starts without difficulty, it means that the add-in you enabled was not the one causing the issue. Now, again go to the add-ins list, enable one of them again, close the outlook, and try to start it. Repeat the process till you find the one causing the issue.
IMPORTANT: Ensure the above procedure for each add-in that Outlook had initially enabled. More than one add-in might be the reason behind the issue, so don’t stop when you find one, follow the procedure for all.
Make a New Profile in Outlook
Corrupted Outlook profiles can also be behind the ‘Cannot open the Outlook window’ issue. Yes, you have guessed it right, in order to solve this difficulty, you either have to switch to another of your Outlook profiles or create a new one.
Jotted down are the steps that you can follow to form a new Outlook profile:
- First, open the Control Panel on your system. For this, type the control panel in the search bar of your Windows and select the same from the search results.
- Next, from the top right corner of the Control Panel window, select the Category option in the View By menu.
- After that, click on the Mail option.
- Then, a Mail Setup-Outlook dialog box will open, where you have to select the Show Profiles option and then click on the Add button.

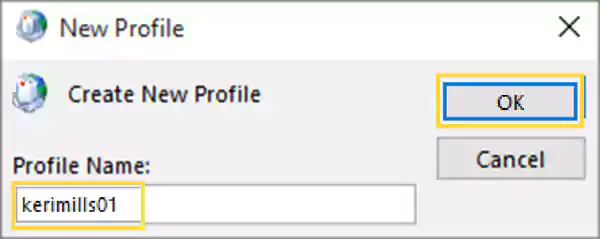
- Fill in the name of your profile in the Profile Name text box on the next dialog box, and click on OK.
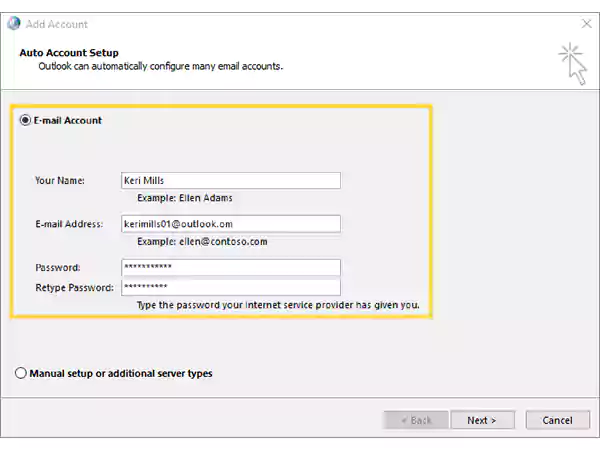
- Next, an Add Account window will open. There, select the E-Mail Account option, then, fill in your name, email address, and password in their respective fields, and click Next.
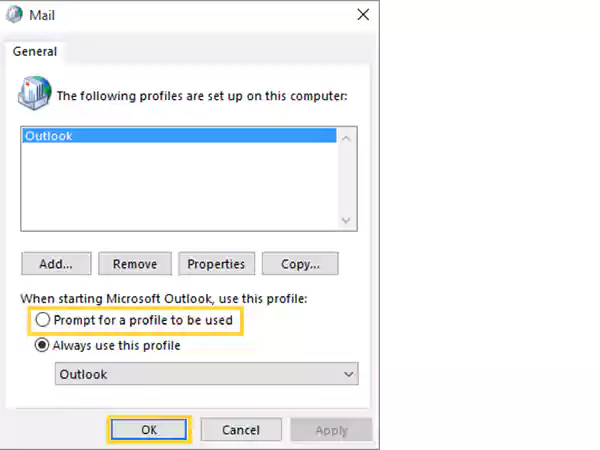
- Click on the Finish button, and now, you will find the name of the profile you just created under the General tab of the Mail dialog box.
- Finally, select the Prompt For a Profile To Be Used option from the When Starting Microsoft Outlook, Use this Profile section, and click OK.
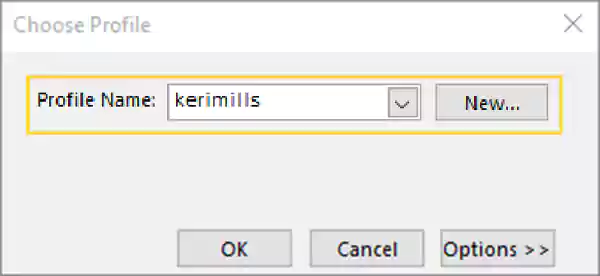
Now, when you try to start Outlook, you will be shown a dialog box to choose the profile with which you want to open it. There, select the name of the profile you just created. This time you shouldn’t encounter the ‘Cannot start Microsoft Outlook’ issue.
If after this, your Outlook starts normally, that means your earlier profile was corrupted.
Reset Navigation Pane Settings
The damaged Navigation Pane settings file is typically to blame for Outlook’s inability to launch properly. Therefore, fixing it is the next step in getting the difficulty resolved when you couldn’t open Outlook or the set of folders cannot be opened. The solutions may seem irrelevant, however, Microsoft itself suggests it, and many users were able to start their Outlook after attempting this.
Here’s how to go about it.
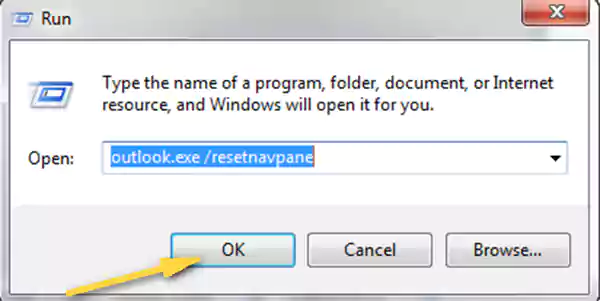
- First off, hit the Windows logo + R keys at the same time.
- The Run dialog box will appear on your screen. There, type Outlook.exe /resetnavpane in the text box and click OK.
Try deleting the XML file that contains the navigation pane settings if, for some reason, you were unable to restore the navigation pane configuration file and the automated Microsoft repair did not resolve the issue. Follow these steps to accomplish this:
- In your system’s search box, type in the following command: %appdata%\Microsoft\Outlook
- This will take you to the location where MS Outlook configuration files can be found. There, look for the outlook.xml file.
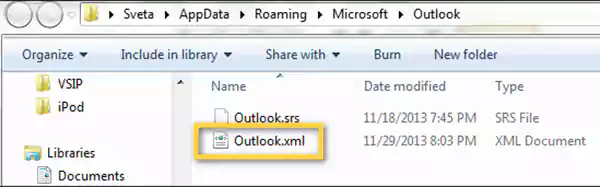
- When you have found the file, select it and delete it permanently.
See if Outlook Compatibility Mode is Enabled
If you have enabled Compatibility mode for your Outlook, then it is the most probable reason why it is not starting. Now, in order to disable it, given below are the steps:
- To begin with, open the Outlook.exe file on your system, which you can find on the following path:
- For Outlook 2013, you can find this file in C:\Program Files\Microsoft Office\Office 15\ or C:\Program Files (x86)\Microsoft Office\Office 15\
- For Outlook 2010, you can find this file in C:\Program Files\Microsoft Office\Office 14\ or C:\Program Files (x86)\Microsoft Office\Office 14\
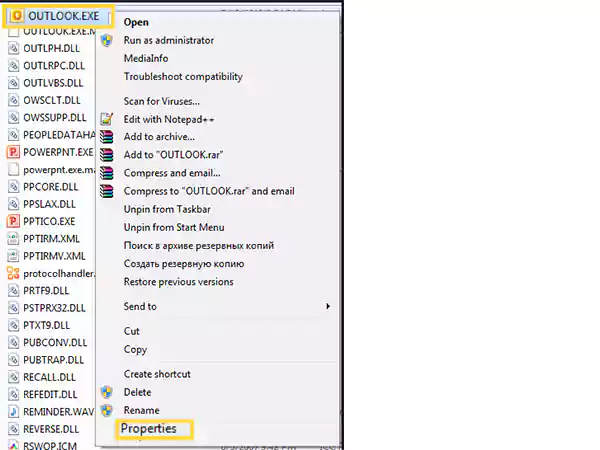
- Once you have reached the location, right-click on the outlook.exe file, and from the menu that will appear, select the Properties option.
- In the Properties dialog box, switch to the Compatibility tab.
- After that, you have to check whether any of the boxes are checked under the Compatibility tab, if so, deselect them all.
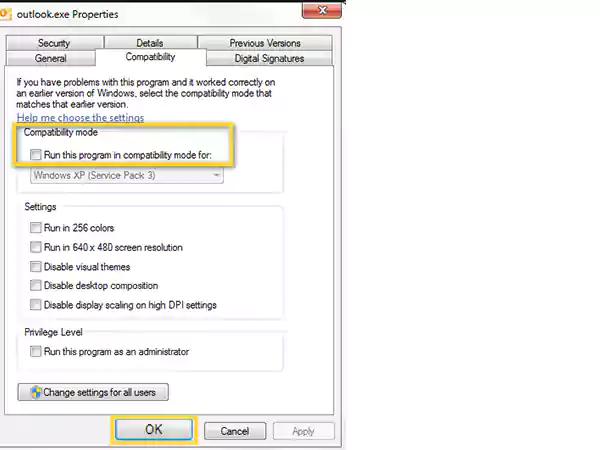
- Lastly, click on the Apply button, to save the changes, and then hit OK.
Now, again try to start Outlook, and if still your Outlook not opening, move on to the next solution.
Repair Outlook Data Files
In case nothing has worked so far, and you are still looking for ways to fix the issue in which Outlook cannot open a set of folders, or couldn’t open at all, then, probably Outlook data files will be damaged.
You do not have to worry about repairing these data files, as Microsoft provides a procedure, following which you will be able to resolve the difficulty. And, stated further is just that:
- Based on the Outlook version you are using, go to the following location on your system:
- Outlook 2019: C:\Program Files (x86)\Microsoft Office\root\Office16
- Outlook 2016: C:\Program Files (x86)\Microsoft Office\root\Office16
- Outlook 2013: C:\Program Files (x86)\Microsoft Office\Office15
- Outlook 2010: C:\Program Files (x86)\Microsoft Office\Office14
- Outlook 2007: C:\Program Files (x86)\Microsoft Office\Office12
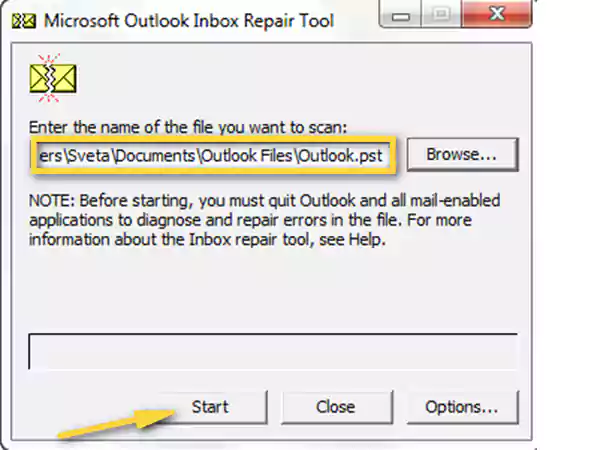
- After visiting the location, open the scanpst.exe file.
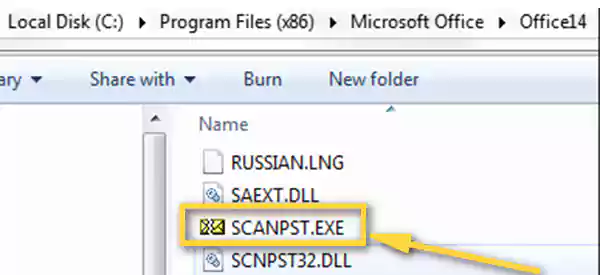
- Next, you will have to click on the Browse button to open your Outlook Data Files (.pst) that are to be scanned.
- Then, click on the Start button to begin the scanning process.
- If any error is found in Outlook Data Files, then you will see the option to repair them, for which you have to click on the Repair button.
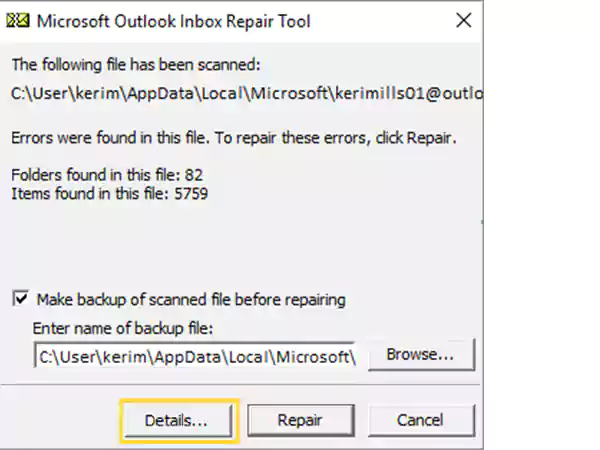
- Once the repair is done, start Outlook with the profile, and the data files which you have just repaired.
Tip: To find Outlook Data Files, follow these steps: File > Account Settings > Account Settings > Data Files.
Note: To know the steps for repairing Outlook data files, you can visit the Microsoft Support page.
End Processes in Task Manager
Unfinished backend processes can also lead you to a situation where you are not able to start your Microsoft Outlook, and cannot even open the Outlook window. To get this issue sorted, you will have to open the Task Manager on your system and end the Outlook processes running in the background.
Refer to the steps below for having this done:
- Right-click on any empty space in your Taskbar, and from the menu, select the Task Manager option.
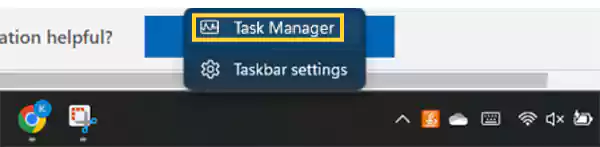
- Now, in the Task Manager window, switch to the Processes tab.
- Then, in the list of processes that are running in your system, find all the Microsoft processes.
- After you have found them, click on any one of them, select the End Task option, and do the same for all the Microsoft processes in the list.
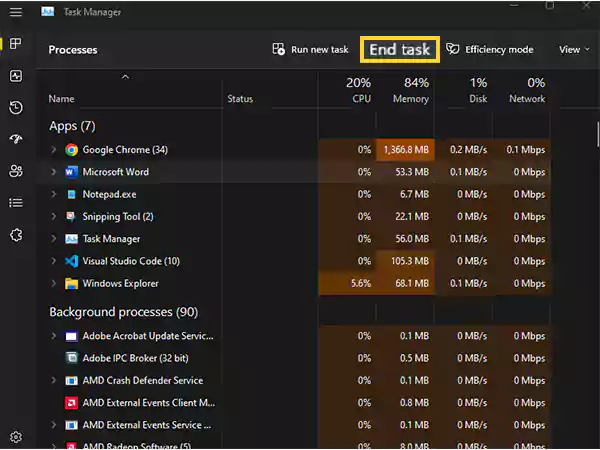
- Once this is done, now try to start Outlook.
Repair MS Office
Repairing MS Office can be considered the last resort when your Microsoft Outlook has stopped working and isn’t starting. Microsoft provides a Windows built-in repair tool, that will find the issue, and will resolve it.
Here’s how you can carry out this fixing procedure:
- Open the Control Panel on your system, and click on the Programs option.
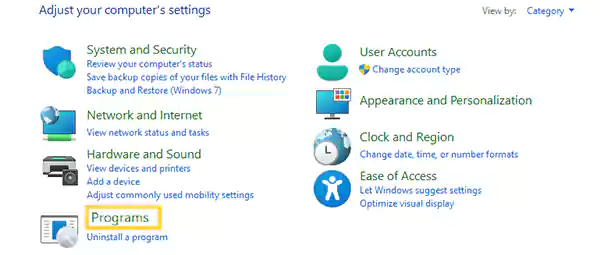
- Now, select the Program & Features option from the next screen.

- From the list of all the programs installed on your system, locate Microsoft Office and click on it.
- Then, click on the Change option present at the top of the list.
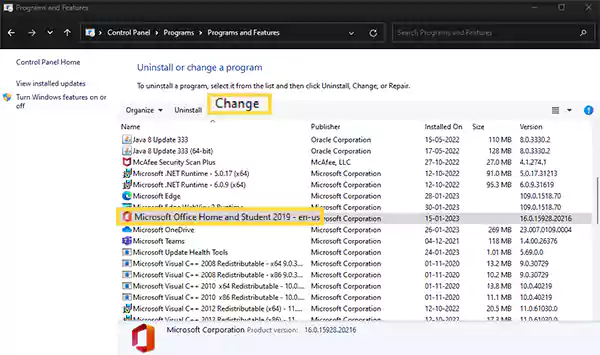
- After that, the window for repairing Microsoft Office will appear. Where you can select either the Quick Repair or Online Repair option.

- Finally, start the repair process by clicking on the Repair button.
Read More:
- 4 Tips to Secure Your Outlook Web App Connection and Data
- MS Outlook Data File Can’t be Access Because Of This Error 0x8004010f
- Tried and Tested Workaround for Outlook 553 Server Error
- MS Outlook is Not Receiving Emails But Can Send? Here Is the Solution to This
Share