All You Need to Know to Create and Manage an Email Group In Gmail?
Today, in this article, a highly time-saving topic is discussed, which is ‘Creating an Email Group in Gmail’.
Email groups are a significant advancement in the emailing world that has immensely contributed to saving time that was earlier wasted in finding the right people to send the right email. Why so?
Well, consider the following situation:
Earlier, when WhatsApp wasn’t introduced and the normal messaging system was generally used to send greetings and other messages, it was a very tedious task to pinpoint every individual from the whole long list of contacts to which the particular message is to be sent. But after WhatsApp and other convenient messaging apps are made available, it becomes very easy to send the same message to a bunch of people by creating groups. This saved a lot of time because it eliminated the need to message individually.
Email groups that you create in Gmail work more or less the same way. You have contacts saved in your Gmail account, you can put them together in a group, and send emails to them at the same time.
Interesting, right? So, to know how you can create an email group in Gmail, send an email to it, and know more about them, read through the following write-up.
- Creating a Contacts Email Group in Gmail
- Method-1: When you have no Contacts Saved in Gmail
- Method-2: If you have Contacts Added in Google Contacts
- Creating an Email Distribution List in Gmail
- Adding New Contacts to Existing Email Group in Gmail
- Method-1 (If you already have the new person saved in your contact list):
- Method-2 (If you do not have the new person saved in your contact list):
- Sending an Email to the Email Group/Emailing List you have Just Created
- Some Basic Operations of Email Group in Gmail
Creating a Contacts Email Group in Gmail
Before starting and jumping right into the steps, you need to know that there are two ways to create an email contact group in Gmail, both of which are stated further in this section.
These methods differ on that ground whether you have contacts saved in Google Contacts or not. The first method is for those who do not have people added to Google Contacts, while the other is for those who already have the contacts saved. So, you can skip to the part according to your situation.
Method-1: When you have no Contacts Saved in Gmail
In order to create an email group in Gmail, you need to have contacts saved in your Gmail account. Obviously, you will be able to make a group only when you have some contacts saved! It might seem like a lot of work to you, to add contacts one by one and then add them to the group, but it isn’t. Well, you can add numerous contacts at once to your Google Contacts, while making a group including them all at the same time.
The following is the process for doing just that. By going through the steps stated below, you will be able to add contacts to your Gmail account and will be able to create a group including them. So let’s get going:
- Open the browser on your desktop and sign in to your Gmail account in which you want to create a contact mail group.
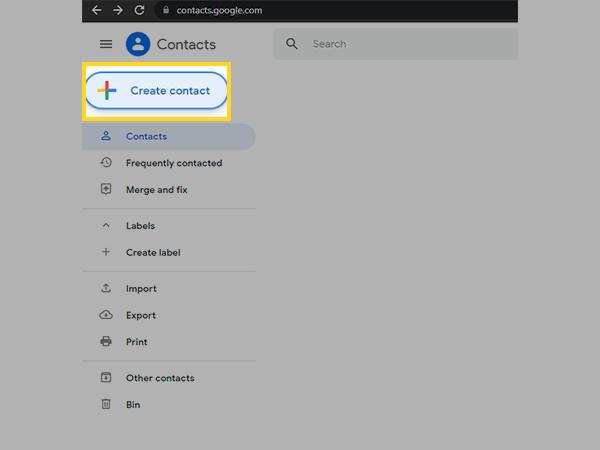
- Click on the Google Apps icon next to your profile picture in the upper right corner of your Gmail dashboard, and select Contacts from the list.
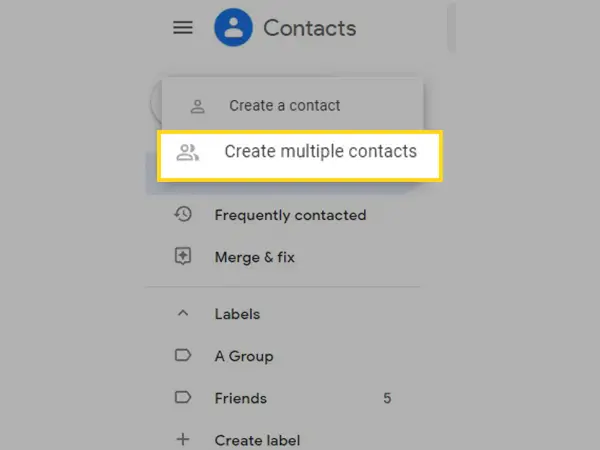
- Now, click on the Create Contact button in your Contacts dashboard’s left pane.
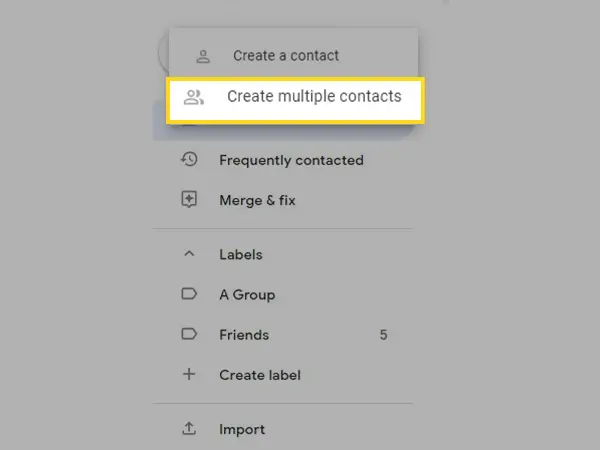
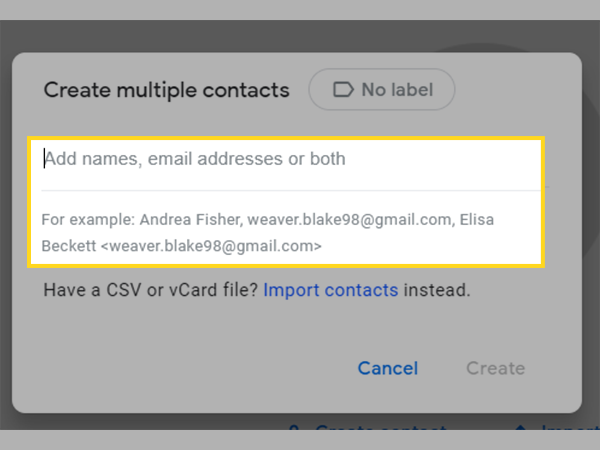
- Then, select the Create Multiple Contacts option.
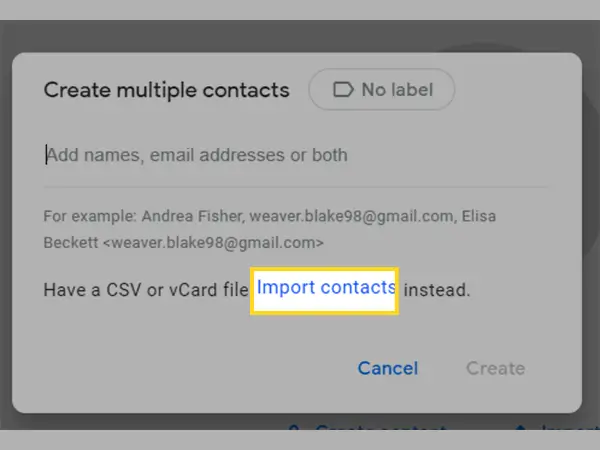
- Next, you must enter the contact details of the person you want to add to your email group. There are three following ways to make an entry of each contact:
- Name only: You can enter only the name of the contact, like Andrew Chase, and can edit and enter further details later.
- Email Address only: You can only enter the email address of the person, like andrewchase@gmail99.com, and can enter other info later.
- Both: You can enter the name of the person along with their email address, like Andrew Chase <andrewchase99@gmail.conm>.

Note: If you are manually entering the names and their email addresses, make sure that each contact is separated by a comma. However, you can also import contacts from your system if they are in CSV or vCard format by clicking on Import Contacts.
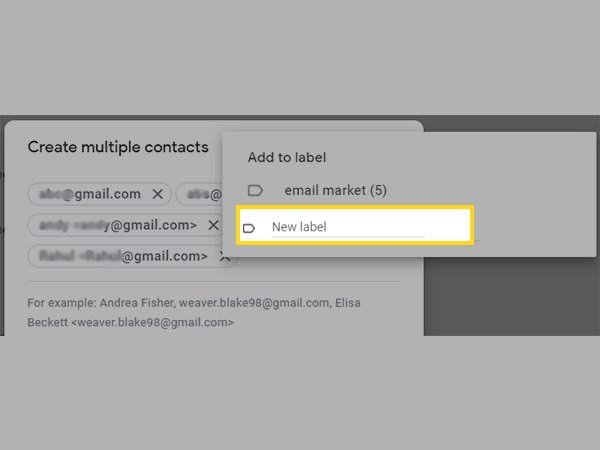
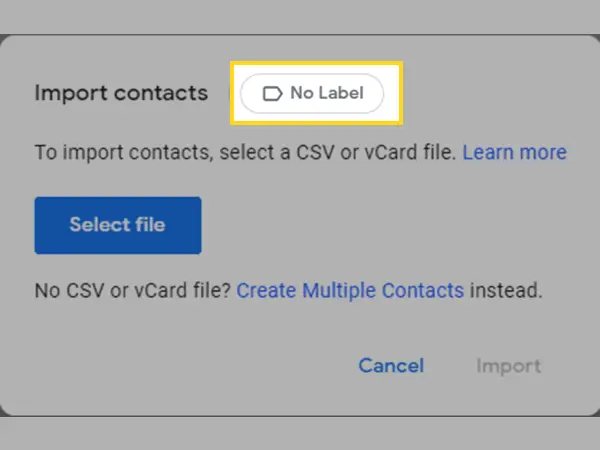
- Click on the No Label option in the Create Multiple Contacts window.
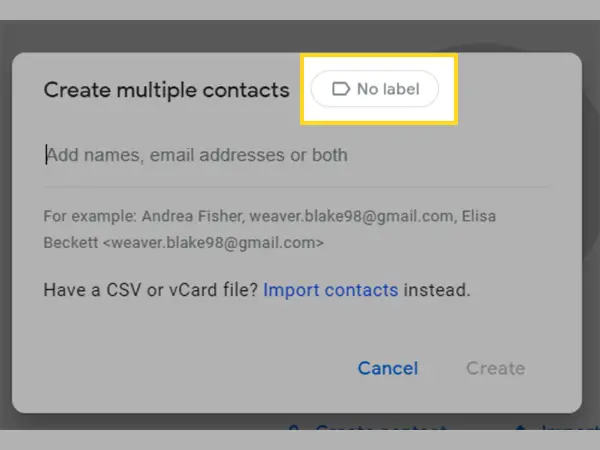
- Thereafter, enter the name of the email group you have created.
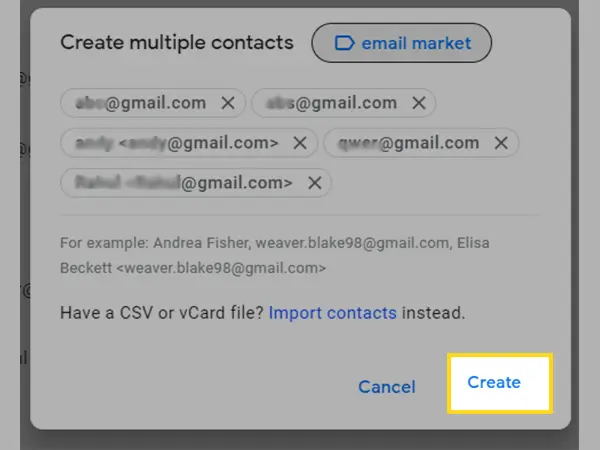
- Finally, click on the Create button.
Method-2: If you have Contacts Added in Google Contacts
If you want to make a group of people that are already added to your Google Contacts, then there is a slightly different method that you need to follow. Listed below are the steps for the same:
- Launch your browser, and log into your Gmail account in which you want to create an email group.
- Now, click on the Google Apps icon next to your profile picture in your Gmail account dashboard, and from the Google apps list, click on Contacts.
- Now, to add contacts to your email group, hover over the profile picture of the contact and check the box when it will be visible.
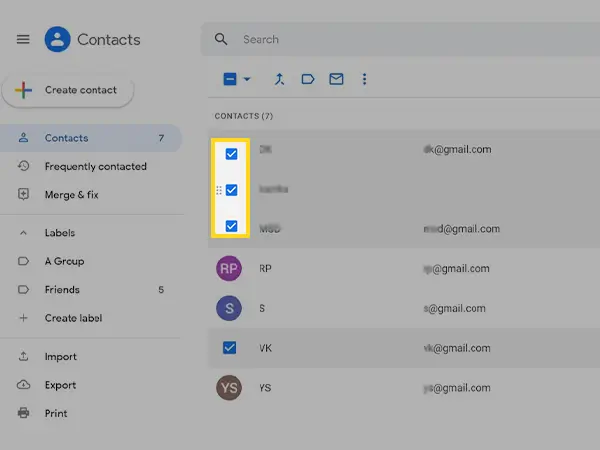
- Next, check the name of all the contacts you want to add to your email group in your Gmail account.
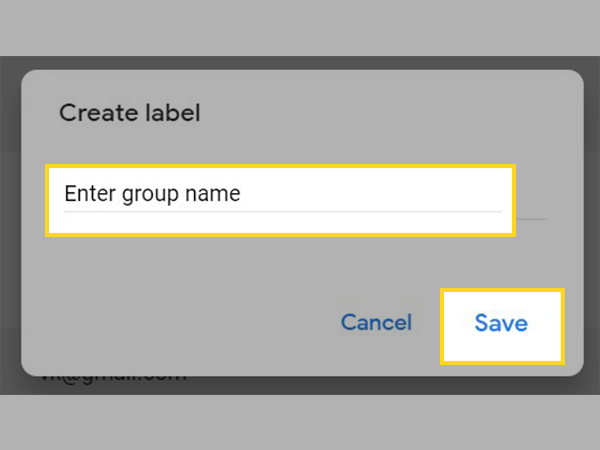
- Once you have selected all the contacts, click on the Manage Label icon, present at the top of the contacts list, and next to the mail icon. Then, a menu will appear, where you have to click on the Create Label option.
- Lastly, enter the name of the group you have just now created in your Gmail account, and click on the Save button.
Creating an Email Distribution List in Gmail
Creating an email list in Gmail is similar to making a group of family and friends. As you might already know, that emailing list or the distribution list is used to promote your product or services to your subscribers, which can be a huge number.
So, instead of saving all the subscribers to your Google Contacts, as we did earlier, you will need to work more professionally here. It’s usually most efficient to enter all of your subscribers’ email addresses into a Google Docs spreadsheet if you send out email newsletters on a weekly basis.
This approach is not only more systematic and effective than sending via Gmail, but it also lessens the possibility of errors during the process. Most importantly, you will be able to send the email to all the emailing list members at once without having to manually type their email addresses one by one.
Here’s how you can do this:
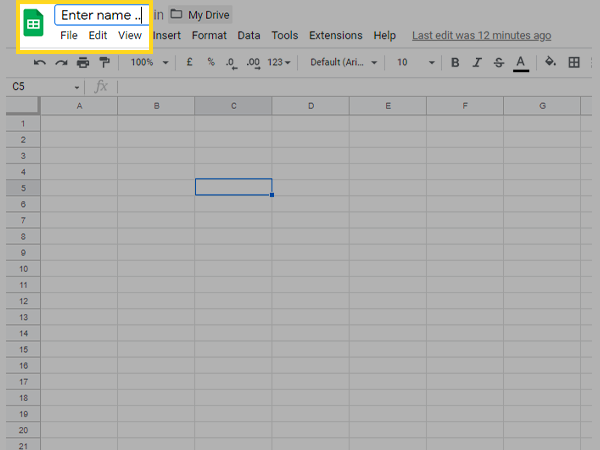
- In your browser, open Google Spreadsheet through your Gmail account, by clicking on Sheets from the Google Apps list.
- Upon reaching there, select the option to create a new sheet and enter its name.
- Now, enter the name of the columns which will contain the information you want to enter for each of the contacts, like name, email address, phone number, etc.
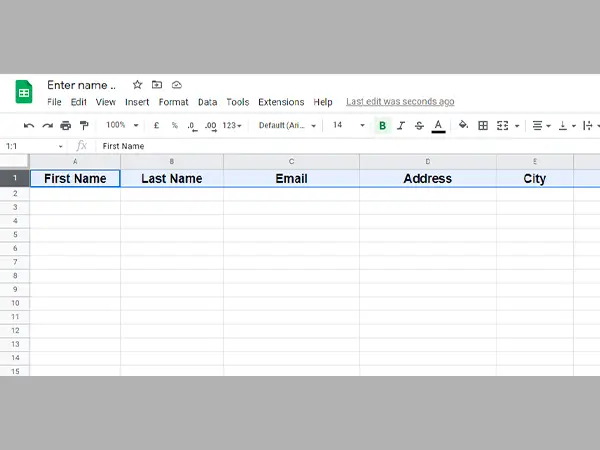
- Thereafter, fill in the spreadsheet with the details of each contact.

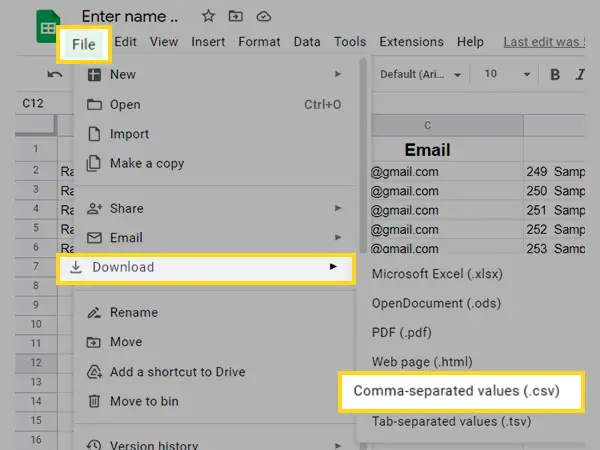
- Next, you have to download the file in CSV format. For this, click on the File in the top left corner, select Download, and click on the Comma-Separated-Values (.csv) option.
- Thereafter, open Google Contacts on your browser and log into it through the Gmail account in which you want to create the emailing list.
- Next, click on the Create Contact button, and select the Create Multiple Contacts option.
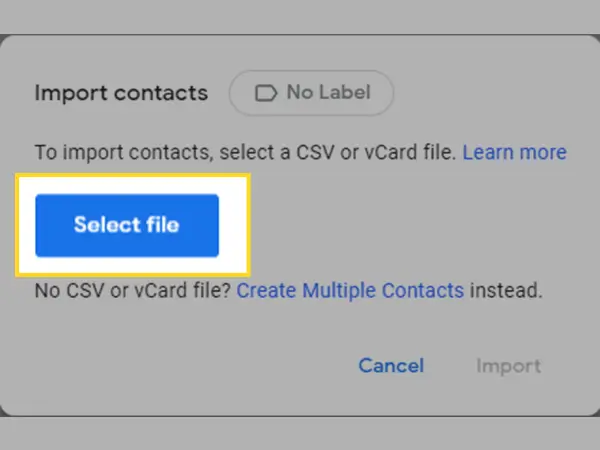
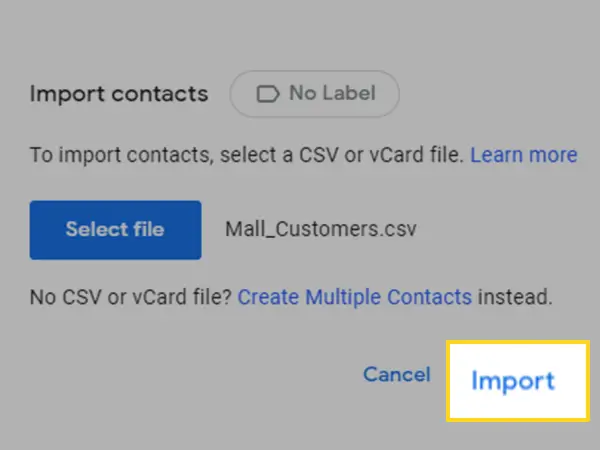
- Then, click on the Import Contact option on the displayed pop-up screen.
- Click on the Select File button, and select the CSV file of contact details you just downloaded.
- Once the file is added, click on No Label to give the name to the emailing list.
- Lastly, click on the Import option. Voilà! Your distribution list/email list is created which you can use to send emails through your Gmail account.
Adding New Contacts to Existing Email Group in Gmail
If you already have an email group in Gmail but want to add more people to it, then you need to follow one of the two methods mentioned below. If the person you want to add to the email group in your Gmail is already saved in your account, then follow the first method, otherwise, hop to the second method.
Method-1 (If you already have the new person saved in your contact list):
- Open the Google Contacts dashboard using your Gmail account in which you have created your contacts email group.
- Now, in the list of contacts, search for the person you want to add to the existing email group.
- Hover over the profile picture of the contact, and select the checkbox when it appears.

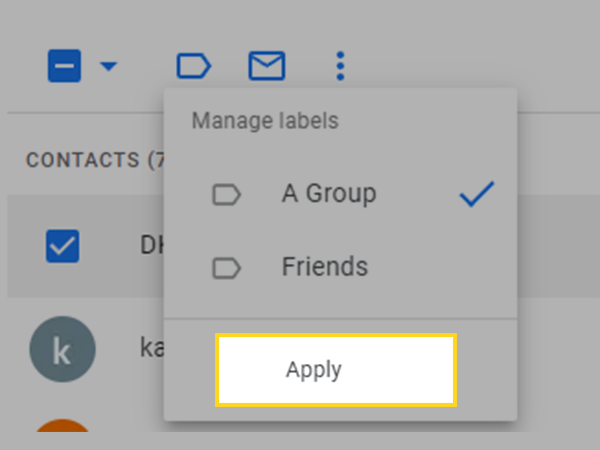
- Thereafter, click on the Manage Labels icon present at the top of the contacts list.
- Next, the list of email groups you created earlier for that Gmail account will appear. From there, select the group to which you want to add the new contact.
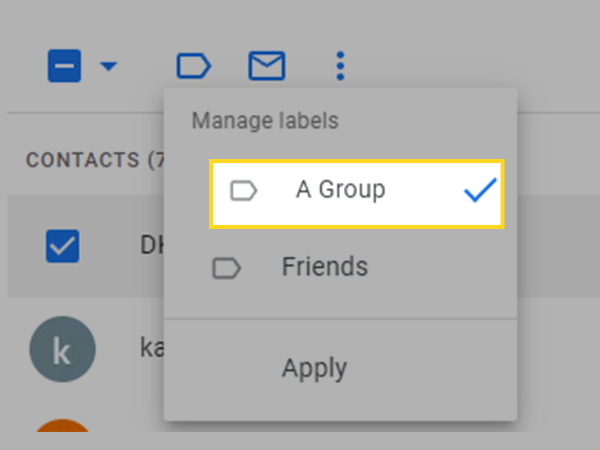
- Lastly, click on the Apply button.
Method-2 (If you do not have the new person saved in your contact list):
- On your browser, open the Gmail account in which you have created your contacts group.
- Click on the Google Apps icon present in the upper right corner of the Gmail dashboard and click on Contacts.
- Now, the Contacts dashboard will open, where you have to click on the Create Contact button present in the left pane of the screen.
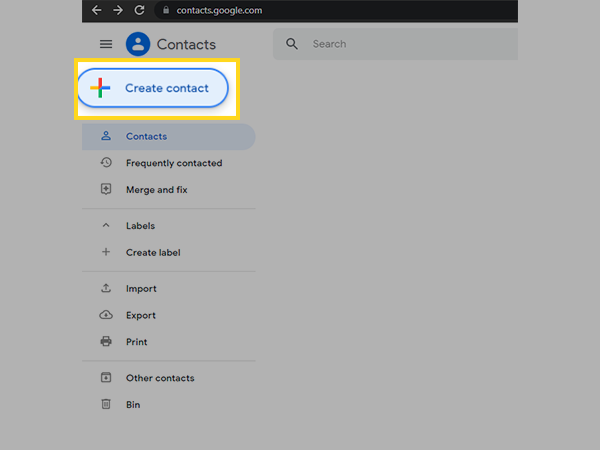
- Next, select the Create Multiple Contacts option.

- Thereafter, enter the name and email address of the person in the text field provided in the pop-up window.
- Click on the No Label option in the upper right corner of the pop-up.

- Then, select the group name to which you want to add the new contact.
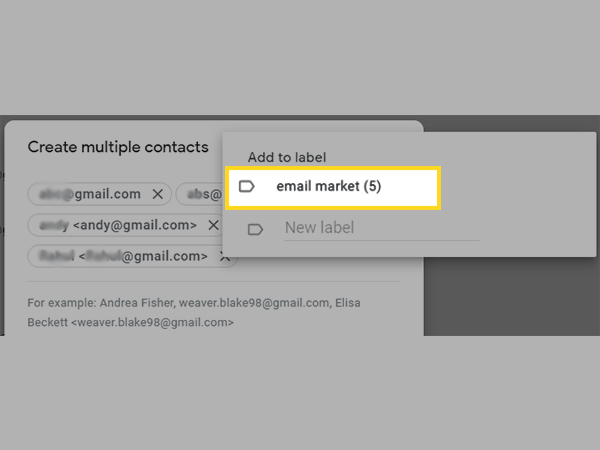
- Finally, click on the Create button and the contacts will be added to the email group.

Sending an Email to the Email Group/Emailing List you have Just Created
Now that you have created an email group of your contacts, you must be wondering how you can send an email to a group through your Gmail account. Well, it is as simple as sending an email to an individual. The following simple steps will walk you through the process:
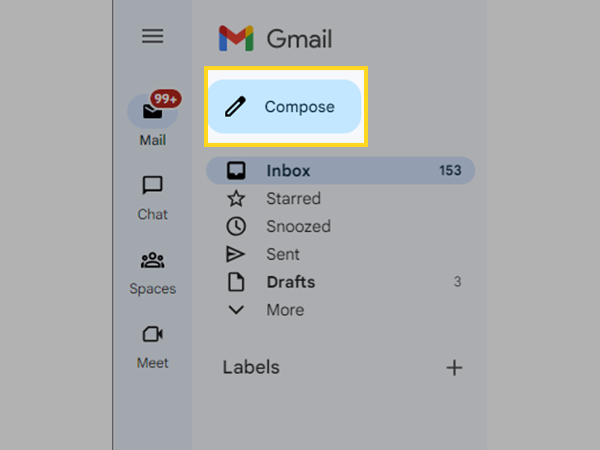
- Open the browser on your system, and log into your Gmail account, in which you have created the contacts group.
- Once your Gmail account dashboard opens, click on the Compose button.
- In the ‘To’ field of the email composing window, enter the name of the group to which you want to send the email. The suggestion of the group will appear as soon as you start typing. To add that group, hit Enter.
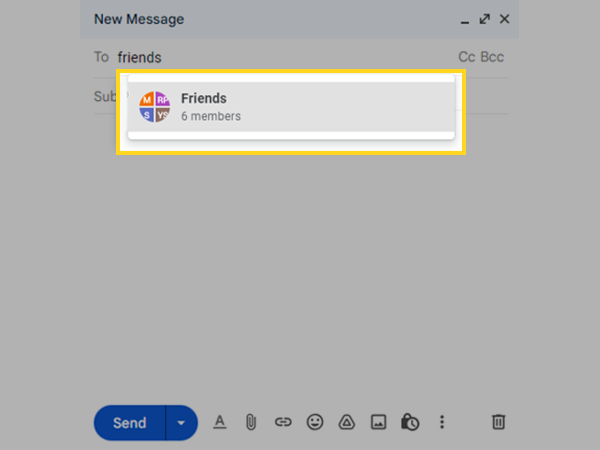
- Thereafter, compose the email body and give the email a subject line.
- Lastly, click on the Send button and the email will be sent to all the persons added to that group.
Note: There is a daily cap of 500 emails sent and received on a free Google account. You’ll get a notification informing you of your overage if you go over this limit within a day.
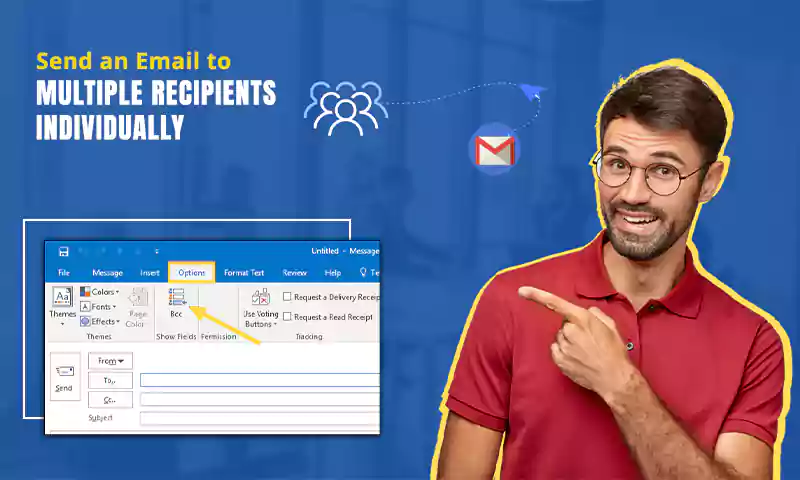
TIP: If you do not want the people on your emailing list to see each other’s names, add the name of your mailing list to the BCC field rather than the To or CC field. This way you will be able to maintain the privacy of the people on your email list and it is appropriate behavior.
Technically, you could instead include this in the distribution list in the ‘To:’ field. However, if you do that, every person on the list will be able to view the email addresses of the other people.
Some Basic Operations of Email Group in Gmail
Now that you know how to create an email group or distribution list in Gmail, you should know some basic operations that will be helpful in managing these groups like removing a person, deleting the group if it is no longer used, or renaming the group. The process for performing all these operations is stated below:
Removing Person from the Contacts Email Group
- First, open the browser and log into your Gmail account in which the group that you want to edit is added.
- Click on the Google Apps icon and select the Contacts from the list.
- Now you will be directed to the Contacts dashboard, where under Labels on the left side pane, all the groups you have created will be listed. Click on the one from which you want to remove the person.
- Now, hover over the profile picture of the person you want to remove and select the checkbox when it appears.
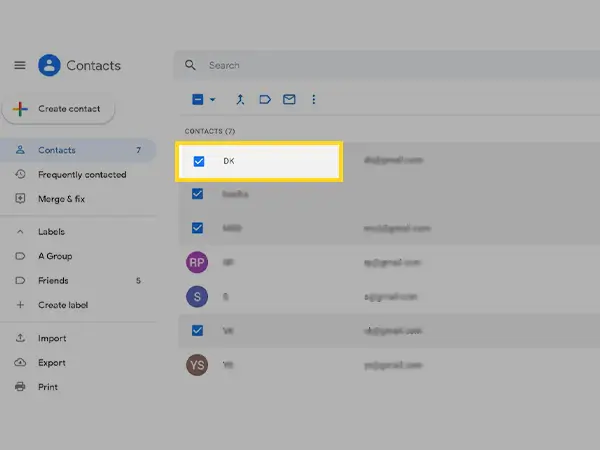
- Click on the more menu icon (three dots) displayed at the top of the group members list, and from the expanded menu, select the Remove From Label option.
With this, the person will be removed from the email group and will no longer be part of the contact group, but they will remain in your list of Gmail contacts.
Note: Please take note that selecting the Delete option from the expanded menu, (present below the Remove From Label) will delete the selected Contacts from your Gmail account permanently.
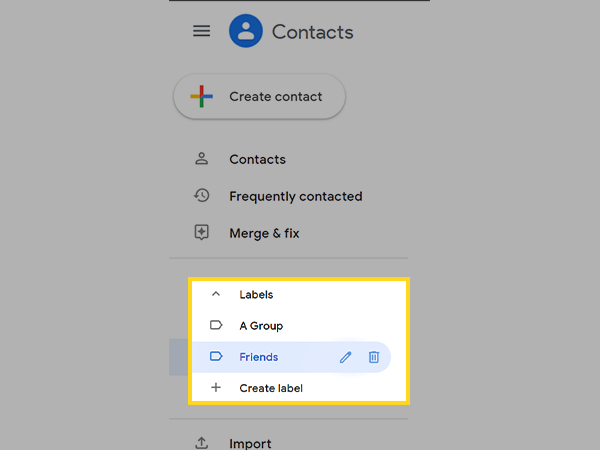
Renaming the Contact Group
- First, you need to go to your Google Contacts dashboard through the Gmail account in which you have created the email group in the first place (follow 1 and 2 steps of the above process for reference).
- Once you have reached the Contacts dashboard, select the contact group that you want to delete, which will be listed under Labels on the left side pane.
- Then, you have to click on the pencil/edit icon that will appear next to the group name.
- Lastly, a pop-up will appear, where you can enter the new name of the group. To save the changes, just simply click on Save.

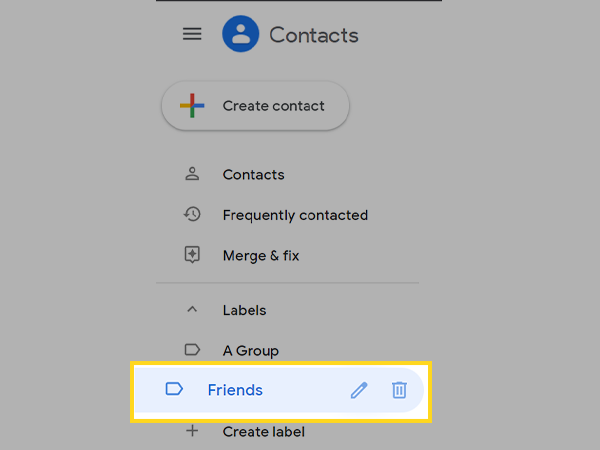
Delete Contact Group from Gmail
- First, you need to go to your Google Contacts dashboard through the Gmail account in which you have created the email group in the first place (follow 1 and 2 steps of the above process for reference).
- Once you have reached the Contacts dashboard, select the contact group that you want to delete, which will be listed under Labels on the left side pane.
- Then, you have to click on the trash/delete icon that will appear next to the group name.
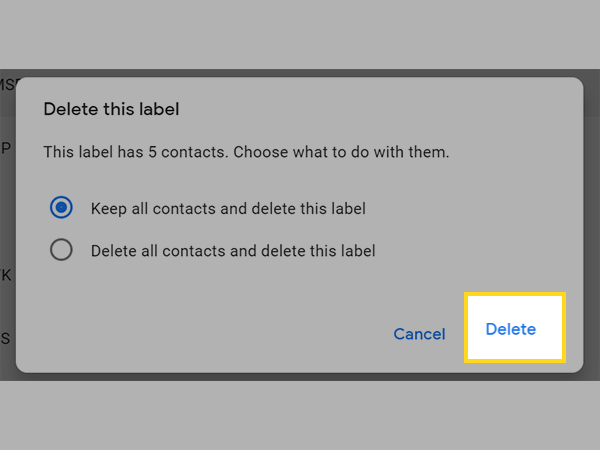
- Lastly, a pop-up screen will appear, where you have to select the Keep All Contacts And Delete This Label option and click on Delete. By selecting this option, all of your Contacts will still be accessible in your Gmail account, even if the group no longer exists. However, if you also want the contacts to be removed, select the other option.
Share