Ultimate Guide to Block, Unsubscribe, Report or Filter Unwanted Emails (Spam) in Gmail!
- If the built-in spam filters don’t work properly, there are ways to report spam & phishing, block senders and unsubscribe from the marketing email senders on Gmail, so you can keep your inbox “junk-free.”
- Gmail also has a feature to ‘Automatically filter messages on Gmail’ so that messages can be sent directly from a specific sender to a certain label, such as the Spam folder.
If you are reading this, it means that you are getting unwanted emails in your Gmail.
Gmail is one of the most used email services around the world, which people use not only for professional correspondence but also for many other purposes such as sending digital files, getting messages from school or university, keeping in touch with distant friends or family, and keeping track of your online accounts and purchases, etc. But, in the midst of receiving such important emails, what’s it like to receive unwanted and unnecessary emails?
Very frustrating, isn’t it!
However, don’t worry as you are not alone facing this problem. There are many Gmail users who are complaining that their inbox is full of uninvited junk and bulk-sent emails. This is because Gmail, though, has a spam management system to filter out (unwanted) spam emails with its built-in filters, but since it’s not perfect, spam emails or phishing attempts to happen anyway.
So, what needs attention is the solution on your part!
Well, if you don’t want to receive emails in your Gmail inbox, you can block or unsubscribe the sender and how you can do that, we will explain to you in this post today.
With that in mind, read here the step-by-step guide to block or unsubscribe unwanted emails in your Gmail inbox. However, before that, let’s dive into the little details first—
- Why Am I Getting Unwanted Emails in my Gmail Inbox?
- How to Avoid Getting Unwanted (Spam) Emails in Gmail?
- Method 1: Block Emails /Email Address on Gmail
- Method 2: Report Spam and Phishing on Gmail
- Method 3: Unsubscribe from Mass Marketing Emails on Gmail
- Unsubscribe from Mass Marketing Emails On Desktop
- Unsubscribe from Mass Marketing Emails On the Mobile App
- Bonus Method: Automatically Filter Out Messages on Gmail
If we look at the statistics, it is found that about 85% of the world’s email traffic is spam, which makes up about 122.3 billion (a day). In this regard, however, automatic filters can be effective, but not 100%, at filtering out spam emails – that may carry malware, act as phishing tools, and clutter your inbox.
Therefore, it is more necessary to learn how to block any unwanted emails targeting your inbox.
Why Am I Getting Unwanted Emails in My Gmail Inbox?
If it is about knowing why you get unwanted (spam) emails in your Gmail inbox in the first place, let us tell you that it is because of these few ‘most’ common reasons—
- You have posted your email on a public forum or website.
- You have subscribed to a company newsletter.
- A company that has your email details, such as an email ID, was the victim of a data breach.
- Or, you may have accidentally clicked on a malicious email in the past.
In addition to these factors, you receive unwanted emails when spammers get your email address in any of the following ways—
| Way:1 | Hacking | From time to time, safe lists are hacked and details, including email addresses, are leaked. |
| Way:2 | Scraping | Using software, Spammers search the web to get email addresses from websites and then, they send spam emails to the addresses they find. |
| Way:3 | Guessing | Subsequently, they can also use algorithms to generate variations of the email and then, they send the same spam message to every email address they generate. |
| Way:4 | Purchase | Last but not least, some companies sell lists of email addresses and this list is often created when you respond to a free offer. |
How to Avoid Getting Unwanted (Spam) Emails in Gmail?
Whatever the circumstances, if you’re receiving unwanted email on your Gmail, there are ways to report spam and phishing, block senders, and unsubscribe from marketing email senders on Gmail so that you don’t keep your inbox from “junk-free.”
So, now it’s time to look at the procedure of how to block spam and filter emails in Gmail —
Method 1: Block Emails /Email Address on Gmail
Albeit, it is not at all difficult to learn to block certain emails or filter emails in Gmail to prevent a specific user from sending you messages, but if you block a particular email address on Gmail, it means you will no longer receive any kind of messages/emails from that account in your inbox.
So, basically, it’s either an all or nothing option that you can choose from! However, if you want to receive some messages from an email address but not all, what option do you have is to manually delete the unnecessary emails that you receive from that particular address.
Now, with that in mind, you can block an email or email address on your respective computer or mobile device by following the below steps accordingly:
Block Emails /Email Address on Desktop—
- Step 1: To begin, head towards the Gmail website using the web browser of your choice.
- Step 2: Then, log in to your Gmail account, in case you aren’t already logged in.
- Step 3: Now, when you’re logged in and on your inbox page then, open an ‘Email’ from the sender whom you want to block.
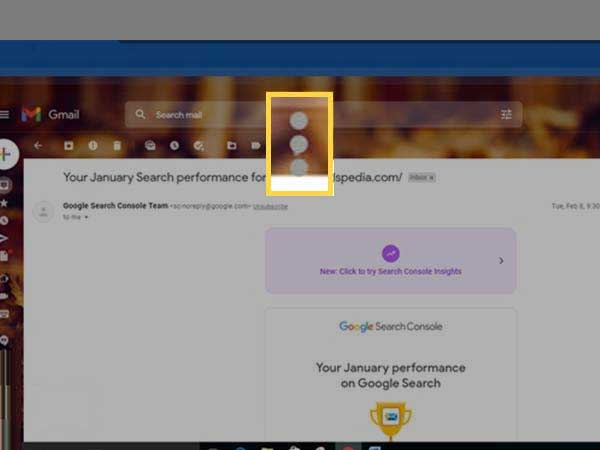
- Step 4: Once opened, on the same horizontal plane as the sender’s name and address, you’ll see an icon made up of ‘Three Vertical Dots’ in the top-right corner of the email, which you need to click to open the drop-down menu.
- Step 5: From the drop-down menu that appears, click on the ‘Block (Sender)’ option. As soon as you do this, you will receive a confirmation message indicating that future messages from this sender will be marked as spam and any messages received from this particular sender will be sent to your Spam folder.
- Step 6: If you are okay with this confirmation message, click the ‘Block’ option in the pop-up window and finally confirm your action to block a sender.
However, if you’ve blocked someone by mistake then, in this regard, let us also tell you that you can anytime ‘Unblock an email address.’ To do so, you just need to—
- Click the ‘Unblock sender’ option located at the top of the email.
- Or, you can repeat the steps above but make sure to select ‘Unblock’ (Sender) instead of ‘Block’ (Sender) option.
Block Emails /Email Address on the Mobile App—
- Step 1: Begin by opening the Gmail app on your respective iPhone, iPad, or Android device.
- Step 2: Then, open the email of the particular sender you want to block to not receive any emails.
- Step 3: Following that, in the top-right corner of the email, you’ll see a ‘Three Vertical Dots’ button if you’re an Android user or a ‘Three Horizontal Dots’ if you’re on iOS, located next to the ‘Reply’ button on the same horizontal plane as the sender of the email. So, all you have to do is select the same dots icon to open the drop-down menu.
- Step 4: After that, tap on ‘Block (Sender)’ option from the menu list.
Now, just like you can unblock an email address on a computer desktop, you also get the option to ‘Unblock an email address on your phone.’ To do so—
- Tap on the ‘Unblock sender’ option on the email.
- Or else, you can repeat the steps above and while doing so, make sure to select ‘Unblock (sender)’ instead of ‘Block (sender)’ option.
Method 2: Report Spam and Phishing on Gmail
Whether you know it or not, Gmail has a sophisticated algorithm that sends messages of some particular nature directly to the ‘Spam Folder’! To give you a clear idea of the same, here we’ve listed some examples of ‘type of messages’ that Gmail sends directly to your spam folder—
- A message with no content in it.
- A message with deceptive email addresses that appears to be from a well-known company but is actually not.
- A message that seems to be phishing for both your personal or financial information.
Note: If you want to read more about them, let us tell you that Google has a full list of such (spam) email types on their support page.
What else you need to know is that you can even flag unwanted messages you receive in your Gmail inbox as spam.
Wondering why you need to do this? Well because it helps Gmail ‘learn’ what types of messages you consider to be spam.
So, considering it important, here’s how you can flag/report a message as ‘Spam and Phishing’ in Gmail:
Report Spam and Phishing on Desktop—
- Step 1: To start, you’ll need to open the Gmail website and log in to your account if you’re not already logged in.
- Step 2: On your account, click the ‘box’ to the left of ‘Spam or phishing email’ or simply click on that email to open it.
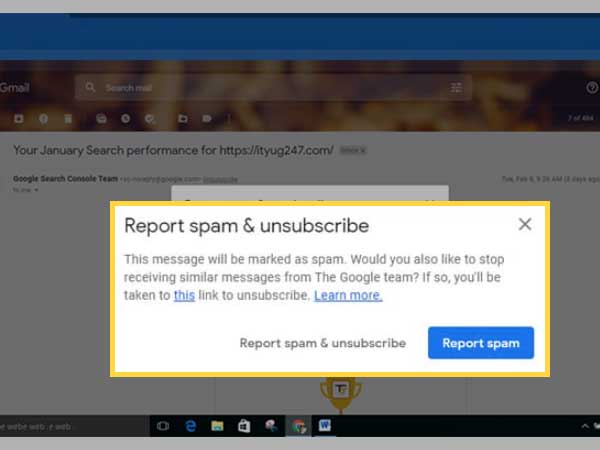
- Step 3: Now, for reporting ‘Spam,’ click on the ‘Report Spam’ button which is located in the toolbar.
- Step 4: Following that, you’ve to again select the ‘Report Spam’ option in the pop-up.
- Step 5: Similarly, for phishing, you need to open the email, click on the ‘Three Vertical dots’ icon in the top-right corner of the email and then, select the ‘Report Phishing’ option.

- Step 6: Once you’ve done that, click on the ‘Report Phishing Message’ to confirm your action of reporting a phishing email.
Report Spam and Phishing on the Mobile App—
- Step 1: Tap on the ‘Gmail Mail’ icon’ to open the Gmail app on your respective iPhone, iPad, or Android device.
- Step 2: On the Gmail app, tap on the ‘Circular Profile’ icon’ of the ‘Spam or phishing email’ sender, located to the left of the email. Or else, you can simply open that email.
- Step 3: After that, you need to tap on the ‘Three Horizontal dots’ icon from the top-right corner.
- Step 4: In doing so, a menu will appear on the screen and from the same; you just have to select the ‘Report Spam’ option.
Now, sometimes, a genuine message is mistakenly reported as spam and sent by you to your ‘Spam folder.’ So, in that case, you can retrieve it from your spam folder like this—
- Start by opening Gmail and logging in your account.
- Once you’re logged in, navigate to the ‘Spam Folder’ from the list of folders available on the left.
- Inside the Spam folder, find the message that you wish to retrieve and simply select the checkbox next to that particular message.
- After that, just press the ‘No Spam’ button on top of the message to bring it back to its desired folder.
Note: You can confirm this with a message display that says ‘The message has been marked as spam and has been moved to its desired folder.’
Method 3: Unsubscribe from Mass Marketing Emails on Gmail
In addition to blocking email and reporting spam, if you’ve knowingly or unknowingly signed up to be on a company’s email list, you can unsubscribe at any time.
To do so, all you have to do is delete the weekly, bi-weekly or daily promotional email that you haven’t even read by following the steps below according to your device:
Unsubscribe from Mass Marketing Emails on Desktop—
- Step 1: First open the Gmail website and log in to your Gmail account in case you’re logged out.
- Step 2: Then, simply open a promotional ‘Email’ from the sender you no longer want to receive such emails.
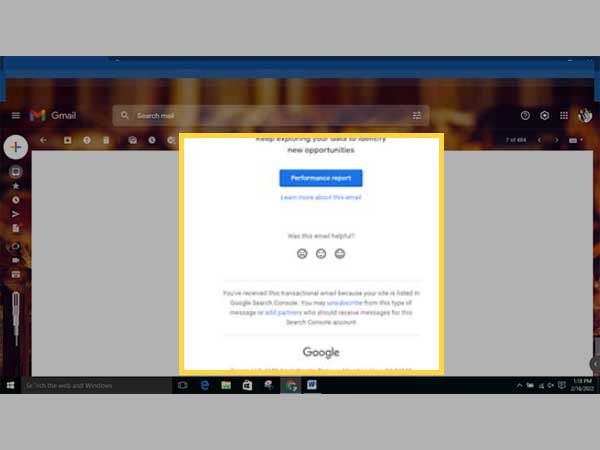
- Step 3: Once the email gets opened, click the links to ‘Unsubscribe or Change Preferences’ located next to the sender’s name.
However, in your case, if none of these options are available next to the sender’s name then, instead of using this Gmail unsubscribe feature; you can scroll to the bottom of the email and select ‘Unsubscribe or change preference’ or any related ‘Unsubscribe Email Link,’ which is usually available in all mass marketing emails.
Alternatively, you can also follow the above given procedure to simply block the sender or to report the email as spam and phishing.
Unsubscribe from Mass Marketing Emails on the Mobile App—
- Step 1: On your respective iPhone, iPad, or Android device, firstly launch the Gmail app.
- Step 2: Then, open the ‘Email’ of the sender from whom you no longer wish to receive promotional emails.
- Step 3: Once opened, you’ve to scroll down to the bottom of that email to tap on the ‘Unsubscribe or Change Preferences’ option.
Note: After you unsubscribe, it may take a few days for the mailing list to stop sending you promotional messages/emails.
Now, in case you want to ‘Turn off Unsubscribe Recommendations’ from a particular sender let’s say Google then, all it takes from you is to—
- Tap on the ‘Three Horizontal lines’ icon to open ‘Settings.’
- Then, select your particular Gmail account you want to edit.
- Next, tap on the ‘Inbox Tips’ option and following that, tap on ‘Unsubscribe Tips’ to turn off.
Bonus Method: Automatically Filter Out Messages on Gmail
As per this method, you can use automatic Gmail filters to send messages from a certain sender directly to a certain label [folder]. So, if you consider doing it, check out the steps below to know how to automatically filter emails from a specific sender in Gmail—
- Step 1: Firstly open Gmail and your account on your respective computer or mobile device.
- Step 2: Then, click or tap the ‘Arrow’ which is located on the right of the Gmail search bar. This is to be done to display the ‘Advanced Gmail search box.’
- Step 3: Then, in the ‘From’ field type ‘Sender Name’ whose messages you want to filter. However, note that, you can be more precise in a way that you can provide more information in the ‘other fields’ when applying the automatic filter.
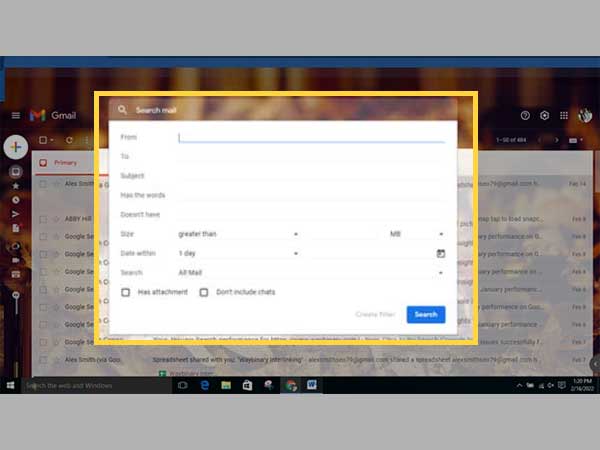
- Step 4: Now, when you’re done entering all the required information, just click or tap the ‘Create Filter with this search link.’
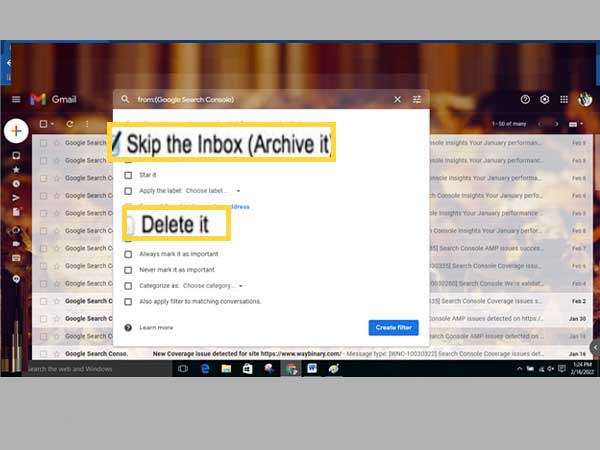
- Step 5: As you do so, the Create Filter box appears and asks you what you want to do with each message that meets the criteria which you’ve defined in the Advanced Gmail search box. Basically, you have to choose from either ‘Delete it’ or ‘Skip the Inbox’ option.
In this regard, it is worth noting that, “Skip the Inbox” would keep an unwanted message from a sender out of your Gmail inbox and “Delete it” option in particular, would keep the same out of both your inbox and Spam folder.]
- Step 6: Next, you simply need to check the box next to the ‘Apply the label’ option.
- Step 7: After this, click or tap the arrow in the ‘Select label box’ to display a drop-down menu showing the available labels.
- Step 8: From the list of labels, you need to select the label where you want to file messages from a particular sender.
- Step 9: Once you’ve done that, click or tap on the ‘Create Filter’ option to finally create a filter, which can be confirmed with a message displayed at the top of your inbox saying ‘Your filter was created and will now be labeled.’
That’s all! However, this write-up won’t be considered complete until we give you an answer to: ‘How do I permanently block email addresses in Gmail?’
So, the answer is that unfortunately there is no option to block email completely yet. Instead, use the Gmail blocking email (sent to spam) or filtering email (sent to trash) option to block unwanted emails in Gmail.
Share