How to Send Mass Emails from Excel? Simple Steps to Send Bulk Email Using Excel Mail Merge
No doubt, Excel has been one of the most useful tools to store and share information. For email marketers, Excel has been a boon for storing and managing their mailing list data. But, have you ever wondered how you can send mass emails to recipients added to your Excel mailing list? You might need Excel Training for other tasks, but this post is enough to sort out one of your problems.
Well, one way of doing this is to manually create an email group in Outlook or an email contact group in Gmail, by entering all the information one by one, and then using the group to send emails to multiple recipients at once.
However, it is a very time-consuming and tiresome process, instead, you can directly use your Excel mailing list to send customized mass emails to all the recipients added to it, using the Mail Merge feature.
Seems interesting right? Want to know more about this Mail Merge feature and sending emails from Excel, jump right into the blog below.
Using Excel Mail Merge to Send Bulk Emails on Windows
The process stated here might seem long, but trust me, it is legit the easiest of them all and helps you send mass emails from your Excel spreadsheet.
So, to know how to send mass email from Excel on your Windows, go through the steps listed below:
- First off, open a new Word document on your system.
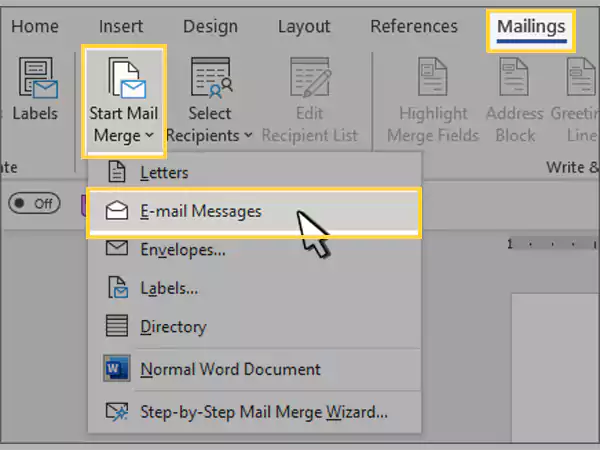
- From the top menu bar, go to the Mailing tab.
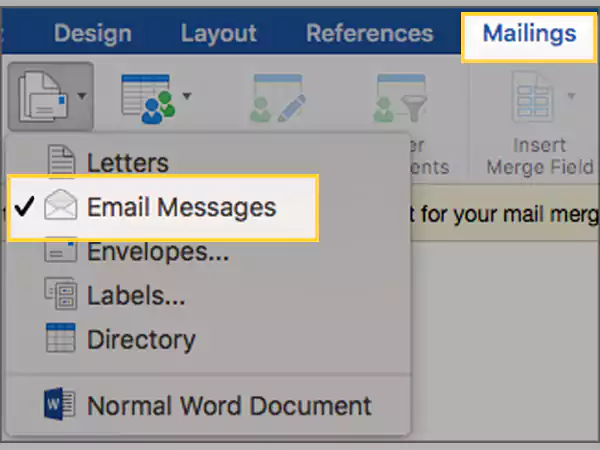
- In the Mailing tab options, look for Start Mail Merge and click on it. From the expanded menu, select the E-mail Messages option.
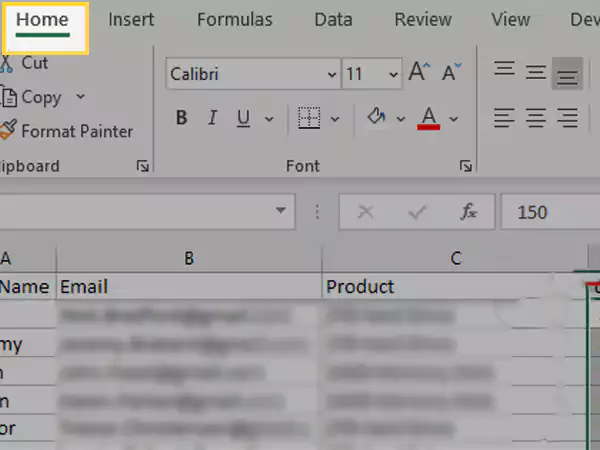
- Next, you have to set up your mailing list in the Excel sheet, which is the list of people you want to send the email to. While creating your mailing list, you need to take care of the following two things:
- If any of the columns in your mailing list is in numbers form, change the type of that column to text for the merging to happen correctly with the Word document. For doing so, select the column, switch to the Home tab from the top menu bar, under the Number section, click on the drop-down and select Text.
- Ensure that your email list in the Excel sheet has a column consisting of the email addresses of each recipient, in order to send emails from Excel spreadsheets to those people.
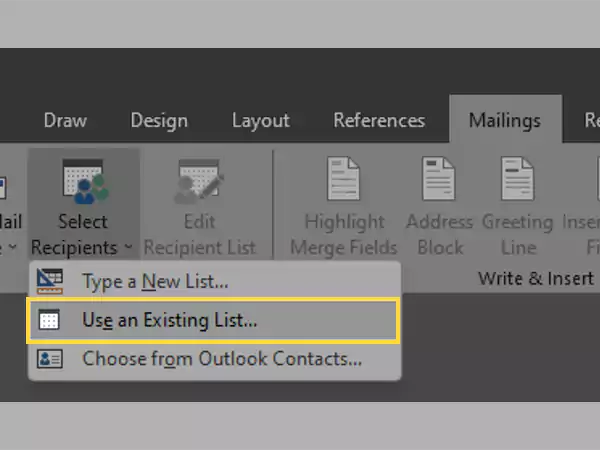
- Now, again open the Word document (created in step 1), and click on the Select Recipients option, present under the Mailings tab.
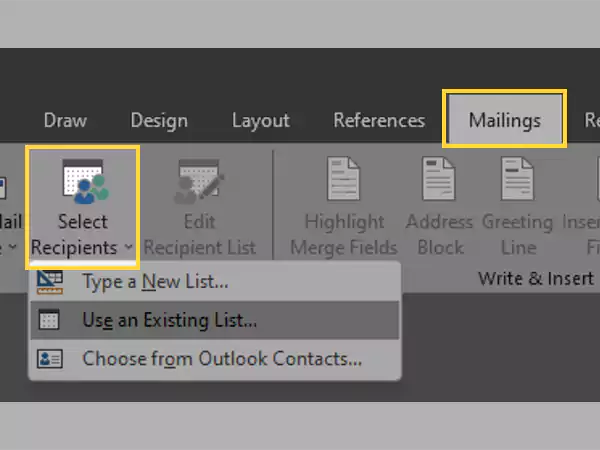
- Thereafter, some options to merge your mailing list (created in step 4) will appear. You have to select it by choosing one of the following options:
- Type a New List: If you don’t have an existing mailing list, and have to create one, then select this option. A form will open after selecting this option, which you have to fill out to create your mailing list, which you can use for sending emails from Excel.
- Use an Existing List: By selecting this option you will be able to merge the mailing list you already have. You can access an Excel spreadsheet from this option and can also merge a database file in the table format. For databases in any other format, you can refer to the MS Support page.
- Choose from Outlook Contacts: If you have your mailing list saved in your Outlook, you can select this option to import it from there. Refer to this MS Support page for more information on how to send bulk email from Outlook using Excel.
- Once your mailing list is merged with the Word document, click on the File option from the top menu bar and select
- Save or Save As to save the document.
- Now, to add personalized content, like the name of each recipient in the greeting line of their respective emails, click on the Greeting Line option in the Mailings tab.
- A small window will open, where you have to select the format for your greeting message. Once it is done, click on the OK button, and the <<GreetingLine>> will be added to your email.
Note: You can add other fields from your Excel spreadsheet to your email. In order to do so, you can visit the Insert Mail Merge Fields page.
- Below it, start typing the body of your email. Once it is done, again save your Word document by pressing Ctrl + S keys at the same time to prevent data loss.
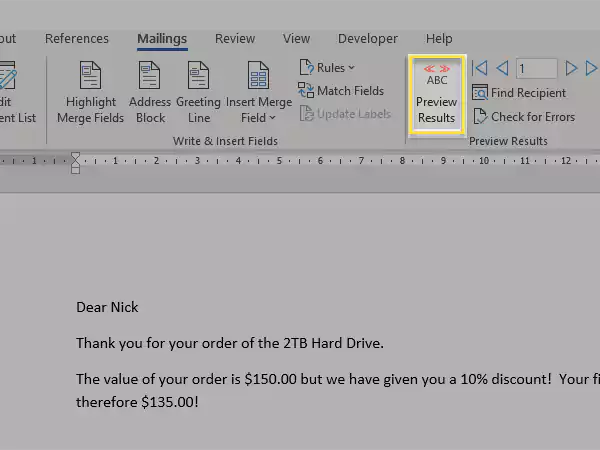
- Once you have typed out your email, click on the Preview Results to see how the mass email that will be sent to the recipients added in the Excel sheet, is looking. You can click on the Next or Previous button to check if the names, email addresses, and other fields merged from the Excel sheet are looking fine in the final email body of every message to be sent.
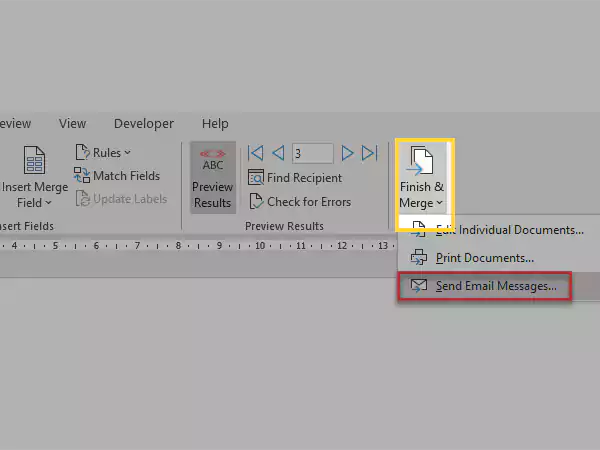
- After you are satisfied with the results, click on the Finish & Merge option, and from the expanded menu select Send E-mail Messages.
- Next, in the To field, select the column containing the email addresses of the recipients from your mailing list Excel sheet, to whom the mass email is to be sent, and type in a Subject line.
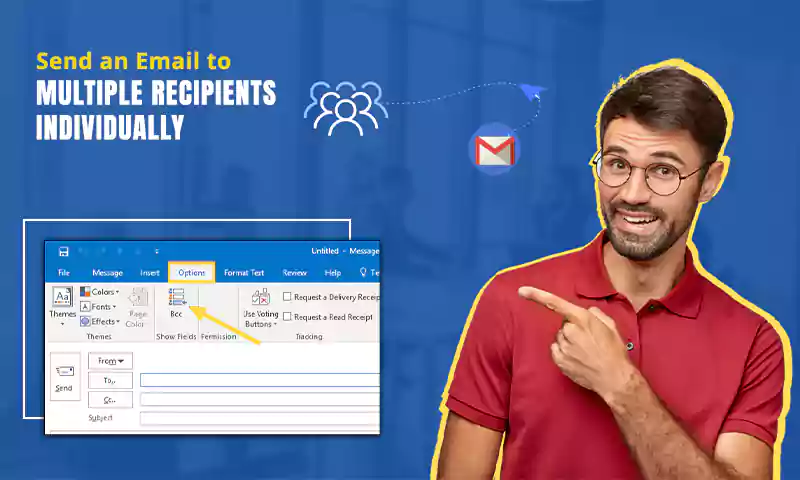
Note: With this method, Word will send the email individually to all the recipients. This essentially means that other receivers cannot be BCC’ed or Cc’ed. Further, links are permitted in the email body, but you cannot send attachments with your email through this method.
- Then, in the Mail Format section, select either HTML (which is the default setting) or the Plain Text option, which will send the attached documents as the email’s body.
- Select one of the options under Send Records and click on the OK button to start the mail merge, and with this mass email will be sent to all the recipients added in the Excel sheet.
Sending Mass Emails using Excel Mail Merge on Mac
The steps for sending mass emails using Excel sheet via Mac are more or less the same as the above method for Windows. Though I must tell you that the process seems long, it is quite effortless.
So, without further ado, let’s jump right into the steps to know how to email from Excel spreadsheet via Mac:
- To begin with, open a new Word document on your Mac.
- In Word, switch to the Mailings tab from the top menu bar.
- Under the Mailings tab, look for the Start Mail Merge option and click on it. From the menu that will appear, select the Email Messages option.
- Next, type out the body of the email you want to send to multiple people.
- After that, you have to set up your mailing list in the Excel sheet, which means the list of people you want to send the email to.
Note: Ensure that your email list in the Excel sheet has a column consisting of the email addresses of each recipient to whom you want to send the email.
- Now, again open the Word document you created in the first step, and click on the Select Recipients option, present under the Mailings tab.
- Then, a small menu consisting of several options to merge your mailing list will appear. Following are these options, select the one suitable to you:
- Type a New List: You can create a new mailing list then and there, using this option. A form will open after selecting it, which you have to fill out to create your mailing list.
- Use an Existing List: By selecting this option you will be able to import the mailing list you already have, from an Excel sheet or database files that are in table formats. For databases in any other format, you can refer to the MS Support page.
- Choose from Outlook Contacts: If you have your mailing list saved in your Outlook, you can select this option to import it from there.
- Once your mailing list is merged with the Word document, click on the File option from the top menu bar and select Save or Save As.
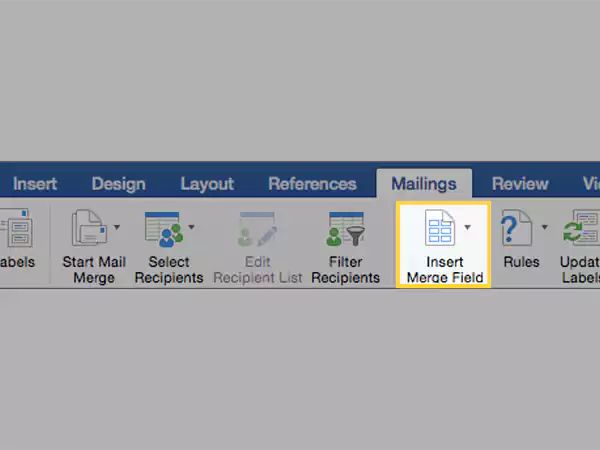
- Now, in order to add fields, like the recipient’s name from the Excel sheet, to make the message customized for each recipient, click on the Insert Merge Field option under the Mailings tab.
- Select Drag Fields Into This Box Or Type Text in your main document, and you can click on the text to delete it.
- Choose OK after adding and formatting the fields you wish to be contained in the mass email message to be sent to the recipients from your Excel mailing list.
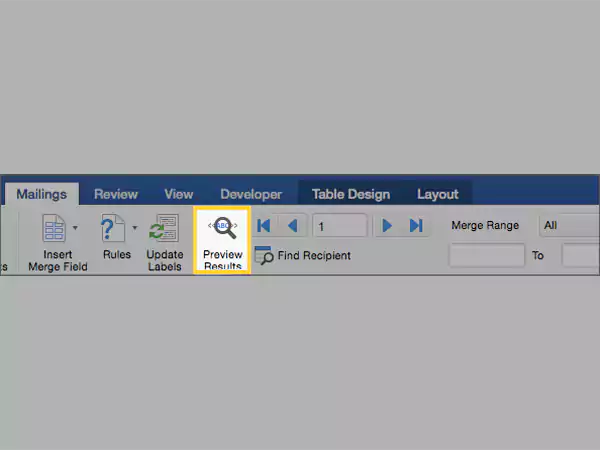
- Now, to review how your email will look when sent to the recipients, select the Preview Results option in the Mailings tab. You can use the left and right arrow buttons that will appear under the Mailing tab only, to view all the email messages that will be sent. If you want to add or remove any merged field from the email body, again click on the Preview Results.
- When you are satisfied with your email, click on the Finish & Merge option under the Mailings tab, and select the Merge to E-Mail option from the menu that will appear.
Note: You will not see the Merge to E-Mail option if you have not set any default program in your system.
- Select the To merge field, type in the Subject line, and select whether you want to send the mass email as HTML or plain text, or as an attachment. When you send an email as an attachment, the message is transmitted as a separate document with no text in the body.
- Finally, to send the messages, click on the Mail Merge to Outbox option, and bulk emails will be sent from your Excel mailing list.
Sending Mass Emails through Google Sheets via Gmail
Want to know how to send email to multiple recipients in a list from Excel via Gmail, go through the steps stated below:
- First off, you need to install an extension in your Google Sheets. For doing so, open Google Sheets on your system, and create a new spreadsheet.
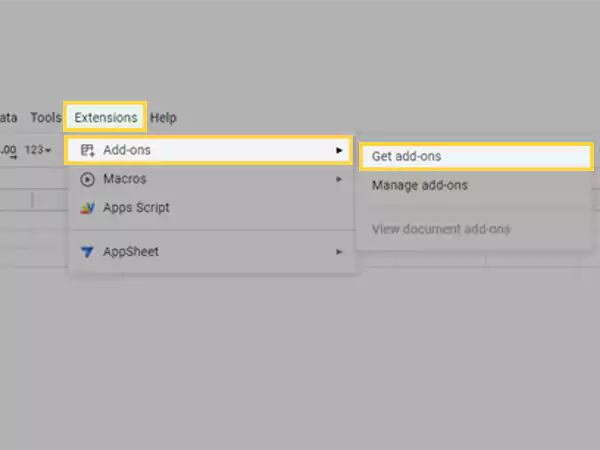
- Now, click on the Extension tab from the top menu bar, select the Add-ons option and then choose Get Add-ons.
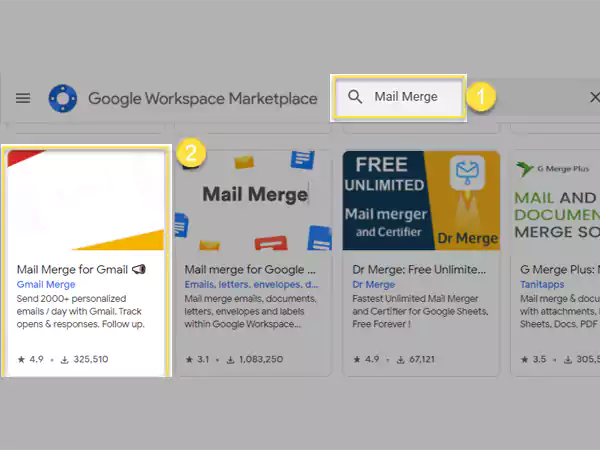
- Thereafter, the Google Workspace Marketplace will open, where you have to search for the extension to be installed. In the search bar, type Mail Merge and hit Enter. Now, the search results will appear on your screen, scroll down there till you find the Mail Merge for Gmail and click on it.
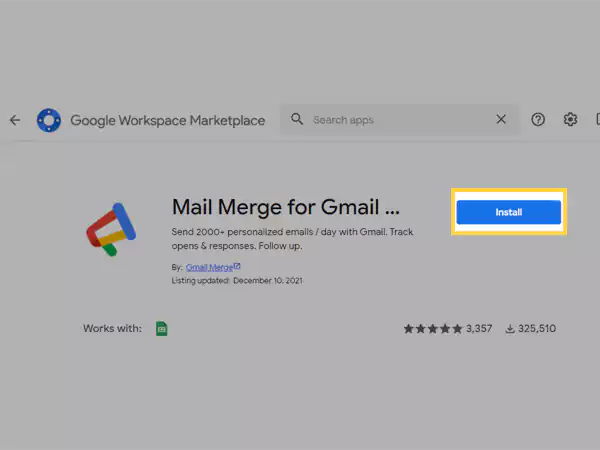
- After that the extension page will open, click on the Install button to download it.
- Once the add-on is installed, log into your Gmail account, open your Google account settings from there and grant permission to the extension installed to access your Gmail account.
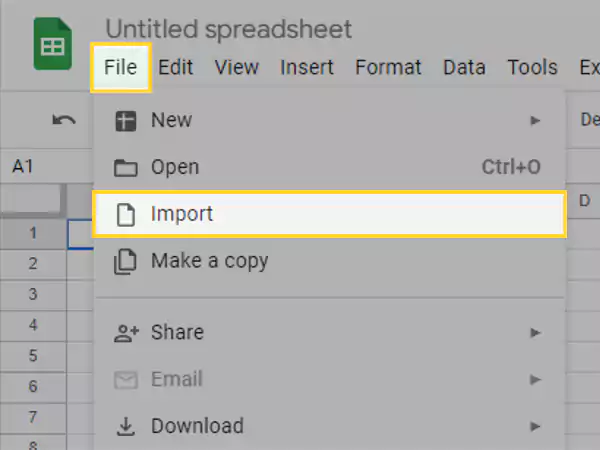
- Next, open the spreadsheet and create your mailing list there. Or, if you have an existing one, open it in Google Sheets. For doing so, click on File, select Import and open your file from your G-Drive or your system.
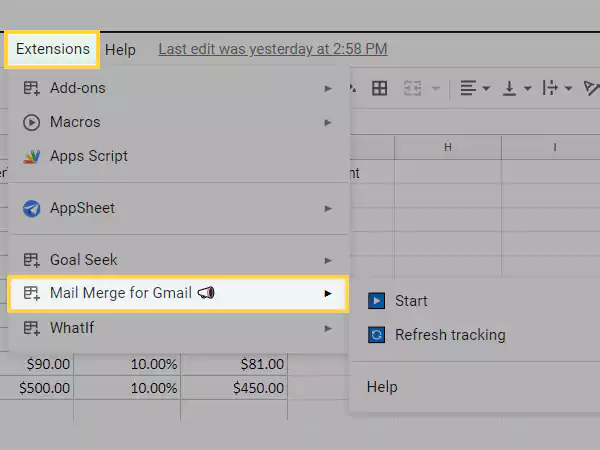
- Now, again click on the Extensions option from the top menu bar, then select Mail Merge for Gmail and click on the Start option.
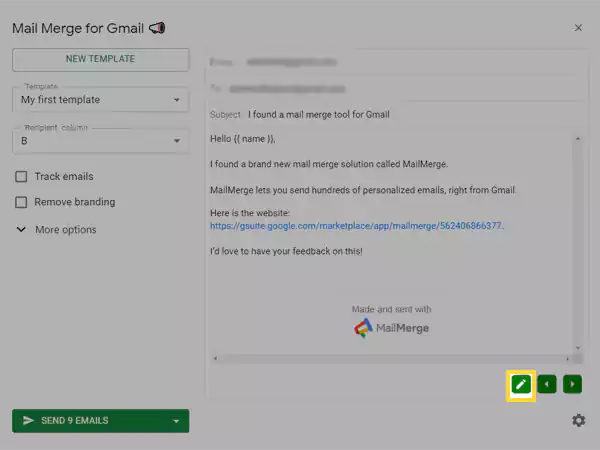
- Thereafter, a Gmail template to send the email will appear on the screen. Recipients’ names and email addresses will be taken from the respective columns of your mailing list. However, if you want to edit the template you can click on the edit icon present at the bottom corner of the window.
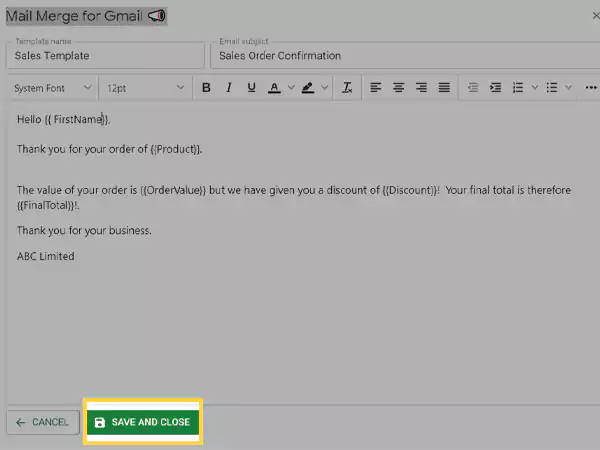
- Change the template as needed and type in your email body. The email topic and template name can both be changed. The fields from your spreadsheet must be added in double curly brackets ({{field}}), as displayed in the image. Additionally, you can modify the text’s format by using the given format Toolbar.
- After you are done and satisfied with how your email looks, click on the Save And Close button.
- Finally, to send the mass email through your Gmail account, click on the Send Emails button at the bottom of the window. When the emails are sent successfully, you will see a message stating the same, there, click on the Close button.

As mentioned before, you can use contact or email groups in Gmail to send mass emails. To know more about it, you can visit the ‘How to Send Emails to a Group in Gmail Using Different Ways’ article to know more about it.
Sending the Excel File as an Attachment via Outlook
If you want to send your Excel file as an attachment via outlook, then look into the simple process stated below and follow the steps:
- To begin with, open a new Excel spreadsheet, and click on the drop-down arrow icon present in the upper left corner of the Excel sheet.
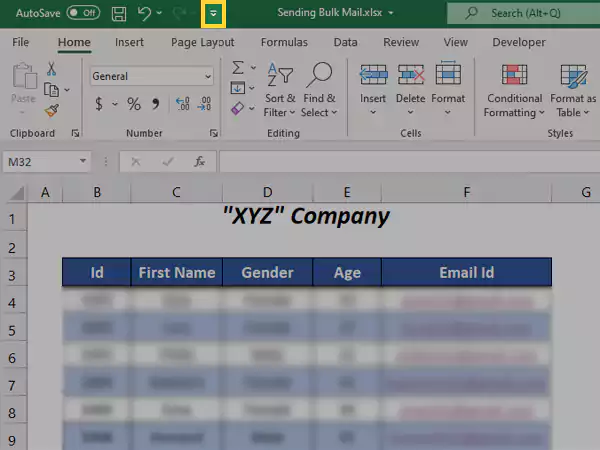
- From the menu that will appear, click on the Email option. This will add the email icon in the quick access bar of your Excel.
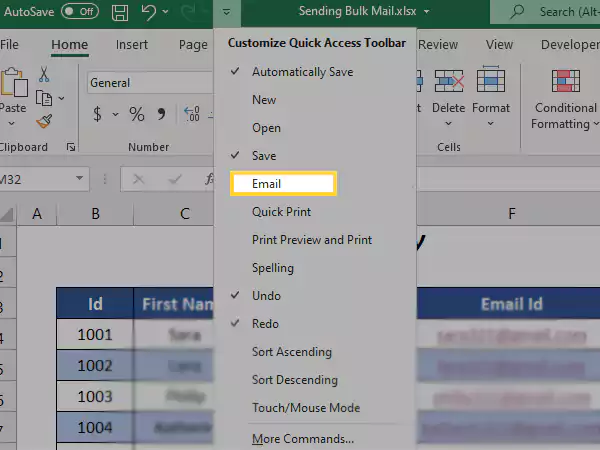
- Now open the Excel file containing your mailing list by choosing File, Open, and then select the file from your computer.
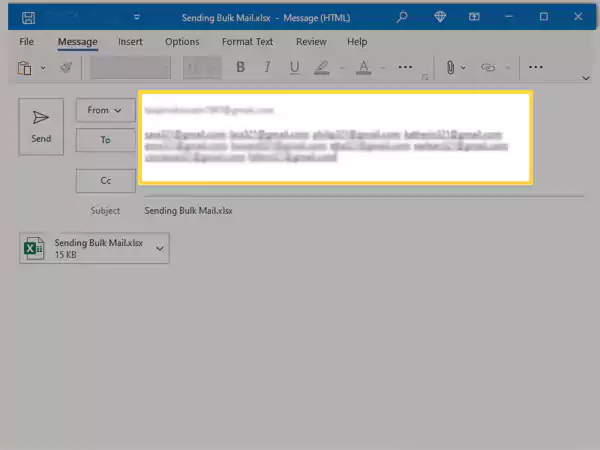
- Once you have your mailing list opened, click on that email symbol from the top left of your Excel sheet.
- This will attach the mailing list to your Outlook New Email window. Now, type in the email addresses in the To field, each separated with a semicolon (;).
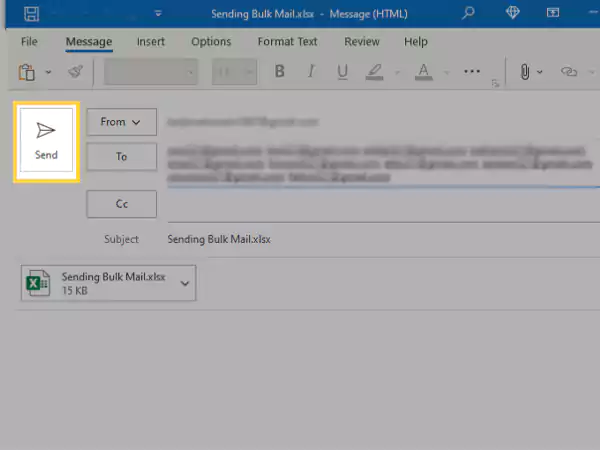
- Once done, click on the Send button.
Share