An Extensive Guide to Refresh Outlook Smoothly
- Outlook: Overview
- Probable Reasons Behind Outlook Not Updating
- How to Resolve Outlook Not Updating Issue?
- How to Auto-Refresh Outlook Inbox on Windows?
- How to Refresh Outlook on Mac?
- Outlook Refresh Rate
- How to Refresh Outlook on An Android Device?
- How to Refresh Outlook on iPhone.
- How to Auto-Update the Outlook Calendar?
- How to Auto-Update Global Address/ Contact Lists?
- How to Refresh Emails on Outlook Manually?
- How to Update Outlook Web App Manually?
- Quick Ways to Refresh Outlook Manually
- Frequently Asked Questions (FAQs)
Are you, too, bothered by not being able to receive and access new mails on Outlook mail once they hit your server?
If your answer is yes, this article will surely provide you desired outcomes. In this article, you will how you can resolve Outlook issues and how to refresh Outlook email easily and effortlessly.
We have enlisted steps for both Windows and Mac users, so it was advised to read on till the end to get the optimum outcomes from the article.
So, let’s get started!
Outlook: Overview
Outlook is a popular email client offered by Microsoft; it enables users to send and receive email messages, collect and store names, the number of their names, and much more.
This widely-known email client by Microsoft, akin to other emails such as Gmail and Yahoo Mail, delivers similar services such as sending and receiving emails and addressing two or more people in an email.
However, it has been seen that this Microsoft email client comparatively has a slower process than other available email clients in the market. For instance, Gmail or Yahoo email.
In the forthcoming section, we will light the shady area and try to know why it happens.
So without wasting any more seconds, let’s head to the next section and get knowledge of why this email client is not as fast as other email clients? What makes it slow, and how can you fix it?
Probable Reasons Behind Outlook Not Updating
There are numerous reasons why your Outlook is not updating and not showing you the new mails on time, and one of the major factors is not refreshed Outlook.
Due to this, incoming mail takes more time to redirect to the inbox and eventually prevents you from accessing your emails through Outlook.
Another major cause why you’re receiving emails slowly on your Outlook is using the Outdated Outlook app on your phone.
So, these are some prominent causes behind Outlook not updating automatically Issue. Now, let’s check how you can resolve this concern and receive emails on time.
How to Resolve Outlook Not Updating Issue?
As we have cited above, not refreshing Outlook is one of the major reasons you cannot receive emails on time.
First, we will look at how you can enable automatic Outlook refresh on your Window, and next, we will see what steps Mac users have to follow in order to refresh Outlook automatically.
So, let’s start by looking at how you can auto-refresh Outlook Inbox on a Windows operating system device.
How to Auto-Refresh Outlook Inbox on Windows?
By enabling auto-refresh on your Windows device, you may be able to resolve the Outlook not updating Issue and will receive emails on time. All you have to do is follow the below-quoted steps in order to get desired outcomes.
Steps to Refresh Outlook Inbox on Windows
Here are the directions you can follow to refresh Outlook Inbox on Windows.
- To refresh your Outlook inbox on Windows, commence with launching the Outlook app on your device, and next, look for the Send/receive button and click on it.
- Next, you must click on the Send/receive the drop-down box and select the “Send/Receive Every” checkbox.
- Now, hit on the Schedule an Automatic Send/Receive, which you will notice under All Accounts.
- In this step, you must alter the minutes’ value from 30 to a lesser number.
Note:– Make sure to keep the minutes value above 5, as setting the minutes value to less than five might result in duplicate entries in your inbox.
- Once you are done altering the minutes’ value to less than 30, click on the below-cited Close button to shut down the dialog box.
Now you will be able to notice that your Outlook inbox will automatically refresh every 10 minutes. Next, let’s slide to the next section titled,” How to refresh Outlook on Mac”?
How to Refresh Outlook on Mac?
Are you accessing the Outlook email client on your Mac to read Hotmail, Gmail, or exchange mail? If yes, you can easily refresh Outlook on Mac by reducing your Outlook folders synchronization interval.
We have listed the steps to reduce the Outlook folders synchronization interval in the most simplified manner so that you can refresh Outlook on Mac and access your important emails more facilely.
So, let’s move to the steps to reduce the Outlook folder synchronization interval and refresh Outlook on Mac.
Steps to Reduce the Outlook Folder Synchronization Interval and Refresh Outlook on Mac
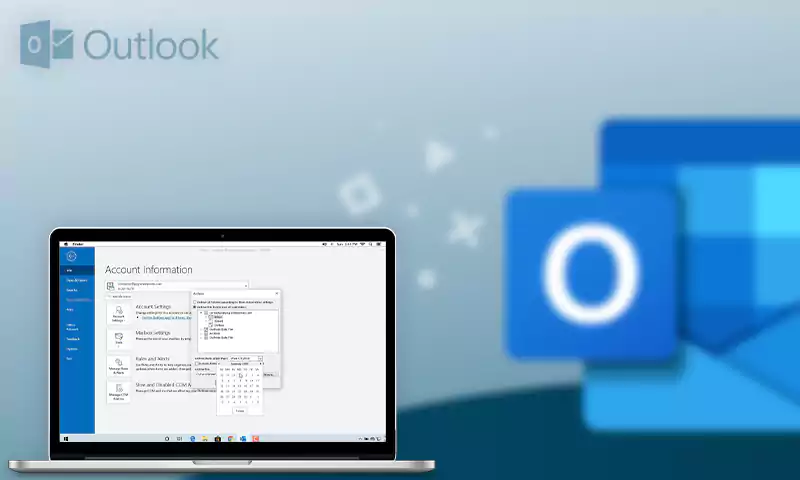
- To refresh Outlook on Mac, initiate with opening the Outlook application on your Mac device.
- After that, in the left pane, you will be able to notice a Gmail/Hotmail account, and next, you have to select Account Settings by hitting the right button of your mouse.
- In the next step, you will notice the Accounts dialog box will pop up, now, hit on the Advanced button, which you will be able to see at the bottom right of the screen.
- Now, open the Server tab and set sync intervals. Keep in mind that for IMAP accounts such as Gmail and Outlook.com, the minimum value will be 2 minutes.
Note: you might wish to check the Download Message Headers only box for slower connections, such as Cellular Hotspots.
- Once you are done with the above-cited steps, hit the OK button, which will close the Accounts dialog.
By performing these steps, you will be able to enable the auto-update process, and your Outlook will be refreshed; you will be able to access your new mails on time on your Mac.
Outlook Refresh Rate
If you have accessed Microsoft Office Outlook as your PC email client, you might have experienced and noticed your inbox refresh rate.
So, to access your mails seamlessly on Outlook-like other email clients, you will require to increase the refresh rate of Outlook.
Don’t worry! You don’t have to go anywhere as we have covered you here too!
You can get the steps to increase the refresh rate of Outlook Inbox below.
Steps To Increase Refresh Rate Of Outlook Inbox
So, these are the steps that will assist you in increasing the refresh rate of your Outlook inbox. By following these mere steps in order, you will be able to increase your Outlook refresh rate and receive emails on your Outlook seamlessly.
- To increase the Outlook refresh rate, you must begin by heading to the Send/Receive dialog panel.
- In the next step, you must look for the “Setting for Group all account” tab.
- Lastly, you will be required to set the “Schedule an Automatic…” value for the required refresh rate.
Note:- Keep in mind that too early regular updates may increase the rate of cloned or, say, duplicate emails in your inbox.
Microsoft Office Outlook is also accessible on Android and iOS devices, so there are probable chances that you may also foresee email not receiving issues on them too.
So, there will be no harm in checking out how you can refresh Outlook on Android mobile and iPhone.
How to Refresh Outlook on an Android Device?
If you are carrying an Android device and encountering the issue “not receiving email on Outlook,” the below-mentioned is especially for you.
It has been seen that due to multiple reasons, you can foresee not receiving email on your Android phone, and one of the profound reasons behind this issue is using the Outdated Outlook app.
So, to make sure you will receive and can access emails on your Outlook app seamlessly, you have to learn how to update and refresh Outlook on your Android mobile. With the guidance of the below-cited steps, you can refresh Outlook on your Android device more facilely.
- In order to refresh Outlook on your Android device, you must first head to the Google Play Store and launch it.
- After opening Google Play Store on your Android device, click on your profile, which you will notice above on the screen.
- After that, you have to tap on the Manage apps and devices option and next click on the Manage tab.
- Now, look for the Microsoft Outlook app and update it.
So, these are steps that will assist you in updating and refreshing Microsoft Outlook on your Android device. Now, let’s look at what steps iPhone users must follow to update and refresh Outlook on iPhone.
How to Refresh Outlook on iPhone
- In the first step, commence with opening the App Store on your Apple device, which you can usually see on the home screen of your iPhone.
- After that, look for the Update button, which you will find at the bottom of the screen.
- In the next step, you have to scroll down and look for the Outlook application, and once you find it, you will notice an Update button next to the Outlook.
- Performing this will automatically update the Outlook app, and you will start receiving emails or messages without any hassles.
So, these are steps through which you can keep your Outlook inbox refreshed and updated on your iPhone.
Now, let’s check how you can keep your Outlook calendar updated.
How to Auto-Update the Outlook Calendar?
Updating Outlook Calendar is very easy; you can facilely update Outlook calendar by following the below-cited steps.
- In order to Auto-update the Outlook Calendar, you have to head to the Send/Receive dialog and click on the Edit button.
- After that, ensure your email account is marked, which you notice in the left pane.
- Next, make sure that your Calendar folder is also marked and once you are done with the above steps, hit the Apply button.
How to Auto-Update Global Address/ Contact Lists?
Akin to updating the Calendar, auto-updating Global Address/ Contact lists are also very facile; all you have to do is go through the steps mentioned below.
- To auto-update the Global Address/ Contact lists, you must redirect to the Send/Receive dialog and hit the Edit button.
- Now, on the left-hand side, you will be able to notice your email account; make sure it is marked.
- Lastly, you have ensured that the Contacts folder is marked or not; if it is not, make sure to mark it for auto-sync, and you are done with the auto-update steps.
The above-quoted steps will aid you in auto-updating Global Address/ Contact lists.
How to Refresh Emails on Outlook Manually?
If you are looking for how to refresh emails on Outlook manually? If yes, movement, we got you!
You can effortlessly and, in a few seconds, can refresh emails on Outlook manually; you have to press the F9 key on your keyboard. Performing this command directs the Outlook email client to download incoming messages and send outgoing messages.
Also, for your information, it doesn’t impact the auto-refresh rate, despite starting the timer over. After pressing F9, Outlook will automatically refresh again.
Also, you can read to know: Why does Outlook Certificate Error Occur and What Are its Common Solutions?
How to Update Outlook Web App Manually?
Updating the Outlook Web app manually is very simple and similar to any available web app; you merely have to hit the F5 to refresh your browser and keep your unread email list updated.
In addition to the above, it is also useful for Outlook OWA users who connect to their companies’ exchange server via their web browser.
Apart from this, in our thorough research, we have also found some quick ways to refresh Outlook manually that we have cited in this article too. With that quick way, you can refresh your Outlook manually and instantly.
Quick Ways to Refresh Outlook Manually
As we have said above, here are the instant ways through which you can refresh Outlook 365 manually as well as from their mailboxes and activate an update.
To Update All Outlook Folders on Windows
The below-cited steps are perfectly applied to all online and offline accounts set up in the Microsoft email client Outlook.
To update all Outlook folders on Windows, you must hit the Send/Receive tab from Outlook’s home page.
After that, hit on the Send/Receive All folders” button, or you also have an option to press the F9 key simply.
To Update a Particular Folder On Windows
If you want to update a particular folder on Windows, then these steps are specially constructed for you.
- To update a particular folder on Windows, you will require to choose Send/Receive Tab.
- Next, hit on the Update Folder tab, and by performing this, you can update a particular folder on Windows.
To Update Entire Mailbox on MacOS
If you want to update the entire Mailbox on MacOS, you can follow the steps below.
- In order to update the Entire Mailbox on MacOS, you have to head to the Home tab.
- Once you have reached the Home tab, “Send & Receive” tab.
To Update Specific Folder
By following mere steps, you can update the Specific folder.
- To update a specific folder, you have to redirect to the Organize tab.
- Lastly, hit on the Sync Folder tab.
Frequently Asked Questions (FAQ’s)
Here are some of the frequently asked questions.
Ans: The best Spanish movie for beginners is ROMA. It has Spanish subtitles which will help you understand what is happening in the movie.
Ans: Many people have reported that when they sign in to their Outlook in iCloud and when they sign out, the refresh iCloud button disappears.
In that case, you can perform various actions to refresh your Outlook.
- Check the Duplicates
- After that, go through your internet connection.
- Next, check the log-in Settings
- Lastly, Refresh the page.
Share