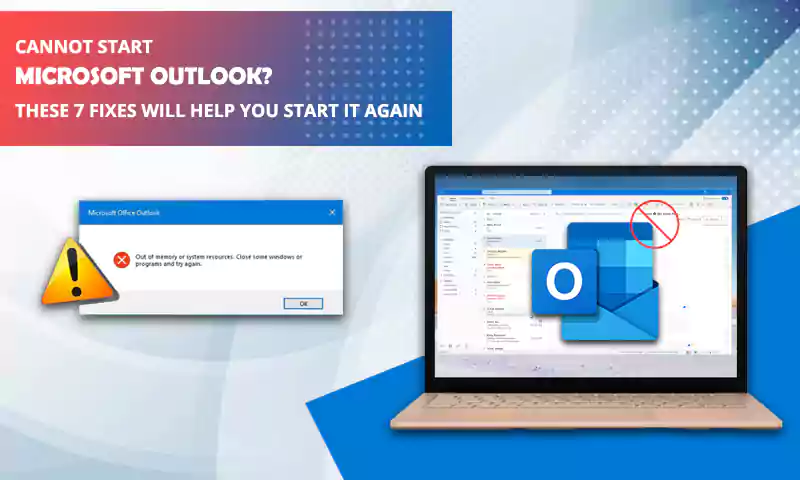
Tried and Tested Workaround for Outlook 553 Server Error
The Outlook error “unknown email address” is a very common issue that appears whenever the recipient address is not valid. This error can be seen in the bounce message received by recipients and this further induces Outlook email sending issues.
Outlook Error 553 mainly occurs due to poor SMTP authentication. Whenever a user tries to send an email using a local email client, and the SMTP is not authenticated at a certain point in time, a message will appear like this:
“The message could not be sent because one of the recipients was rejected by the server. The rejected email address was ‘example@hivelocity.net’. Subject ‘test’, Account: ‘mail.hivelocity.net’, Server: ‘mail.hivelocity.net’, Protocol: SMTP, Server Response: ‘553 sorry, that domain isn’t allowed to be relayed thru this MTA (#5.7.1)’, Port: 25, Secure(SSL): No, Server Error: 553, Error Number: 0x800CCC79”
Solutions to “Outlook 553 sorry, unknown email address’ Error
Cause 1: Incorrect or Invalid Recipient Address
Suppose the mail you sent has an invalid email address in the “CC”, “To”, or “BCC” field. The error message is: “553 sorry, unknown email address”.
Sometimes even a small typo error can keep you from sending emails and they bounce back on you. Even missing a single alphabet, number, or even character can cause problems in sending emails to the recipients.
Even it’s possible that the email address is no longer available or has been disabled in the mail server. If this is the case, the recipient won’t be able to receive emails.
Solution:
It is important to make sure that you are entering the correct email address and not performing any spelling mistakes or errors. If there is no issue from your end, make sure the email address is available on the server.
Cause 2: MX Entry is Not Set in the Right Manner
There is the possibility that SMTP Error 553 occurs when the MX Entry for the domain is not correctly set up. MX Entry is very crucial for setting up the SMTP settings, but not being set up with the MX entry and other related settings can cause a disruption.
Also, users need to make sure that they are working in the right manner with the remote server, else email routing would act properly.
When the MX entries are properly in the domain the recipient server will induce an SMTP authentication error and the email will bounce back as the email account would not be found.
Solution:
Make sure you enter MX Records for a domain using the command below:
“dig domain.com MX”
When you feel that DNS errors or MX records are missing, contact the recipient server support and consult your concern.
Additional Reasons for Email Error 553
Error 553 has various other reasons other than the aforementioned ones. Let’s understand the additional causes that can lead you to SMTP authentication error Outlook 553 error.
Improper Sender Authentication
The authentication process is designed in SMTP servers in a way so that users remain safe from spamming and abuse. Therefore, every user first needs to go through the authentication process before connecting to mail servers and sending emails.
The authentication process is followed by all renowned email clients and Outlook is one of them. And, when the authentication is not performed, the error message 553 takes place.
In Outlook Express, 553 comes to the scene due to inappropriate authentication, and an error code namely Error Number: 0x800CCC79, appears.
Solution:
First and foremost, you need to enable the SMTP authentication of the sender’s email program so that the emails only get sent after validating the login details.
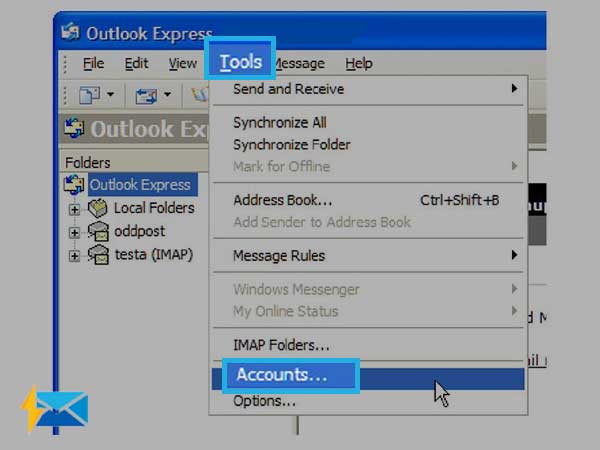
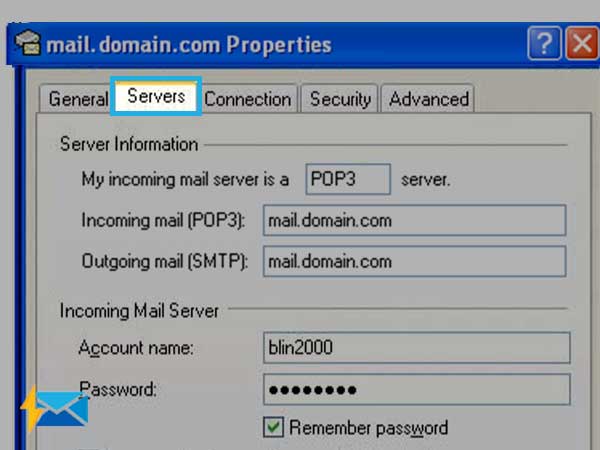
How to Configure Authentication in MS Outlook?
- Go To Outlook>>Tools>> Accounts.
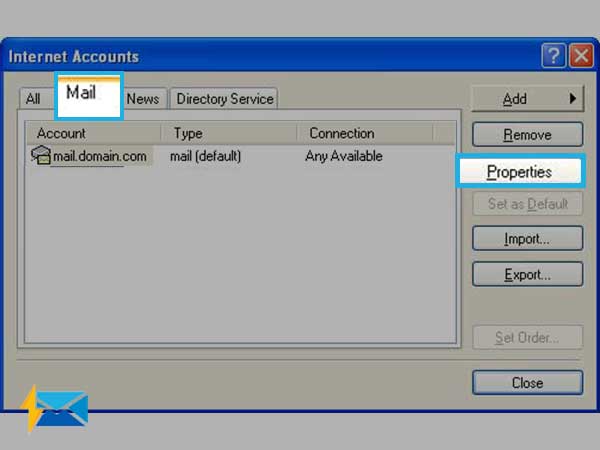
- Click Mail
- Choose your email address from the list of accounts and then click Properties.
- Click on the Servers tab
- Now, in the Outgoing Mail Server, select the checkbox for My Server Requires Authentication.
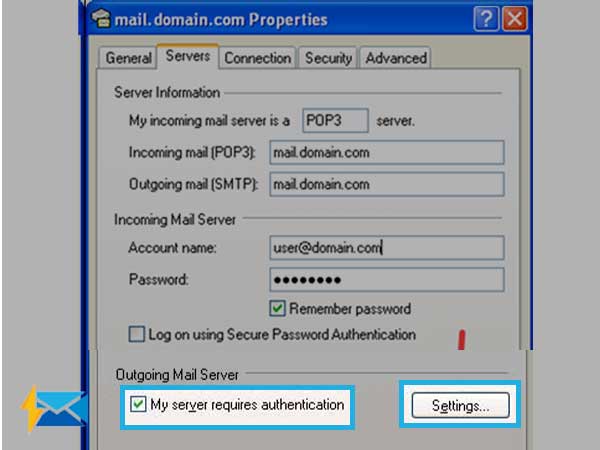
- Hit on Settings and then check if the Use the same setting as my incoming mail server is selected.
- Tab OK>> Apply.
- Press on the Close button to complete the process.
Share