9 Tested Fixes for Gmail Notifications not Working on iPhone
The issue of ‘Gmail notifications not working on iPhone’ is not a normal problem. Given the popularity of Gmail and people’s dependability on it for personal and professional communication, this issue is rather a catastrophe for some people.
Not being able to receive Gmail notifications on your iPhone, can have many important emails missed and unattended, leading to many future issues.
Nevertheless, the difficulty might be a behemoth, but the resolutions to it are effortless, which you can implement without breaking a sweat and get your Gmail notifications working again!
The write-up here presents you with some useful solutions for you to help resolve the ‘Not getting Gmail notifications on your iPhone’ issue.
- Enable Notifications for Gmail in your iPhone Setting
- Enable Gmail Notifications from Its App
- Troubleshooting Tips for Gmail Not Getting Notifications on iPhone
- Enable ‘Fetch’ for your Gmail Account
- Unsnooze Recipients from your Gmail App
- Remove and Re-add your Account to the Gmail App
- Update the Gmail App
- Delete and Again Download the Gmail App
- Update your Phone’s iOS
- Enable IMAP in your Gmail Account
- Bonus: More Notification Settings on iPhone
Enable Notifications for Gmail in your iPhone Setting
If you are not receiving Gmail notifications on your iPhone, the first thing that you need to do is, check whether you have enabled notifications for the Gmail app or not on your phone.
Listed below are the simple steps that will help you to know if this is the case and enable the notifications if they are turned off:
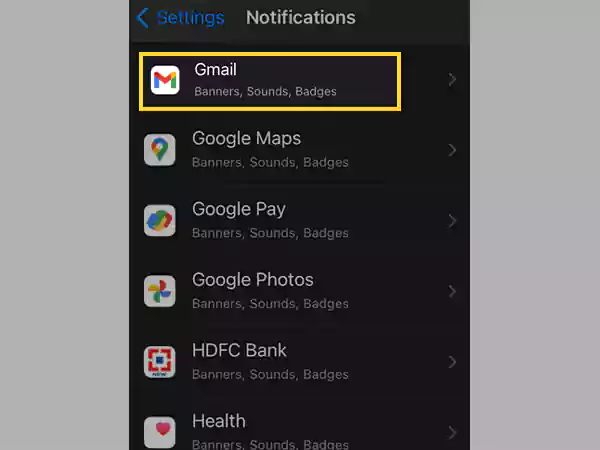
- First off, open the Settings app on your iPhone.
- Inside Settings, scroll down to locate Notifications and tap on it.

- On the following page, the list of apps installed on your iPhone will appear. There, look for Gmail and tap on it.
- The next thing you need to do is, ensure that the toggle button of Allow Notifications is turned on. Further, you can choose the notification type from the Alerts section.
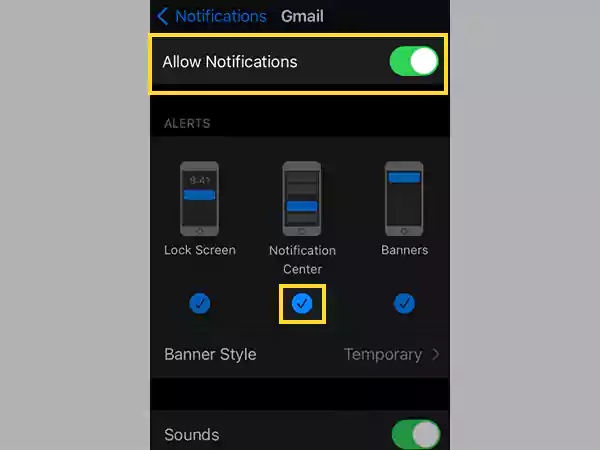
- Additionally, you can use Sounds and Badges to change the sound of the Gmail notifications on your iPhone and choose to show notification badges on the app icon, respectively.
You need not save the changes, as soon as you hit the back button, the changes will be saved and applied, and hopefully, you will start receiving notifications from Gmail by just doing this. However, if not, then go on and try out other suggested solutions.
Enable Gmail Notifications from Its App
Gmail notifications might not be working on your iPhone if they are turned off in its app, even though you have enabled them from your iPhone settings.
Thus, to know how you can enable notifications for an email account added to your Gmail app, follow the process directed below:
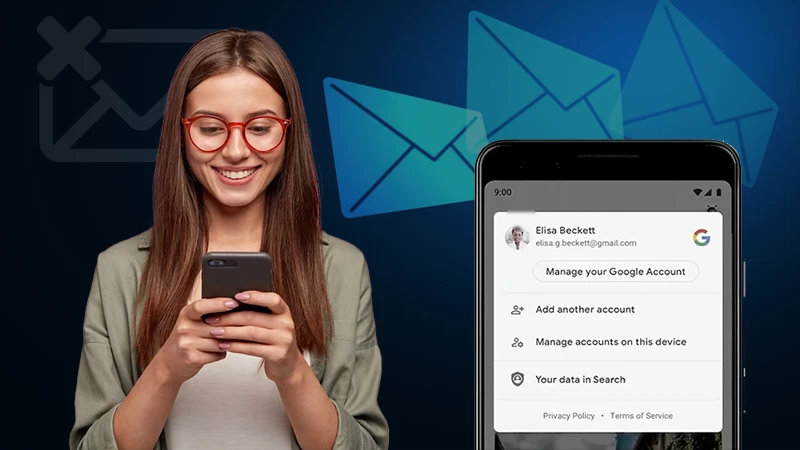
- To begin with, open the Gmail app, and tap on your profile picture from the top right corner of the home page.
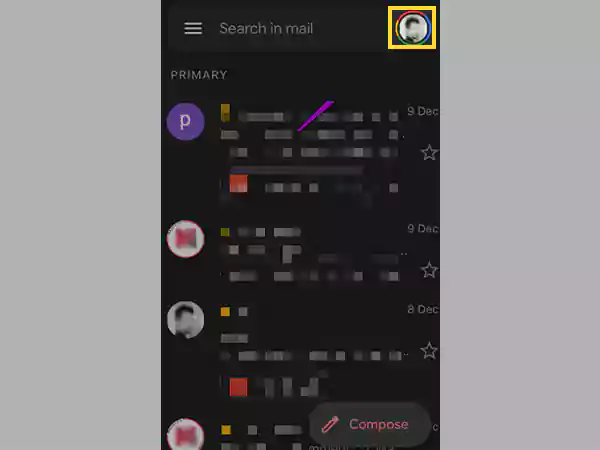
- After that, a left-side menu pane will open. Scroll down to the bottom of it and tap on the Settings option.
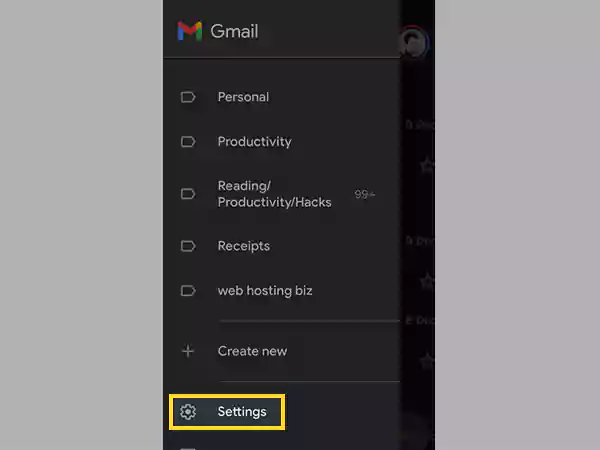
- From the next page that will open, select your email account for which Gmail is not sending notifications on your iPhone.
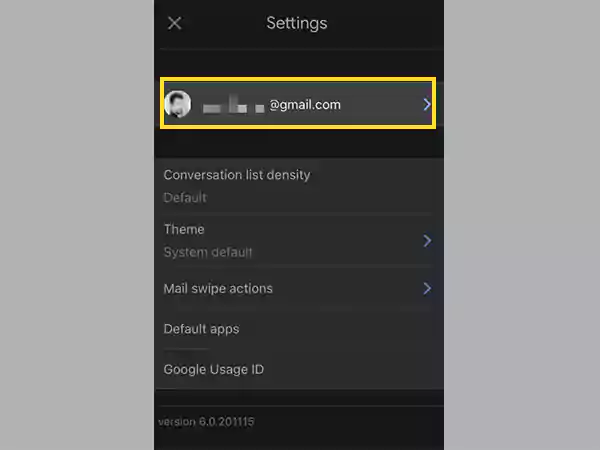
- Tap on the Notifications section on the following screen.
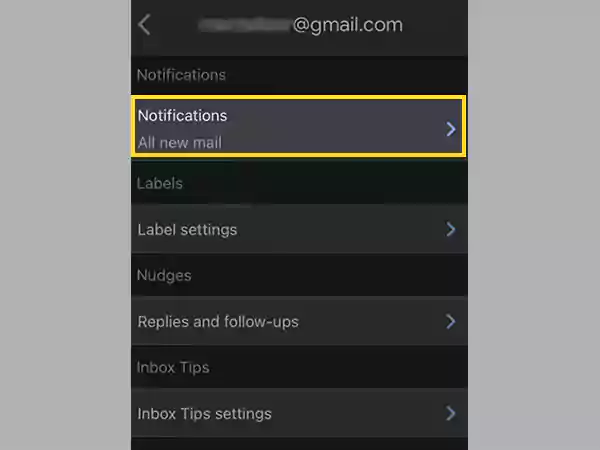
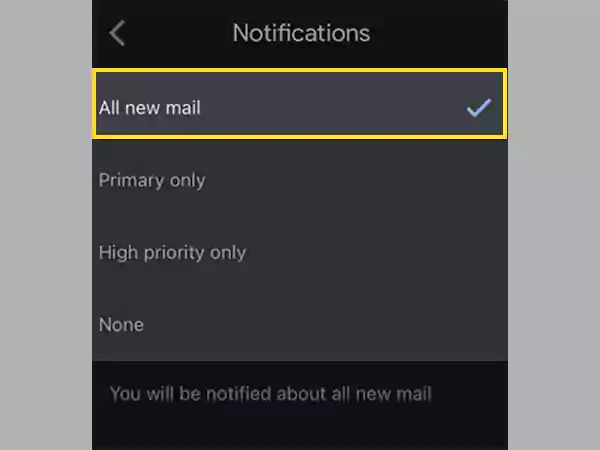
- Thereafter, select the notification type. There are 4 choices, which are stated below, and you can select any one of them according to your preference:
- All New Email: You will receive a notification for each email you will receive on your Gmail account.
- Primary Only: As the name implies, it delivers alerts for emails that are received in the Primary tab.
- High Priority Only: This will only deliver notifications for emails that Gmail has determined are important based on your use.
- None: Obviously, you won’t receive any of the Gmail notifications on your iPhone, if this option is selected.
If you believe that you are receiving too many or too few Gmail notifications on your iPhone, you can always go back and adjust the settings.
Troubleshooting Tips for Gmail Not Getting Notifications on iPhone
If turning on notifications either on the Gmail app on your iPhone settings, fails to resolve the ‘Gmail notifications not working iPhone’ issue, then don’t worry, listed further are some of the most effective solutions for this problem.
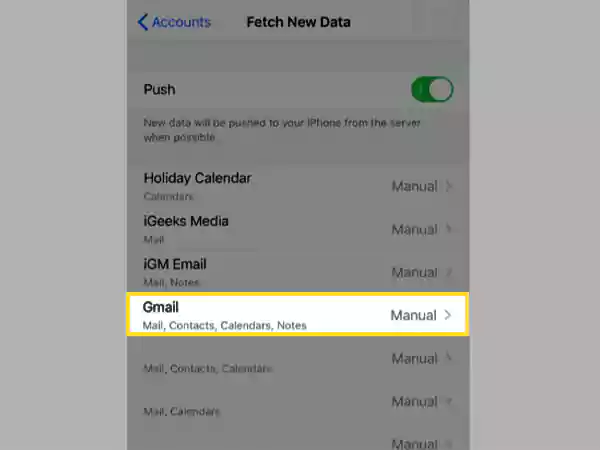
Enable ‘Fetch’ for your Gmail Account
With the Fetch settings enabled, the email app periodically checks to see if there are any new emails. The range for this frequency is from 15 minutes to hourly. When you set Fetch to 15 minutes, the application will do a background check for fresh emails every 15 minutes.
So, by enabling this option, your Gmail will check for new emails in the set frequency and display a notification, if any. So, in order to get started with ‘Fetch’, follow the steps given below:
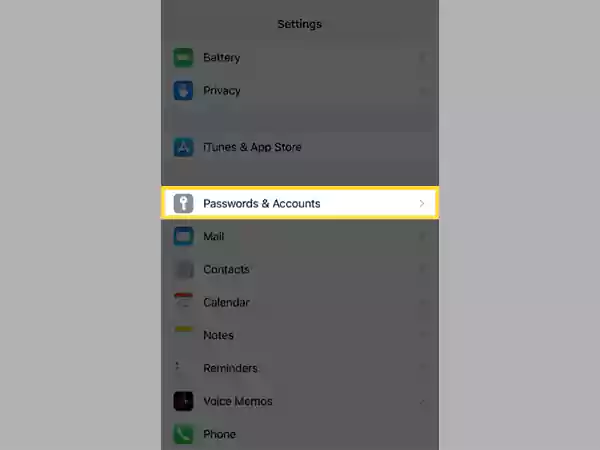
- First off, open the Settings app on your phone.
- Scroll down in Settings and tap on the Password and Account section.
- Then, tap on the Fetch New Data option from the bottom of the next page.
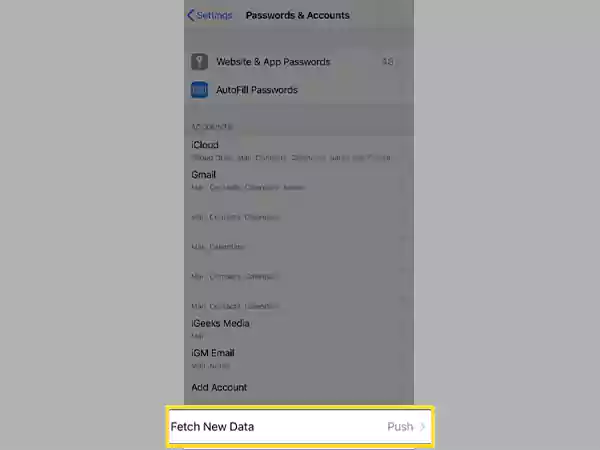
- On the following page, tap on your Gmail account for which the notifications are not working.
- From the next screen, select the Fetch option, and tap on the Back button.
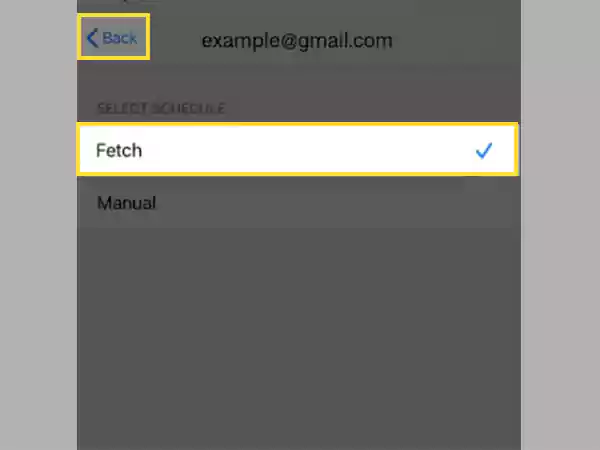
- Next, select the Fetch frequency at which you want your Gmail account to check for notifications and show on your phone’s screen.
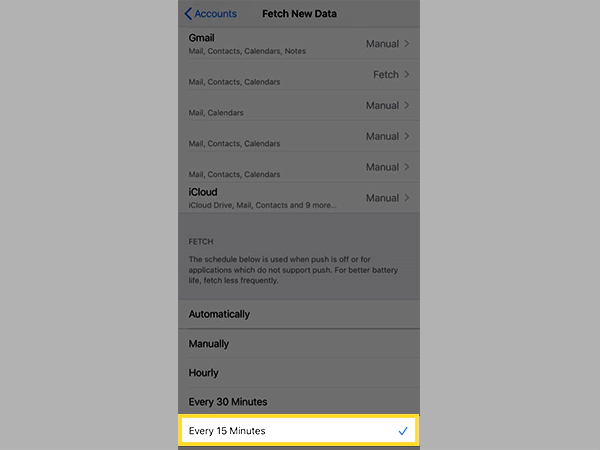
With that done, you will notice that your Gmail account is now checking for new information more frequently and consecutively showing the notifications. However, it consumes a lot of your phone’s battery.
Unsnooze Recipients from your Gmail App
Gmail won’t be sending notifications on your iPhone from people you have snoozed, and you won’t even be able to see their mail in your inbox. You will only receive emails from these recipients on the selected day and hour. Therefore, you might wish to unsnooze someone back if you accidentally snoozed them to start getting email notifications again from them.
Here is how to go about it:
- Launch the Gmail app on your iPhone.
- From the home screen of it, tap on the menu icon present in the top left corner of the screen.
- A left-side menu pane will open, from where you have to tap on the Snoozed option.

- On the next page, you will be able to see the recipients, whom you have snoozed. To undo it, long press on their profile icon, then tap on the menu icon (three dots) from the top of the page and select the Unsnooze option.
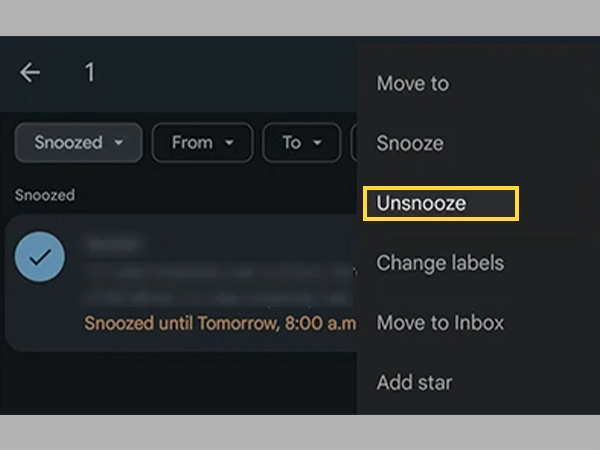
Tip: If you think that your Gmail is not receiving emails, it might actually be the Snooze option that you had accidentally activated for some recipients. So, you check if you have snoozed out some recipients in the Snoozed folder, and undo them to start receiving emails again.
Remove and Re-add your Account to the Gmail App
Removing the email account from the Gmail app and adding it again, is yet another effective method for resolving the issue when Gmail notifications are not working on your iPhone.
Follow the steps stated below to carry out this method:
- First, launch the Gmail app on your phone.
- Tap on your profile icon from the top right corner of the screen.
- Now, on the pop-up screen that will appear, click on the Manage Account on This Device option.
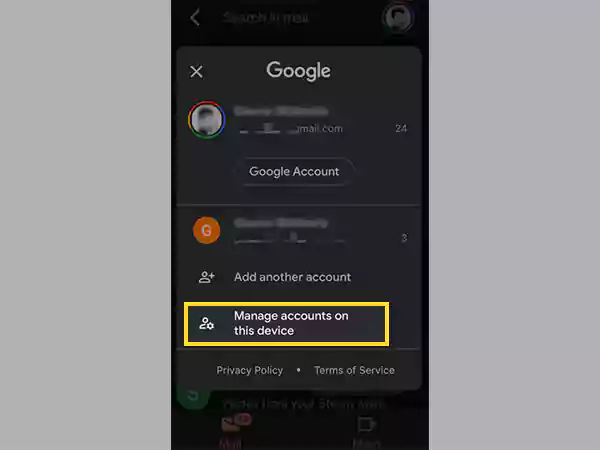
- From the following page, tap on the email account for which you are not receiving Gmail notifications on your iPhone.
- On the following page, tap on the Remove Account button to remove the account from your device.
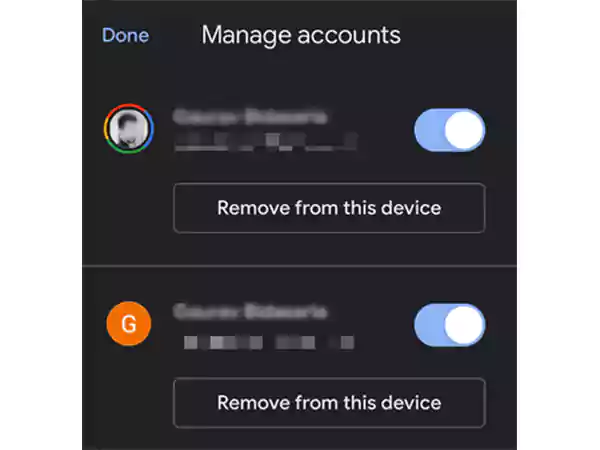
Now, to again log into your Gmail account on its app, tap on your profile picture in the Gmail app, from the pop-up screen, and select the Add Another Account option. Thereafter, fill in your login details, and your account will be added again to the Gmail app.
Once this is done, make sure to enable notifications for that account (refer to the steps above in the article).
Update the Gmail App
The next best thing you can do to resolve the ‘Not getting Gmail notifications on iPhone’ issue, is to update the app. Often, the problem you are facing with the app is because of a bug in its version, the resolution to which is updating the app. The fixes for app bugs are rolled out in the latest versions. Further, if you are having any other background trouble with the app that you wouldn’t know about, it will also be fixed by downloading the latest version of the app.
So, open your App Store, search for Gmail, and update your app if the Update option is available for it.
Delete and Again Download the Gmail App
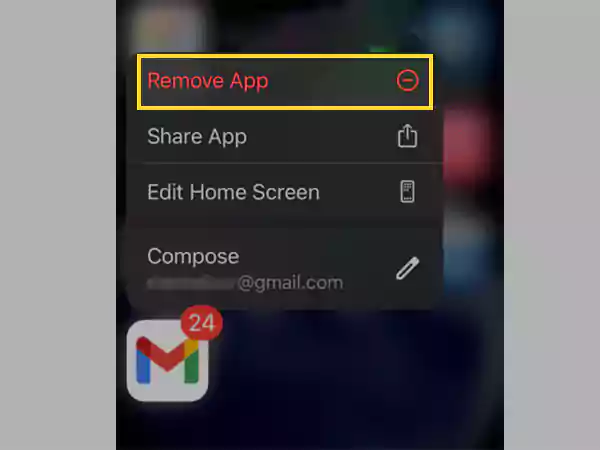
The problem you are facing with your Gmail app can also be because of corrupted cache files. However, there is no direct method to delete cached files on iPhone, but there is a workaround to that, which is by deleting the app and downloading it again.
For doing so, long press the Gmail app icon, and from the menu that will appear, select the Remove App option. After this, the app will be removed from your iPhone, which you can download again by visiting the App Store.
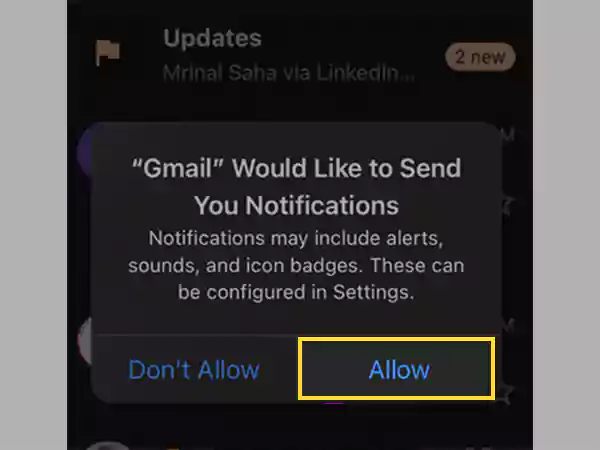
When you launch the Gmail app for the first time after reinstalling it, you will be prompted to enable or allow notifications, where you are required to select the option to enable it. After this, also check the settings on your iPhone and Gmail app to make sure that notifications are enabled there as well.
Update your Phone’s iOS
Apple does a great job at distributing iOS upgrades. Check on your phone’s settings to see whether there is one listed as pending, and if there’s one, install it right away. Doing so might help you with the ‘Gmail notifications not working on iPhone’ issue.
Be aware that occasionally these upgrades cause problems rather than addressing them. So, before applying the update, be sure you learn more about it online.
Enable IMAP in your Gmail Account
If you are still asking yourself the question ‘Why am I not getting Gmail notifications on my iPhone?’, then the next method to adopt is to IMAP on your Gmail account. However, it is suggested that before proceeding further you should know about Gmail POP, IMAP, and SMTP server settings.
Email messages are synced between a server and an email client using the IMAP protocol. You can view your Gmail messages via the Mail app or any other email client on your iPhone, and get alerts for new emails by turning on IMAP. It being disabled can be the reason for iPhone Mail notifications not working.
To enable IMAP on your iPhone, follow these steps:
Note: You will need to enable IMAP if you are using an email client, like Outlook, Apple Mail, etc., other than Gmail, to access your Gmail account.
- To begin with, open the browser on your system and sign into your Gmail account.
- Now, click on the Settings icon from the top right corner of the screen, and from the pane that will appear, click on the See All Settings option.
- Next, in the Settings window, switch to the Forwarding And POP/IMAP tab.
- There, make sure that Enable IMAP is selected under the IMAP Access section.
- Finally, once done, click on the Save Changes button at the bottom of the screen.
Bonus: More Notification Settings on iPhone
On your iPhone, you can change a few additional options after turning on the notifications to receive as many or as few alerts as you choose, or set the customized sound for different apps’ notifications.
Under the Alters section on the notification settings page, select all three options. You can view incoming Gmail messages using the first option (Lock Screen), without having to unlock your iPhone. The Notification Center option allows showing notifications in its panel. The last one, Banners, shows the notification at the top of the screen while you are using other apps.
Further, the behavior of the Banners can also be modified, by tapping on the Banner Style option. It provides you with two choices, Temporary and Persistent. When banners are Temporary, they disappear after a time, and when they are Persistent, they remain on the screen until you tap or swipe them away.
The Sounds and Badges options manage extra notifications for your Gmail. You can select a distinct sound for your Gmail notifications to distinguish it from others. And, with the Badges option selected, you will see how many notifications you have received on Gmail, with a number badge displayed on the app icon.
Read More:
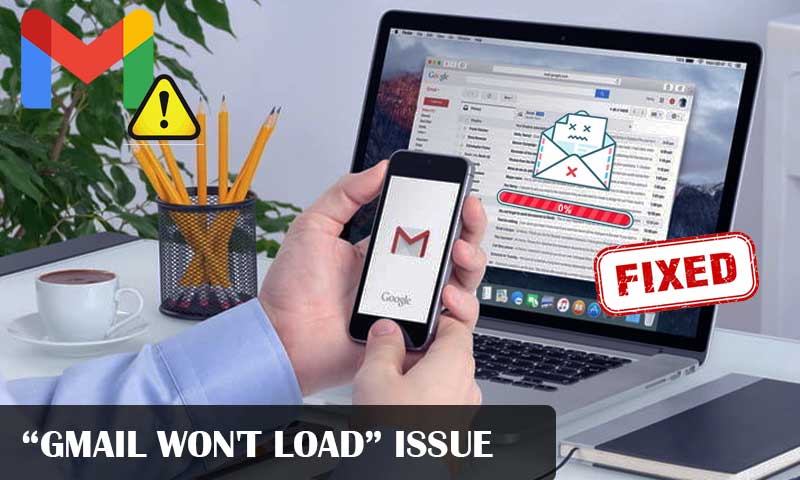
- Why is Gmail not loading on iPhone? Let’s fix it
- Is your Gmail Spam Filter Not Working? Here are All Tips & Tricks You Need to Know
- 11 Trusted Fixes When Your Gmail Emails are Disappearing!
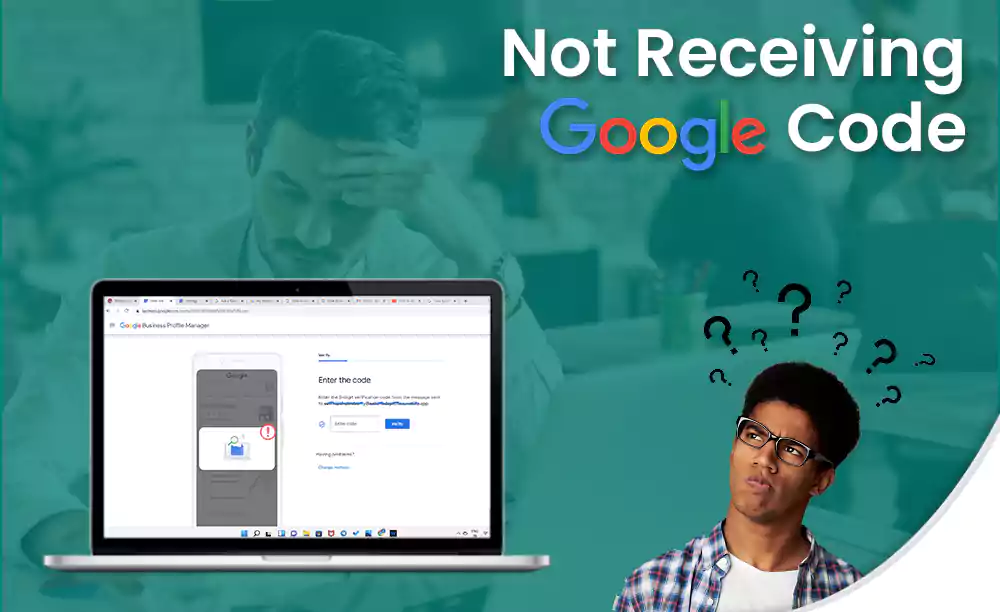
- How to Bypass the Gmail Phone Number Verification
Share