What to Do if iPhone Mail Notifications Not working?
- Introduction
- Common Reasons for iPhone Mail Notifications Not Working!
- How do I Get Instant Email Notifications on My iPhone?
- Configure Fetch Mail for New Mail on an iPhone
- Uninstall and Reinstall Mail Application
- Edit Notifications for Threads and Mailbox
- iPhone Email Notification Sounds Not Working
- Disable Do Not Disturb on your iPhone
- Disable Low Power Mode
- Make VIP Mail Notifications Active
- Install the Newest Version of iOS on your iPhone
- Contact Apple Support
- Conclusion
Introduction
Do the notifications on your iPhone constantly fail to alert you to critical emails? Many users of Apple’s Mail program have experienced this issue and you are not alone. After switching to iOS 15, many iPhone owners have complained that they are no longer receiving incoming email notification noises. If you use email frequently, your iPhone’s malfunctioning notifications could cause you to miss essential correspondence. If you’ve observed that your iPhone isn’t receiving email push notifications, don’t panic it often happens with Thunderbird as well, that it just stops receiving emails; this article will show you how to permanently solve the issue. Here, we’ll go over a number of approaches that have worked wonders for this issue. But before that let’s have a look at the reasons why Gmail notifications do not work on iPhones.
Common Reasons for iPhone Mail Notifications Not Working!
There are multiple reasons why iPhone mail notifications don’t work on your iPhone. A couple of them are listed below:
- Your iPhone might not be updated as per the latest version
- Another reason can be that you don’t use Push, Email notifications might not function in the Mail app on your iPhone.
All you need to do in such a case is to simply turn on Push at the top of the screen by going to Setting > Passwords & Accounts > Fetch New Data. This guarantees that emails arrive on your iPhone as soon as they are sent to you. If this solution fails to work, the article further covers a few more ways that might be of urgent help.
How do I Get Instant Email Notifications on My iPhone?
There are several ways through which one can get instant email notifications on iPhone, be it iPhone 11, iPhone 13, ios 14, or ios 14, the solutions that are listed below can help you operate mail notifications on iPhone without any issue. A few of them are even useful when your email is not working on your iPhone. Do check out:
1. Configure Fetch Mail for New Mail on an iPhone
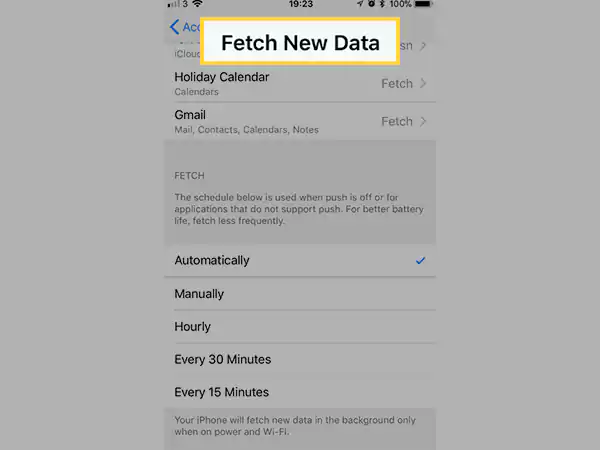
Do you receive email messages but no notifications, or do you need to manually open the iOS mail app and reload the app in order to receive email messages? Enable Fetch for all mail; before activating this option, make sure it won’t drain your power too much because, as you set the choice in the Fetch section, your device will periodically check the mail server. Additionally, the Push option must be disabled for fetch to function. As an illustration, select the Fetch settings and deactivate Push Toggle.
- iPhone/iPad Settings app > Accounts & Passwords > Fetch New Data by scrolling up. Switch off Toggle Push.
- Choose the time for Automatically, Manually, Hourly, Every 30 Minutes, or Every 15 Minutes in the Fetch Section.
2. Uninstall and Reinstall Mail Application
Apple made it easy to delete some of the stock apps from your iPhone with the arrival of iOS 10. You may reinstall the Mail app to fix issues with your email notifications not functioning, which is useful for debugging. From your Home screen, tap and hold the Mail app icon to bring up the Delete App menu. Then restart your iPhone after tapping it to delete the app. Download Mail from the App Store after your iPhone restarts. To switch Mail back on for each of your email accounts, you might need to go back to the Passwords & Accounts settings.
3. Edit Notifications for Threads and Mailbox
The Mail app makes it clear that the iOS 15 update is far from complete. Even if you have made sure that Mail’s notifications are enabled, it’s still conceivable that you won’t receive any. However, one user was able to identify both the cause and solution to this. The most likely outcome of the new iOS version is the creation of fake duplicate Inboxes and Threads. You might never receive Mail notifications if these fake duplicates are chosen in place of your primary Inboxes and Threads. Here’s a test to see whether this is the problem and a patch for it:
- Go to the Mailboxes screen in the Mail app after opening it. Ensure that you are viewing the ‘Mailboxes‘ panel and not the ‘Inbox’ screen (it should state so at the top). Now click Edit in the top right corner.
- If there are multiple inboxes listed here and one of them has a checkmark, uncheck it and select the other one. Be certain that the check is blue and not grey. Apply the same procedure now to the Thread Notifications settings. If there are two Thread Notifications, tick the other one while unchecking the one that is now selected. The check should be blue on this one as well, not grey.
- Now click Done in the upper right corner.
To see if you receive any notification noises, send yourself a test email. Alternatively, return to the Edit screen and count the number of Inboxes and Thread Notifications options there. This time, see if you can verify the other choices (a little trial and error may be necessary here). Once more, your goal is to obtain the Blue checkmark. Once you’ve located and chosen the primary inbox and thread notification options, you should resume receiving notification noises, and the fake duplicates ought to vanish.
4. iPhone Email Notification Sounds Not Working
Each app installed on the iPhone has its own customized, distinct notification settings. Check to see if your iPhone has Mail notifications turned on and if your email push notification isn’t working.
- Simply select “Notifications” under Settings on your iPhone.
- Then, after finding the “Mail” option by scrolling down, choose the email provider you are utilizing and turn “Allow Notifications” on.
- Additionally, you can activate the banners, notification center, or lock screen notifications.

5. Disable Do Not Disturb on your iPhone
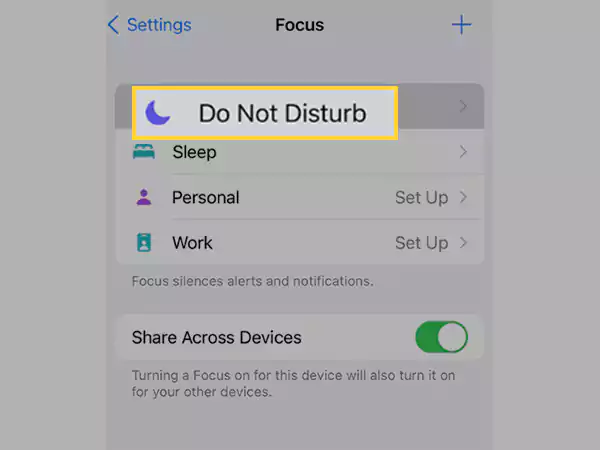
Block all types of distractions, including incoming phone calls and notifications, simultaneously when using Do Not Disturb and Do Not Disturb while driving. Therefore, I advise using DND with caution. If you’re unsure how to use DO NOT DISTURB mode on an iPhone, go to this article. DND mode is incorporated into the brand-new focus mode in iOS 15 and later software updates, so read on to learn how to access it.
- Turn off Do Not Disturb mode and Do Not Disturb While Driving mode quickly from the control center: Swipe down to activate the control center, Or
- Using the iPhone’s settings: Disable the “Do Not Disturb” toggle in the Settings app’s “Do Not Disturb” section. as well as “Schedule toggle.”
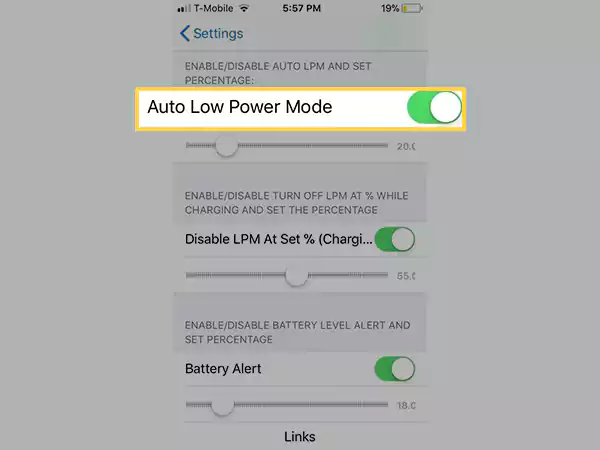
6. Disable Low Power Mode
Email notifications may not be working because Low Power Mode disables several iPhone services to conserve battery life. You should also check to see whether your iPhone is in Low Power Mode or if the device stops pushing email alerts. Go to Settings, click on “Battery,” look for “Low Power Mode,” and then toggle it off on your iPhone to turn off Low Power Mode.
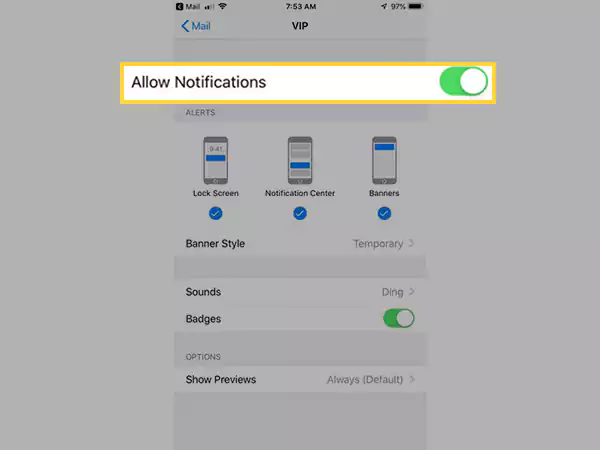
7. Make VIP Mail Notifications Active
Just follow these simple steps and you will be able to resolve the mail notification issue on your iPhone. Hopefully, this will work for you if VIP mail alerts aren’t working on your iPhone.
- On the iPhone, launch the Settings app.
- To the Notifications options, scroll. Go to the Mail option next.
- Decide on Customize Notifications.
- The Enable Alerts toggle should now be green in the VIP area. Check the Sounds not set up None as well, and lastly, turn on the Badge switch. You can display count figures for upcoming elections on the Mail app icon by using the badge icon.
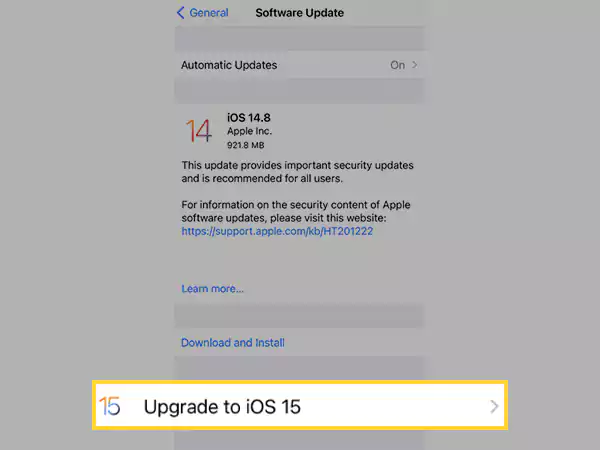
8. Install the Newest Version of iOS on your iPhone
New issues are frequently brought up by iOS updates for your iPhone. In reality, past iOS versions had a history of breaking the Mail app on iPhones, preventing users from receiving email notifications. When this occurs, Apple typically fixes the issue in the following few weeks with a new update. Make sure iOS is up to date so you can take advantage of Apple’s fix updates. To update the software on your iPhone:
- Join an active Wi-Fi network using your iPhone.
- To update your software, go to Settings > General.
- Remain patient as your iPhone checks for new software updates.
- Download and apply any iOS upgrades that are available.
9. Contact Apple Support
If despite following the instructions provided above, the bug affecting Phone Mail notifications is still present, your only option is that you should contact Apple Support for assistance. Find out how to get in touch with the app developer with the help of the customer support that is available 24*7.
Conclusion
Whatever the reason, users who depend on Mail to inform them of new emails can find it to be rather bothersome when it doesn’t function properly. We wish you luck with one of these solutions. Otherwise, you’d have to wait for Apple to provide a permanent fix and check Mail every few hours to see whether you’ve received any.
Share