How to Sync Contacts from Your iPhone to Your Mac? Three Ways Explained!
Your phone stores contacts from your families, friends, co-workers or business partners. These contacts in your address book are some of the most valuable information on your phone.
More than just phone numbers and addresses, they are how you communicate with the people in your life. Hence, you cannot afford to lose them, and that is why to avoid losing such important information, you may need to back them up on a computer, be it a Mac or a Windows PC. So, in case of data loss, you can get them back!
With that in mind, we’ll show you in this article—how to sync and backup your contacts from iPhone to Mac, how and when you should use iCloud to sync contacts, how to manage your contacts, etc.
Having said that, let us begin—
Also, Read This: Descriptive Guide for ‘How to Transfer Photos from iPhone to Computer?
Why to Sync Contacts from iPhone to Mac?
Importing contacts from iPhone to Mac is a wise practice as you do not need to worry about data loss, and you can connect with your loved ones using the address book in your Mac system.
In more simple words, your iPhone stores some important contacts of your families, friends, colleagues, or business partners, and to prevent such important information from being lost, you may need to make a copy of them on a computer. Well, because by doing so, you can recover them back when data loss happens!
How to Sync iPhone Contacts to Mac?
You can sync your iPhone contacts to your Mac using any of the below-discussed three methods.
[Note: While all three methods are reliable and let you easily transfer contacts from iPhone to Mac without any hesitation, it is suggested to choose the right method that adheres to your expectations without any compromise.]
Method 1: Sync Contacts from iPhone to Mac with iCloud
The fastest way to keep your contacts synced across iPhone and Mac is to use iCloud. Cloud storage service is included in all Apple products making it easy to transfer data between devices.
Moreover, the best part of iCloud is that it will not only ensure that all your data is correct but it also keeps your address book up to date as you add new contacts or edit existing ones.
So, on that note, here’s how to sync your iPhone contacts to your Mac using iCloud—
Note: You need to be logged into the same iCloud account on both devices then, it doesn’t matter whether you make the change on your iPhone or if you add the contact on your Mac — your address book will always remain in sync.
- Step 1: In your iPhone, first hit the ‘Settings’ option, located on the home screen.
- Step 2: Then, you’ve to select your ‘Device name’ and tap your ‘Profile name’ at the top of the list.
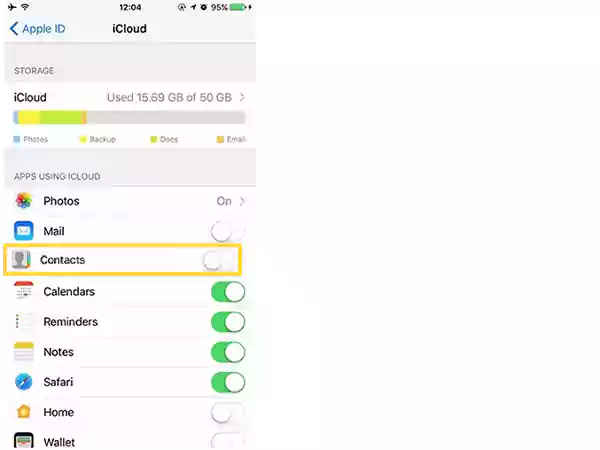
- Step 3: After that, tap ‘iCloud’ and toggle contacts on to enable the ‘Contacts’ option.
- Step 4: Once you’ve enabled the contacts option, tap ‘Merge.’
- Step 5: Now, in your Mac system, click the ‘Apple icon’ in the top-left corner.
- Step 6: Next, click ‘System Preferences’ and choose ‘iCloud.’
- Step 7: Following this, enter the credentials to ‘log in to your Apple ID.’ Here, you’ve to check the ‘Contacts’ item in the list to sync contacts from iPhone to Mac. As you do so, your devices will now sync contacts between them.
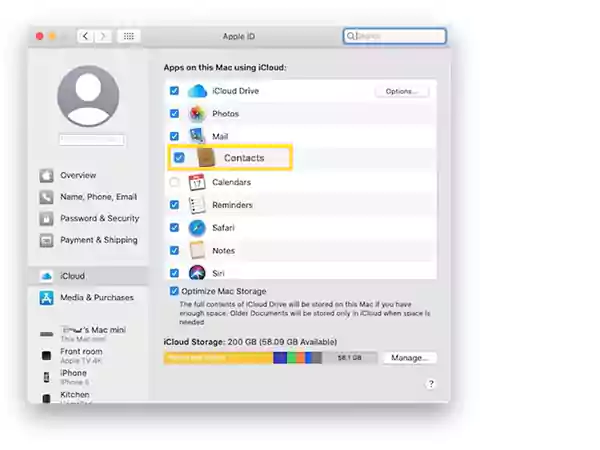
- Step 8: Now, open the ‘Apple Contacts’ app in your Mac system and select ‘All iCloud’ to view the iPhone contact list.
By using these above steps, you can flawlessly sync contacts from any iOS device to the Mac system.
Method 2: Sync iPhone Contacts to Mac Using a USB Cable
If you prefer to sync your iPhone contacts to a Mac in a more manual way, like using a USB cable and plugging it into your computer, that’s an option, too.
In other words, if you’re not already using iCloud or you prefer to use iTunes to sync your iPhone to your Mac, don’t worry, there’s still a way for you to sync your contacts.
You can contact them using a USB cable. However, it should be mentioned that this method is generally not as convenient as using iCloud and you can use this method only if you do not use iCloud to sync contacts.
- Step 1: Launch the ‘iTunes or Finder window in your Mac system and connect your iPhone to your Mac using the ‘USB cable.’ When you do this, you may need to hit the ‘Trust’ option (if it appears) on both devices to be able to see and connect with each other.
- Step 2: Once you’ve connected both your devices, choose your ‘iPhone device name’ from the ‘Finder environment’ which lists on the sidebar of the screen.
- Step 3: Then, on the Mac, click ‘Info’ located in the button bar.

- Step 4: Next, you’ve check in ‘Sync Contacts’ on the screen to sync the contacts to your Mac.
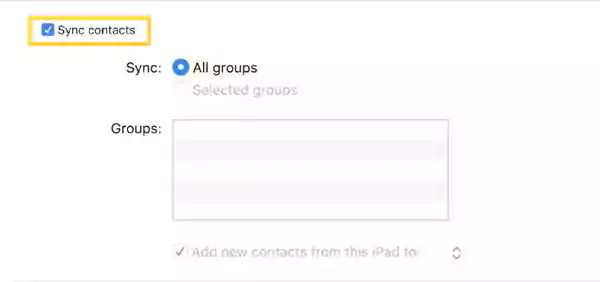
- Step 4: After that, hit the ‘Apply’ button to save the changes.
The contacts will now be automatically updated every time you connect your iPhone to your Mac using the above method without using the iCloud interface. Once updated, your iPhone contacts automatically sync with your Mac system.
Method 3: AirDrop Contacts from iPhone to Mac
If you only want to sync certain contacts to your Mac instead of your entire contact list, AirDropping contacts can come in handy. So, to use this method here’s what you need to do—
- Step 1: Firstly, you’ve to ensure that both your devices i.e., iPhone and Mac systems are accessible to the ‘Wi-Fi network.’
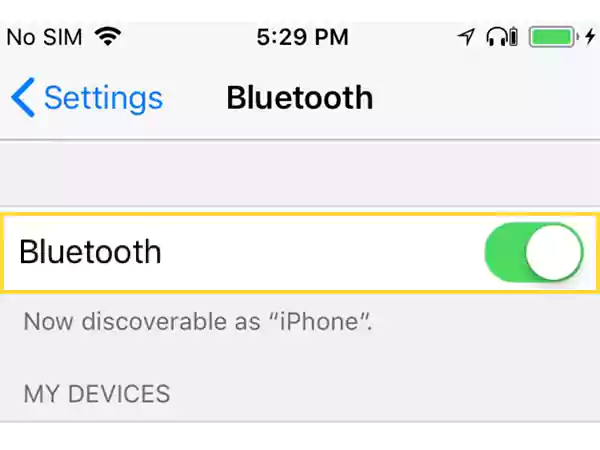
- Step 2: Then, turn on ‘Bluetooth’ in both your devices i.e., iPhone and Mac system.
- In order to turn on the Bluetooth option in your iPhone; go to ‘Settings > Bluetooth’ and then, simply toggle the Bluetooth option to ‘Turn it on.’
- To turn on the Bluetooth option in your Mac system; go to ‘Apple Menu > System Preference > Bluetooth’ and then, just ‘Turn it on.’
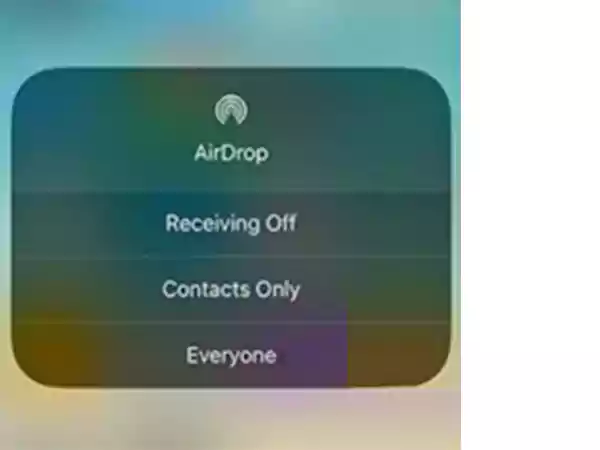
- Step 3: After that, turn on the ‘Airdrop’ feature on your iPhone and Mac.
- To do so on the iPhone— “go to the ‘Control Center’ > press the ‘Network Settings Card’ > select ‘Contacts only’ or ‘Everyone’ in the list.”
- To do so on the Mac system— “navigate to ‘Finder’ > ‘Go’ > ‘Airdrop’ > tap ‘Allow me to be discovered by’ and choose either ‘Contacts only’ or ‘Everyone’ in the list.”
- Step 4: Now, on your iPhone, click on the ‘Contacts icon’ and find the contact you wish to share.
- Step 5: Once you’ve selected the ‘Contact’ you wish to share, tap on it.
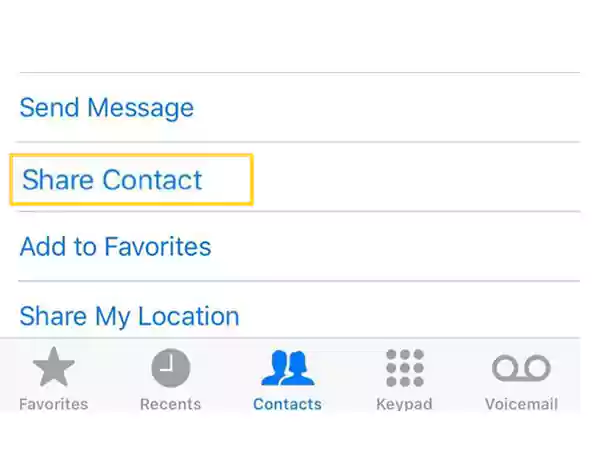
- Step 6: Next, you need to scroll down and tap ‘Share Contact’ on your iPhone.
- Step 7: Now it’s time to choose ‘Airdrop’ from the expanded list and select your ‘Mac’ system name to start the transfer process and share it.
- Step 8: In the end, you need to ‘authenticate the notification’ in your Mac system regarding the process of sharing contacts from iPhone gadgets.
- Step 9: Once done, your shared contacts are stored in the ‘Downloads’ folder in your Mac system.
Note: You’ll need to do this with each contact, and that’s why it is recommended to only share a few details.
Now that you know how to import contacts from iPhone to Mac with iCloud, it’s time to sync and organize your contacts properly.
How to Quickly Tidy Up Contacts After Syncing?
You may not know that when you sync iPhone contacts to a Mac, your phone contacts can get mixed with your Mac contacts from Messenger or FaceTime. Therefore, you need to keep your contact list organized on your device, and for that, here’s what you can do—
- Step 1: First, go to ‘Contacts’ on your Mac.
- Step 2: There, make sure you’ve selected ‘iCloud contacts’ in the sidebar.
- Step 3: Then, simply ‘tidy up, delete, or add contacts’ as needed.
- Step 4: After that, give your changes some time to ‘Show up’ on your other devices, and then pat yourself on the back when you’re done!
When your contacts are properly synced and organized, you may want to export them from Apple’s ecosystem for added security and peace of mind. So, considering it a good idea, if you wonder how to get contacts from iCloud, know that it can be easily done directly in the Contacts app on your Mac—
- Step 1: Open the ‘Contacts app.’
- Step 2: Then, under ‘File’ in the contacts menu bar at the top of the screen, click ‘Export.’
- Step 3: After that, select the ‘Export vCard.’
- Step 4: Finally, choose where to ‘export your contacts to.’ Once this is done, you can import your vCard into Gmail, Outlook, or any other contact management service.
Now, you can rest assured that you have a backup of your important contact information.
Why Are My iPhone Contacts Not Syncing?
If your iPhone contacts don’t sync to your Mac, there can be a few major reasons why. So, have a look at them—
- You are offline: If one or both of your devices are offline, you won’t be able to sync your contacts until you have a connection again.
- Your devices are logged in to different iCloud accounts: You need both the iPhone and the Mac to be logged into the same iCloud account in order to sync contacts.
- Your iCloud storage is full: If your iCloud storage runs out, you will not be able to sync your contacts. So, unless you free up some space or upgrade your storage, you will continue to face the issue.
- Contact sync is off: Maybe your contacts syncing has been turned off somehow on one or more of your devices. If so, you can use these steps to verify that it is enabled on all devices;
How to Force Sync Your Contacts?
In case your iCloud contacts are not syncing on their own or even after tying the methods discussed above, you can try force syncing them in this way—
- Step 1: On your iPhone, open the ‘Contacts app.’
- Step 2: Then, scroll to the ‘top of the screen.’
- Step 3: After that, pull down until you get the ‘activity gear,’ and let it refresh.
If your contacts still aren’t syncing after you’ve tried this, you can alternatively try to force a sync by logging out of iCloud and then logging back in. Here’s how you can do so—
- Step 1: On your iPhone, go to ‘Settings.’
- Step 2: Inside settings, tap on your ‘Name.’
- Step 3: After that, hit the ‘Sign Out’ option.
- Step 4: When you’re signed out, quickly ‘Restart’ your phone.
- Step 5: Now, log back into iCloud, and for that, navigate to ‘Settings > Passwords & Accounts > Add Account > iCloud.’
- Step 6: Here, enter your credentials to finally sign back in.
Bonus Tip: Replace Contacts with BusyContacts
If you mostly work with Contacts on a Mac, try a more robust solution than Apple’s native Contacts. You can try replacing contacts with BusyContacts—it is the best contact manager app for Mac.
BusyContacts has many capabilities that are not there in the original utility. It can automatically pull in all your contacts from Google accounts, local address books, iCloud, and even social media!
Not only that, BusyContacts is way more informative, with the possibility to track your contacts’ activity on social media and email, tag them on events and to-dos, and more.
Regarding BusyContacts, you will also like the instant contact entry feature.
Bottom Line
That’s all there to tell you how to sync contacts from iPhone to Mac. So, now that you know the different ways of syncing iPhone contacts to Mac, I hope you no longer face any difficulty while you sync your iPhone’s contacts to Mac. Even so, we have already discussed ‘how to troubleshoot it if your contacts do not sync the way they should!’
FAQs
Ans: To sync iMessages on your Mac, you need to do is follow these steps—
- Step 1: Open ‘Messages’ on Mac.
- Step 2: Select ‘Messages > Preferences > Settings.’
- Step 3: Then, ‘Sign in with the Apple ID’ you use on your iPhone.
- Step 4: After that, in the “You can be contacted for messages” section, check all available ‘Phone numbers and email addresses.’
- Step 5: Now, set the ‘Start New Conversations’ to the same phone number from the drop-down on your iPhone and Mac.
Ans: If you want to sync your photos from your iPhone to your Mac, you’ll need to—
- Step 1: First, go to ‘Settings’ on your iPhone.
- Step 2: Then, go to ‘your name > iCloud.’
- Step 3: There, you’ve to enable ‘Photos.’
- Step 4: Simultaneously, on your Mac, go to ‘System Preferences.’
- Step 5: Inside the same, tap on your ‘Apple ID.’
- Step 6: After that, just hit the ‘Photos’ option to enable it.
Ans: For syncing music from your iPhone to your Mac, simply you need to do is—
- Step 1: First, ‘Connect’ your devices.
- Step 2: Then, open the ‘Music app’ on your Mac.
- Step 3: After that, choose your ‘iPhone’ in the sidebar.
- Step 4: Finally, select ‘Sync Settings.’
Ans: If you only want to sync a handful of contacts and not your entire address book, a quick alternative would be to send them via AirDrop.
Ans: If your contacts aren’t syncing automatically even though they’re set up correctly, what you can do is force your contacts to sync. To do so—
- Step 1: Open ‘Contacts’ on your iPhone.
- Step 2: Then, swipe down from the top of the screen to ‘Refresh’ and force sync your contacts.
Alternatively, you can try restarting your phone.
Ans: In order to sync contacts on your iPhone using iCloud, follow these simple steps—
- Step 1: Tap on the ‘Settings icon’ to open Settings on your iPhone.
- Step 2: Inside settings, tap on ‘Profile Name.’
- Step 3: After that, tap on ‘iCloud’ and there, toggle the ‘Contacts’ option to turn it on.
Ans: To AirDrop contacts via your iPhone, what you need to do is—
- Step 1: Tap ‘Contacts’ from the list.
- Step 2: Then select the ‘contact you wish to share.’
- Step 3: After that, just hit the ‘Share Contact’ option.
Ans: If you want to sync iPhone contacts to Mac with one click, then, consider using AnyTrans for iOS. This professional backup manager and file transfer tool is the easiest way to sync contacts from iPhone to Mac. This is because it can directly export iPhone content to Mac by categories or by copying content with one tap on your device. Not only it transfers data across multiple iCloud accounts but also moves content from iCloud or iTunes library to Mac.
Ans: If you’re using iCloud to sync contacts from iPhone to Mac, go through this checklist for when your iPhone contacts aren’t syncing to Mac—
- On your iPhone: Navigate to Settings, iCloud, and check to make sure the Contacts option is selected.
- On your iPhone: Go to Contacts, select Groups and make sure All iCloud should be selected.
- On your Mac: Open System Preferences, go to iCloud, and check that Contacts should be selected.
However, if this way you can’t fix the problem, consider an alternative method and i.e., you can sync and back up contacts by using AnyTrans for iOS.
Ans: Sometimes you might want to replace all the contact information on your device with information on your Mac. In that scenario, here’s what you need to do—
- Step 1: First of all, connect your iPhone device to your Mac.
- Step 2: Then, in the Finder on your Mac, select your iPhone device in the Finder sidebar.
- Step 3: Next, you need to click the ‘Info’ option in the button bar.
- Step 4: After that, in the “Advanced Replace information on this device” section, select the ‘Replace contacts’ checkbox to replace the contacts on your device.
- Step 5: Finally, when you’re ready to sync, just hit the ‘Apply’ button.
Now, your contact information is updated on your device every time you connect it to your Mac.
Share