A Descriptive Guide for “How to Transfer Photos from iPhone to Computer”
If you are an iPhone user, you know the struggle of saving up storage for images without making the space full. And not everyone can go for the option of buying iCloud storage every month, right?
So, many users prefer to save their photos and videos on their PC as this doesn’t hamper the storage limit on iPhones and the data stays saved as well. And if you are one of them, this article is for you.
In this article, we are going to discuss the methods for ‘how to transfer photos from iPhone to Computer’ and also talk about the reasons along with fixes for the ‘why pictures won’t upload from iPhone to Computer?’ So let’s get the ball rolling and head over to the perks of it first.
- Perks of Transferring Photos from iPhone to Computer
- Why Pictures won’t Upload from iPhone to Computer?
- How to Transfer Photos from iPhone to Windows?
- How to Transfer Photos from iPhone to Mac?
- Steps to Transfer Photos from iPhone to iPad
- How to Transfer Photos from PC to iPhone?
- How to Download Photos from iPhone to Computer via iCloud Photos?
- Ways to Fix ‘Photos won’t Import from iPhone to PC’
- Conclusion
Perks of Transferring Photos from iPhone to Computer
There is no point in keeping your photos limited to your iPhone when you can view them on a bigger display and enjoy the moments in it. And there are more reasons why one would want to transfer images from iPhone to PC, as there are some advantages to it too.
- You get a better view of the pictures.
- Your pictures are saved as a backup if you lose your iPhone.
- Extra space gets saved on your iPhone if you transfer the images and delete them.
- You can have access to the photos on both devices at the same time.
Apart from these, there can be several other reasons as well why people consider transferring photos from iPhone to Computer as reliable. However, the process sometimes may not go smoothly due to some reasons causing issues, so let’s have a look at some of them.
Why Pictures won’t Upload from iPhone to Computer?
Before you start with the process of transferring photos from your iPhone to your computer, let’s see some of the possible reasons which could lead to the issue of ‘pictures won’t upload from iPhone to Computer.’
- Connection Issue
One of the most common reasons which gets in the way of a smooth process of transferring photos from the iPhone to the computer is a poor connection. Even though not all the methods necessarily require an internet connection, the ones that do need it should have a stable and working network connection.
- Importing Many Pictures at Once
If you have selected a huge bunch of pictures at once and are trying to transfer them at the same time, it can be a possible reason leading to the issue of ‘pictures won’t upload from iPhone to the computer.’ Hence, the users should avoid doing so and follow the article to know more about it.
- ‘iCloud Photos Library’ is Enabled.
If the photos are actually stored in a smaller preview of images in your iPhone, it is possible that they won’t be transferred to your PC. Meaning if you have enabled Optimize iPhone Storage on your iPhone, the images are stored in iCloud. So it is possible that due to this reason, the pictures won’t transfer to the computer from the iPhone.
- There is an Update Issue
Another reason which can interrupt the process of transferring photos from an iPhone to the PC can be pending updates. If you have any updates available or any previous updates cannot be installed properly, the transfer procedure can get hampered.
The above-mentioned points could be the reasons why your photos may not get transferred from your iPhone to your computer. So make sure that none of these are happening.
How to Transfer Photos from iPhone to Windows?
So now that you have got an idea of what might be the possible reasons causing the issue of ‘pictures won’t upload from iPhone to Computer,’ make sure that you keep a check on them. Now, let’s get into the steps for the process of ‘how to transfer photos from iPhone to Computer’ for Windows 8 and Windows 10.
Windows 8
If you are a user of Windows 8, the steps are slightly different from the ones you have to follow for Windows 10. So to transfer photos from iPhone to PC in Windows 8, follow the steps below:
- Plug in the USB cable to your iPhone and connect the other end to the computer.
- Once your iPhone gets detected, a pop-up saying ‘Tap to choose what happens to this device’ will appear. Click on it.

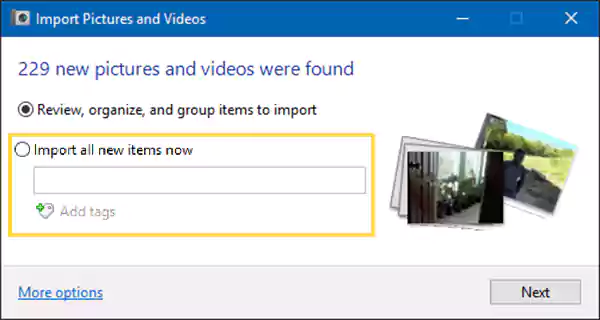
- After you tap on it, choose ‘Import photos and videos’ and select the images and videos you want to transfer.

- Once you are done selecting, tap on Import and the process of transfer will get started.
If you think there is any step that was missed out here, you can also refer to Windows 10 steps for an idea.
Windows 10
We will now be discussing the steps for Windows 10 and describing the method in the easiest way. So follow the steps given below if you are a Windows 10 user.
- Plug in your iPhone to your Computer using the USB cable.
- Then a pop-up will appear, tap on Allow.
- After that, the Photos app will launch. If it doesn’t, you can open it yourself from the search bar or Start menu.
- And when you are done, tap on Import from the top-right of the Photos app.
- Now a drop-down menu will appear, tap on From a USB device.
- After that, you will be asked to select the device that you want to import the images from. Choose your iPhone.
- Now select the photos or videos that you want to transfer.
- Next, to save the location where they will be saved, tap on the gear icon (for Settings) from the top-right.
- If you are fine with the location selected by default, move on to other options, and if you aren’t, click on Change the import destination.
- Once you have set the folder where you want to save the images, tap on Done.
- Lastly, tap on the Import Items option given below with the total number of images selected.
Now, your pictures will successfully get transferred from your iPhone to your Windows 10. If you are a Mac user, the steps to transfer pictures from iPhone to Mac are given in the next section.
How to Transfer Photos from iPhone to Mac?
As you may have understood about the different ways to transfer photos from iPhone to Windows, now we are going to explain the steps to transfer photos from iPhone to Mac. There are basically two ways to transfer images from iPhone to Mac – however, both are wireless. So let’s talk about the different methods now.
Via Cloud,
Another way is to transfer the photos wirelessly using iCloud. The steps for the process are as follows:
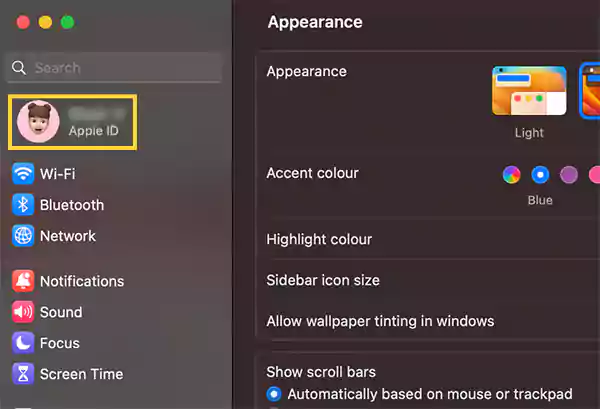
- Go to the Apple icon from the top left and select System Settings.

- Tap on your Apple ID.
- Then click on iCloud.

- Now enable the Photos option if it is not turned on, and enter the passcode if asked.
Now all the photos which you have on your iPhone will get updated to iCloud and you will have them on your Mac as well.
Note: Make sure that you have Photos in iCloud enabled on your iPhone as well, from the same Apple ID.
Using AirDrop
Apart from iCloud, you have another method as well to send photos from your iPhone to your Mac and that is, using AirDrop. AirDrop makes it really easy for Apple users to share media and files among Apple devices. So now, we will be sharing the steps for the process:
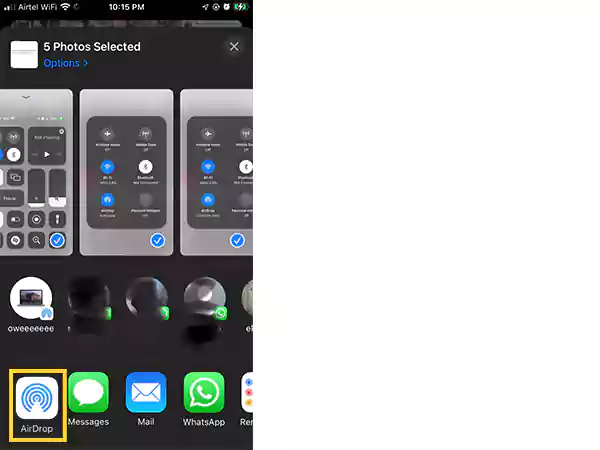
- Open the Control Centre on your iPhone.

- Press and hold anywhere (except the icons) on the top left section.

- Enable AirDrop.

- Open the Photos app on your iPhone.

- Then select the photos that you want to transfer.

- Once you are done, click on the Share button from the left bottom.

- After that, tap on AirDrop and select your Mac’s name.

Using the steps given above, you will be able to successfully transfer your images from your iPhone to your Mac.
Steps to Transfer Photos from iPhone to iPad
Now that we have discussed different methods for how you can transfer photos from iPhone to PC, there are many iPad users who want to know how to transfer pictures from iPhone to iPad.
Basically, we will be explaining the methods in two different ways – wirelessly and via cable. So now, let’s dive right in without further ado!
Through AirDrop
One of the simplest wireless methods in today’s time to not only transfer images, but videos, files, media, and almost everything is via AirDrop.
However, keep in mind that the magic of AirDrop only happens in the Apple world in its devices. And since here, it is the case of Apple to Apple, using AirDrop will only make the process smoother. The steps for the process are as follows:
- Open the Control Centre on your iPhone.

- Press and hold anywhere (except the icons) on the top left section.

- Now the section will expand, and more options will appear. Long press on AirDrop and select Contacts Only.

Note: You can select the option of Everyone as well, but this allows anyone and everyone to share pictures and videos with you.
- Once AirDrop is enabled, head over to the Photos app and select the pictures that you want to transfer.Select the photos to transfer

- Now tap on the upward arrow icon for Share from the bottom left.

- After that, click on AirDrop and select your iPad’s name.
- Lastly, if you are asked for any permissions, allow them and the pictures will get transferred successfully.
Via iCloud
While there are a couple of things that can be done without iCloud, like
transferring data from iPhone to iPhone without iCloud, iCloud makes the transferring process among Apple devices pretty easy. If you think that the process of AirDrop is complicated for you, you can go with the process of iCloud, which does the syncing part at its best. So let’s start with the steps to see how it works:
Note: The following steps will work only if you have the same iCloud Account or Apple ID signed in to both your devices – iPhone and iPad.
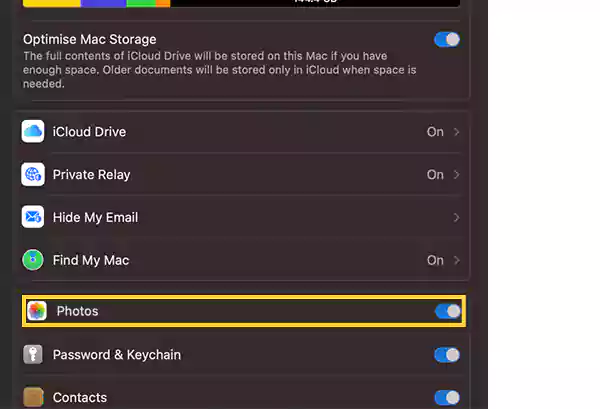
- Open Settings on your iPhone, scroll down and tap on Photos.

- See if the iCloud Photos option is enabled, if it is not green, turn the toggle right and turn it on.
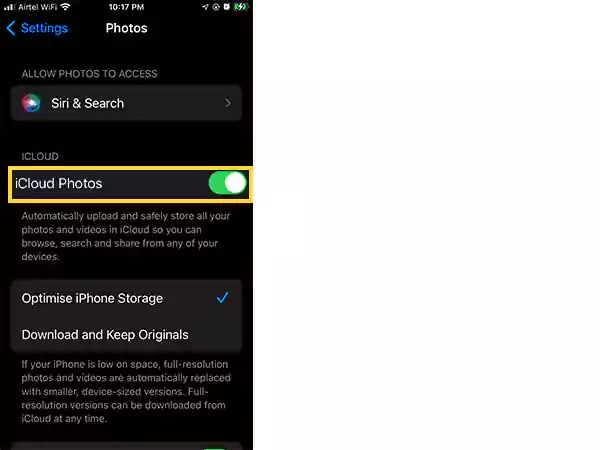
After turning it on, open the Photos app on your iPhone and you will be able to see the updated photos on the Photos app on your iPad.
With USB-C
Apart from the above given wireless methods, you can also go with the option of the old traditional method, that is, using a USB-C cable for transferring your photos from iPhone to iPad. The steps for it are given below:
- Take the USB-C cable and plug it into your iPad and the other end of the cable into the iPhone.
- Now unlock your iPhone and tap on Allow in the pop-up that appears. After that, the import screen will be visible to you on your iPad.
- Lastly, choose the pictures that you wish to import from your iPhone to your iPad and click on Import.
How to Transfer Photos from PC to iPhone?
There are a number of ways to transfer photos from iPhone to computer, but can pictures and videos also get transferred from PC to iPhone? Let’s find out and move ahead to the process of transferring pictures from your PC to your iPhone using the steps below.
- Go to your browser and enter iCloud.com and log in with your Apple ID.

- Click on Photos.

- Now select the pictures and videos that you want to transfer or upload to your iPhone.

- Once you are done selecting the photos and videos, tap on Open/Choose, and they will get uploaded to your iCloud Photo Library successfully.
- Now turn on the Wi-Fi or Mobile Data on your iPhone and you will be able to see those media files in your Photos app.
✍🏻 Note: Keep in mind that the photos will appear in the Photos app of your iPhone in the same order of date as they were saved earlier. So you have to scroll a little as per their timeline to locate them.
How to Download Photos from iPhone to Computer via iCloud Photos?
If you are thinking of transferring the photos from iPhone to Computer via the steps we discussed earlier, let us tell you that there is another way that many don’t know about – and that is via iCloud Photos.
If you want to avoid plugging in your iPhone to your PC for transferring photos and find this process draining, you can keep your pictures in sync using iCloud. The steps for the process are as follows:
- Go to Settings and tap on your Apple ID.
- Click on iCloud.
- Select Photos.
- Enable iCloud Photos.
Ways to Fix ‘Photos won’t Import from iPhone to PC’
If you aren’t able to transfer photos from iPhone to Computer and are facing the issue of ‘Photos won’t import from iPhone to PC’, here are some fixes for it.
But first, you have to figure out what might be causing this issue. For that, you can refer to the ‘Why Pictures won’t Upload from iPhone to Computer?’ section given in the article above. Now let’s dig right into the methods.
Restart iPhone and PC
The first way to overcome most of the technical issues is by restarting the device. And so, you can apply it here as well. There are often pending updates that most people don’t pay attention to. Apart from this, make sure that the apps are not running in the taskbar, as this can cause issues in the restart process.
Disable iCloud Photos Library
Another way to get over the issue of ‘why pictures won’t upload from iPhone to Computer?’ is turning off iCloud Photos Library. It is possible that you have your iCloud Photos Library turned on, which is causing issues in the process of transferring photos from your iPhone to the computer. To do so, check out the steps given below:
- Open the Settings of your iPhone.
- Go to iCloud.
- Now tap on Photos.
- Lastly, turn off the toggle for iCloud Photos.
Make Changes in iPhone Location and Privacy
If your iPhone’s location is different from the PC to which you are trying to transfer your pictures, there may be an issue with detecting the devices. For this, all you have to do is:
- Go to Settings and tap on General.

- Now click on Transfer or Reset iPhone < Reset Location & Privacy.
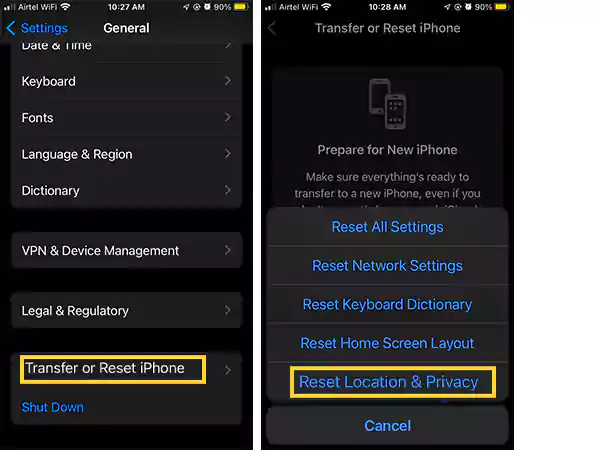
- Then connect your iPhone to your PC, and allow the permissions you’re asked for.
This way, the process of ‘how to transfer photos from iPhone to Computer’ will now hopefully take place smoothly.
Look for Pending Updates
If you think that there might be software update(s) available that you might have missed out on, you can check if any are pending. For doing that, follow the steps below:
- Go to Settings and tap on General.

- Then select Software Update and check if any is pending.

Avoid Importing Many Pictures in One Go
When you are trying to import photos from your iPhone to your PC and you choose many images at once, there can be problems in importing a lot of images altogether. So make sure to select limited images at a time and create sections for importing the pictures to the PC.
Using these fixes, you will be able to get over the issue of ‘photos won’t import from iPhone to Computer’.
Conclusion
There are various pros of transferring your photos from iPhone to Computer as mentioned in the article above. And on top of everything, it is a safe process. So, we hope that the different methods discussed in the article will help you out in transferring photos from your iPhone to your computer. There is more detail for the same on the Apple Support page and the official Microsoft Support page.
Share