How to Setup Gmail on iPhone Mail for Trouble-Free Access?
Configuring Gmail on iPhone is not that easy as you think it is. Therefore, we have compiled a guide that will let you access Gmail on iPhone with iOS 11 or later.
Gmail IMAP, POP, and SMTP Settings for iPhone
IMAP Settings

POP3 Settings
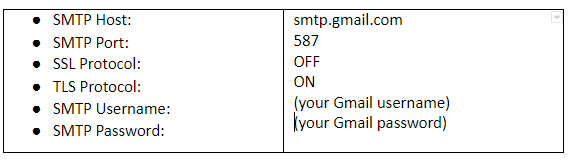
SMTP Settings
Like any other webmail, Gmail does provide two methods to configure Gmail on iPhone, namely IMAP and POP. Both are equally effective, but IMAP offers better synchronization and thus is suitable to manage Gmail data on multiple devices. After adding your Gmail account to iPhone, all the previous data will be restored within the iPhone mail app in which all your new and previous received and sent emails will be saved. If Gmail is not working on iPhone, try setting using the below-given steps.
How to Setup Gmail on iPhone using IMAP Settings?
These steps will help you set up Gmail on iPhone using IMAP server settings:
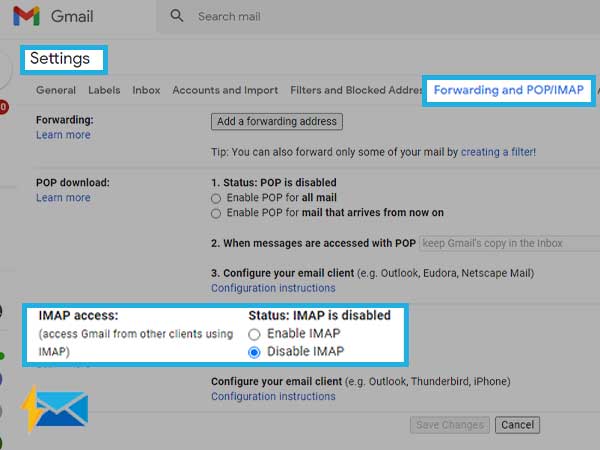
- First you need to enable the IMAP on Gmail by going to Settings>> Forwarding and POP/IMAP>> IMAP access>> Enable IMAP.
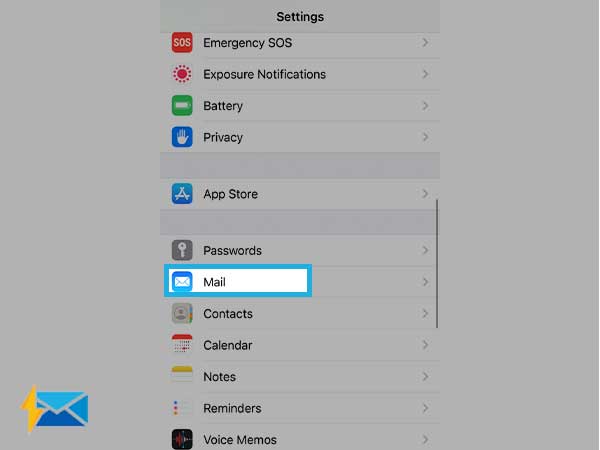
- On your iPhone, go to Settings from the home screen.
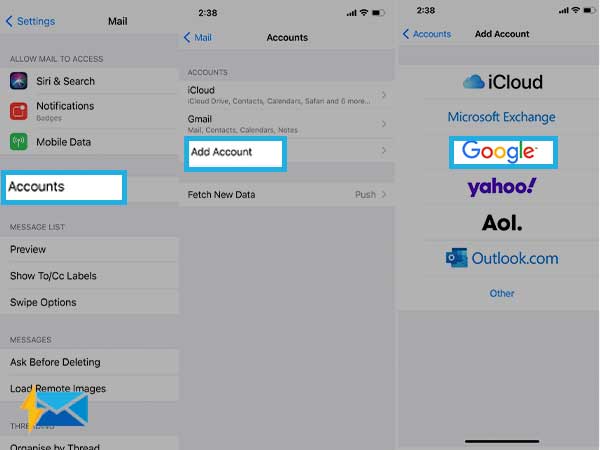
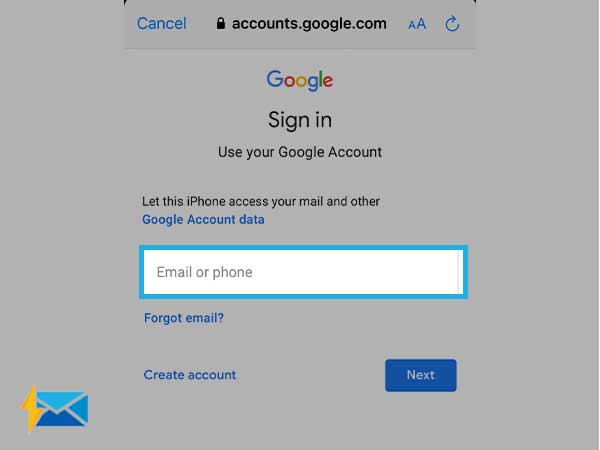
- Select Password & Account>> Add Account and then Google.
Important Note: For the older versions of the Mail app, you need to select Mail > Contacts > Calendars>>Add Account > Google Mail.
- Now, type in your Gmail address and then hit Next.
- Then, enter your Gmail “Password” and hit “Next”.
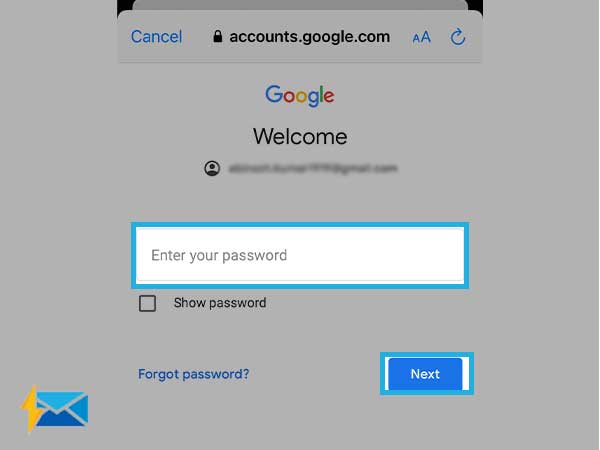
Note: If required you can use the “Forgot Password” link to reset your Gmail account password.
- If two-factor authentication is enabled on your account, you need to follow the on-screen instructions to sign in.
- Keep the Mail option toggled in so that you can use mail features for sending and receiving. Also, enable “Other items” to sync contacts, calendar events, and notes.
- Click Save.
Setup Gmail on iPhone using POP 3 Settings
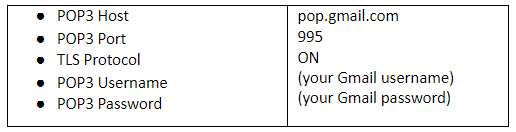
Gmail POP server settings are required for configuring the Gmail on your iPhone using POP.
- First, enable the POP server settings on your Gmail. For this, first, go to Settings>> Forwarding and POP/IMAP>> Enable POP for all mail.

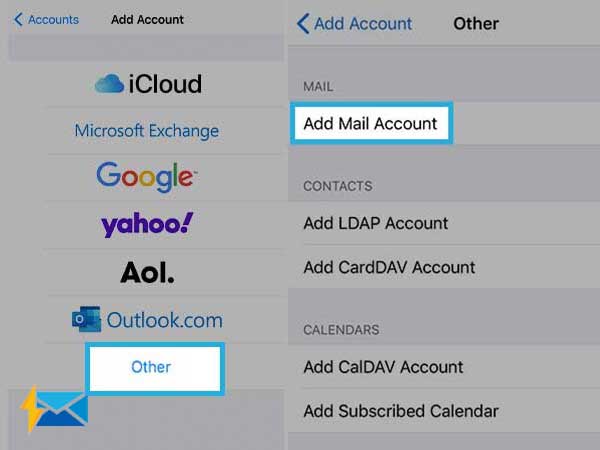
- Now, go to Settings and then Passwords and accounts>> Add account>> other>> Add Mail Account.
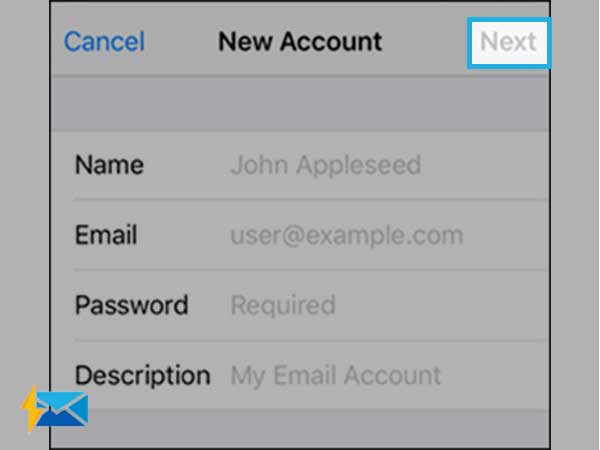
- Then, enter your name, email address, and password. Hit “Next”.
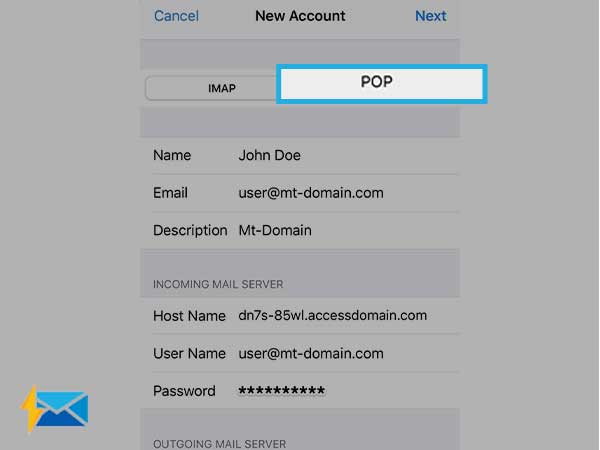
- Choose POP.
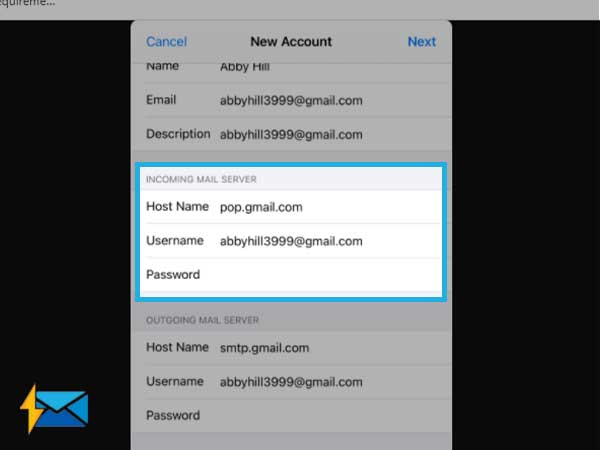
- Now, go to Incoming Mail Server and provide Gmail POP server Settings:
- Host Name: pop.gmail.com
- User Name: Your full email address
- Password: The password to your email account
Important Note: If you have the two-factor authentication enabled, you can use the app password instead of the account password.
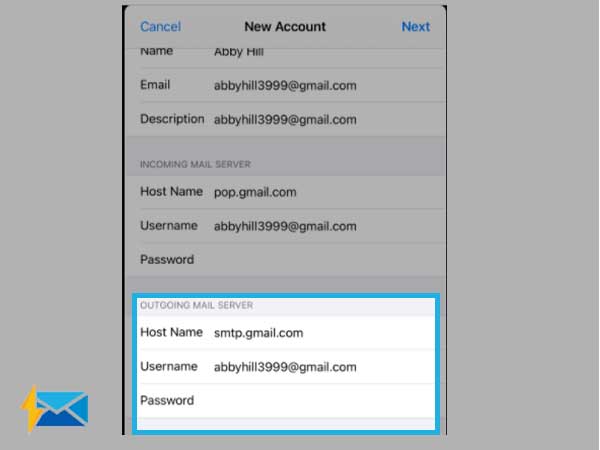
- Now, go to the Outgoing Mail Server and then provide Gmail SMTP Server settings:
- Host Name: smtp.gmail.com
- User Name: Your full email address
- Password: The password to your email account
- Click Save.
- Now, choose the account you added from the list.
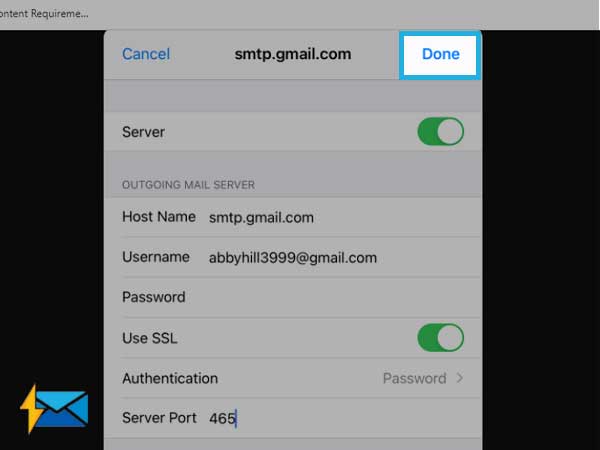
- Click on smtp.gmail.com from the bottom of the page and the same from the top of the next page.

- Toggle the switch to Use SSL.
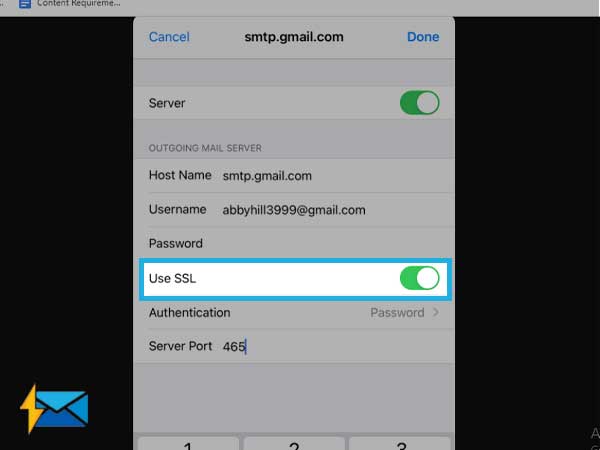
- From the Server Port, enter 465 instead of the existing number.

- Click Done.
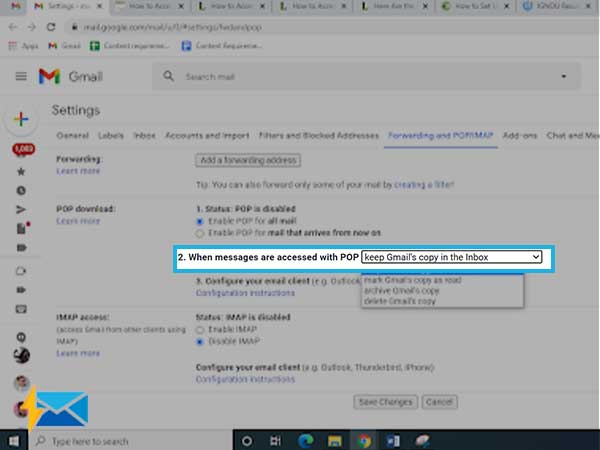
Important Note: For specific POP settings on your Gmail account, you can delete the email on your iPhone, without deleting it from your Gmail account. For this, go to Gmail Forwarding IMAP and POP settings and then select “When messages are accessed with POP” followed by “keep Gmail’s copy in the Inbox”.
Share