Instructions To Setup and Configure Yahoo Mail in Outlook Email Client (All Versions)
Popular email clients like MS Outlook, can help you centralize all your email accounts (be it on Gmail, Yahoo or any other) and their data in one place. Wondering how? Well, simply through the setup and configuration process. With configuring your accounts at one platform, it becomes easier for you to access and manage them altogether.
However, those who’re not from a technical background, find it difficult to do so because they have little or no idea of configuring email accounts in Outlook. Therefore, considering that in mind, today we’ve come out with this blog to enlighten you precisely about the process of how to set up Yahoo Mail in Outlook. So, if you are using a Yahoo Mail account and wish to add it in Outlook for convenient access of the same then, before getting started with the process, make sure to meet the following prerequisites:
List of Prerequisites to Setup Yahoo Mail Account in MS Outlook
- A strong and stable network connection.
- User Information such as email address, username, and password of your Yahoo email account.
- The following Yahoo Mail (IMAP) Server Settings for MS Outlook. [Note: Consider IMAP over POP. The former is more advanced and flexible to sync emails across all devices.]
| IMAP Mail Server Settings of Yahoo Mail |
|
|
- Backup of Yahoo email account data to avoid any important data loss during the configuration of Yahoo with Outlook.
- Prepare Yahoo to accept sign-ins from Outlook. However, as it depends on whether you’ve enabled two-step verification or not, you’ve to execute the steps accordingly to give Outlook permission to connect with Yahoo:
| Two-Step Verification Disabled? | Two-Step Verification Enabled? |
| 1. In this case, set your Yahoo Mail account to allow email clients (Outlook) to access it using your Yahoo account sign-in password only— | 1. In this case, generate a Yahoo Mail app password to use the same in place of your Yahoo Mail sign-in password when you configure Yahoo with Outlook— |
| 2. To begin, open Google or any of your preferred web browsers. | 2. Here also, begin by log in to your Yahoo Mail account. |
| 3. Then, paste this link https://login.yahoo.com/ in its URL address bar and hit the enter button. | 3. Then, navigate from your ‘Profile Name’ to ‘Account Info’ and click on the “Account Security” tab. |
| 4. On the ‘Yahoo Sign-in Page’ enter the login credentials of your account correctly and click on the ‘Sign-in’ button to access your Yahoo account. | 4. Inside it, scroll down to select the “Generate App Password” option. |
| 5. Inside it, click on your “Profile Name” followed by “Account Info.” | 5. After that, you can select the version of Outlook that you want to use from the following: Outlook iOS, Outlook Android, or Outlook Desktop. However, here you’ve to simply select the “Outlook Desktop” version from the menu. |
| 6. In continuation, select “Account Security” tab. | 6. Once you’re done selecting, click on the ‘Generate’ button. |
| 7. There, you’ve to turn on the “Allow apps that use less secure sign in” toggle switch. | 7. In doing so, a new window will appear that contains the password key as well as the instructions for using it. |
| 8. Now, your Yahoo Mail account will accept sign-ins from Outlook and that’s how your account is all prepared to configure in Outlook. | 8. In the end, just copy the ‘Code’ and hit the ‘Done’ button. |
Now, as you’re done fulfilling the basic prerequisites for the configuration of Yahoo Mail in Outlook, move forward to follow the below-mentioned instructions about how you can easily set up Yahoo Mail in (all) Outlook versions be it 2019, 2016, 2013, 2010, 2007, 2003 and Microsoft 365. So, without wasting any more minutes, let’s begin—
Instructions to Setup and Configure Yahoo Mail in Outlook 2019, 2016 and Microsoft 365
- Step 1: Launch MS Outlook (whatever version you’ve out of the three) on your PC.
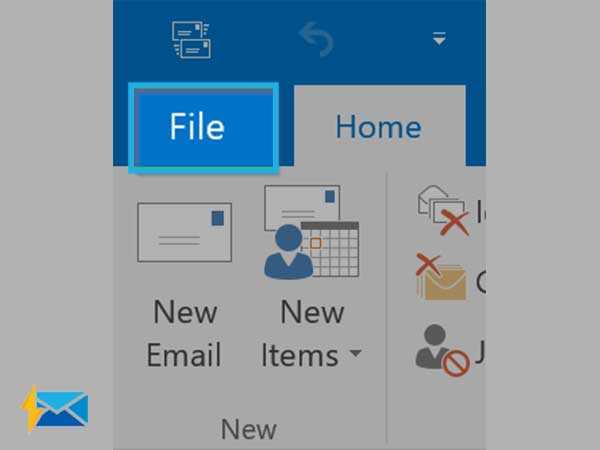
- Step 2: Go to its “File” tab.
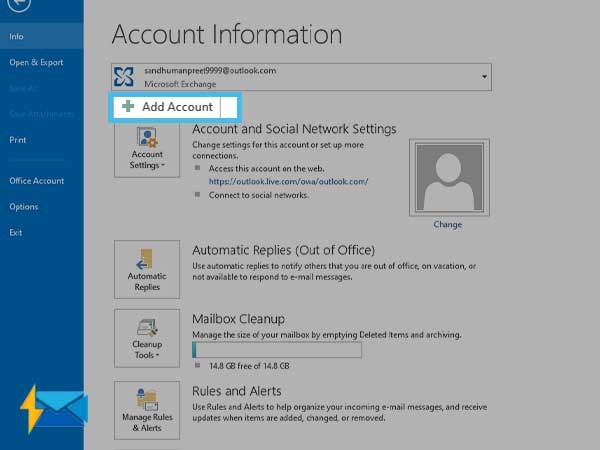
- Step 3: Select “Info” option and choose “Add Account” tab.
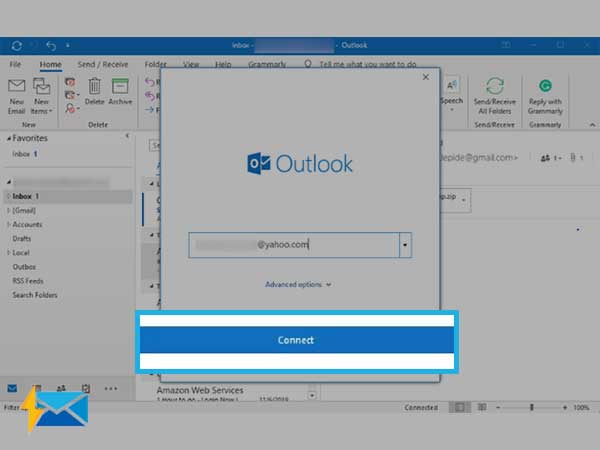
- Step 4: Inside that new tab, enter the “Email Address” of your Yahoo Mail account at the desired space.
- Step 5: Then, simply click on the “Connect” tab.
- Step 6: There, all you have to do is enter the “Sign-in Password” of your Yahoo Mail account in the required text-field. [Note: Here, you’ve to remember that if the two-step verification is enabled for your Yahoo Mail account then, instead of your Yahoo account’s sign in password you’ve to enter the “App Password” that you generated earlier.]
- Step 7: And, once you’re done entering the correct password of your Yahoo Mail account, simply click the “Connect” option in the end to finally finish adding your Yahoo account in Outlook 2019, 2016 and Microsoft 365.

Instructions to Setup and Configure Yahoo Mail in Outlook 2013 & 2010
- Step 1: To initiate the setup process in either Outlook 2013 or Outlook 2010, launch the respective version on your PC.
- Step 2: Then, click on the “File” tab and select “Info” to choose “Add Account” from there.
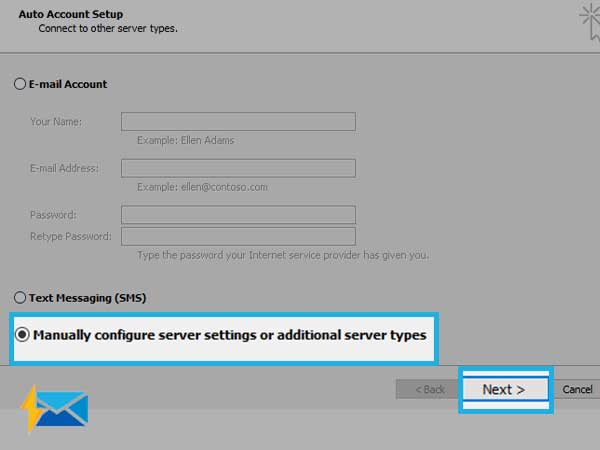
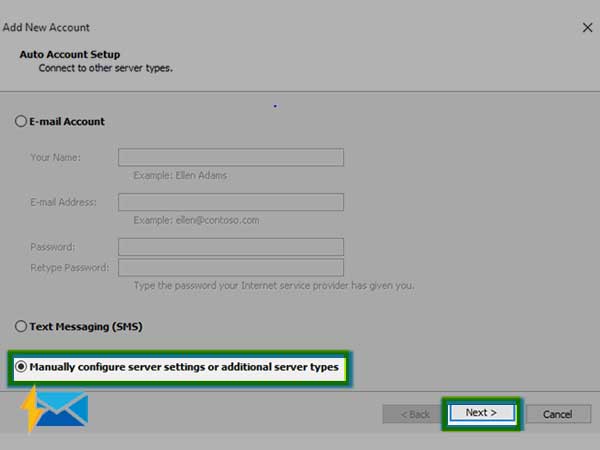
- Step 3: In doing so, you’ll reach onto the new window where you’ve to select the “Manual setup or additional server types” option. [Note: If you’re using Outlook 2010 version then, choose “Manually configure server settings or additional server types.”]
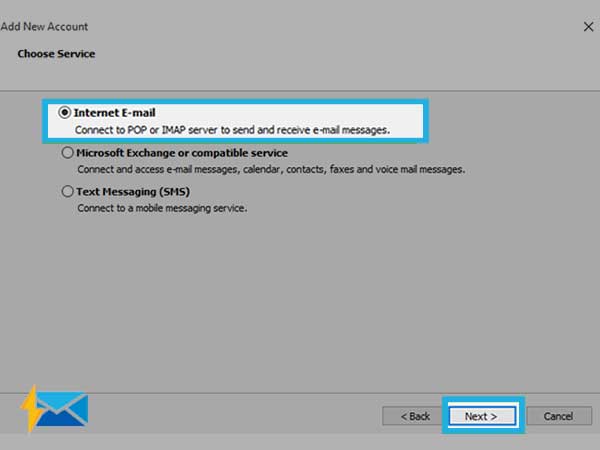
- Step 4: After selecting the same, click on the “Next” button to choose “IMAP or POP—connect to a POP or IMAP email account” option. However, in Outlook 2010, choose “Internet-Email.”
- Step 5: Now, hit the “Next” button to reach onto the new window where you’ve to enter the mail server settings for your account. And, to do so—
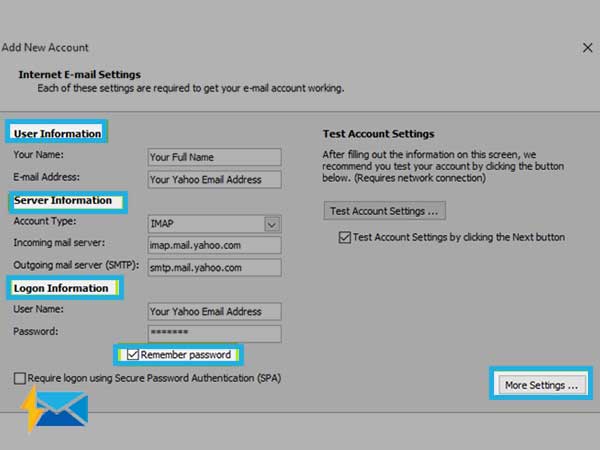
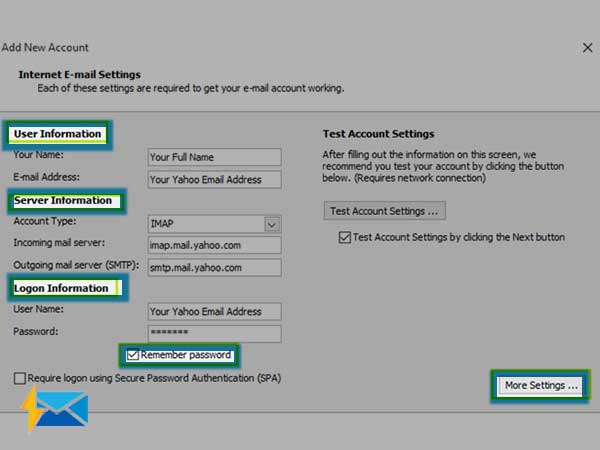
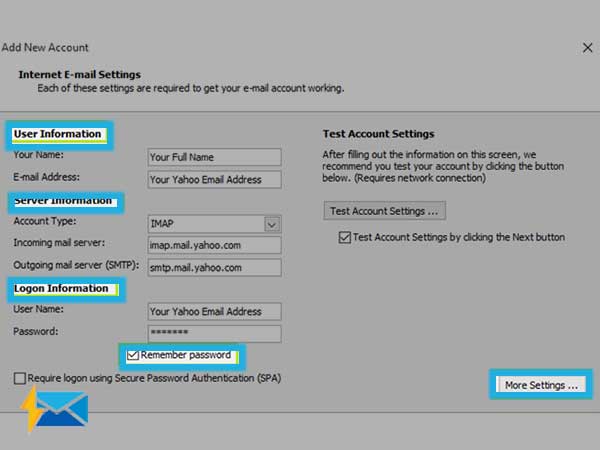
- Step 6: Firstly enter your ‘name and email ID’ of your Yahoo Mail account in the “User Information Section.”
- Step 7: Secondly, in the “Server Information Section” click on the drop-down icon of “Account-Type” option and select “IMAP” from it.
- Step 8: In continuation, enter ‘imap.mail.yahoo.com’ in the “Incoming Mail (IMAP) Server text box” and similarly, enter ‘smtp.mail.yahoo.com’ inside the “Outgoing Mail (SMTP) Server text box.”
- Step 9: Thirdly, in the “Logon Information Section” enter the “Username” from your Yahoo Mail address (if the same isn’t automatically displays at the desired text-box) and along with that also input your Yahoo account’s “Sign-in Password” or “App Password” you have generated earlier (in case your account uses two-step verification security).
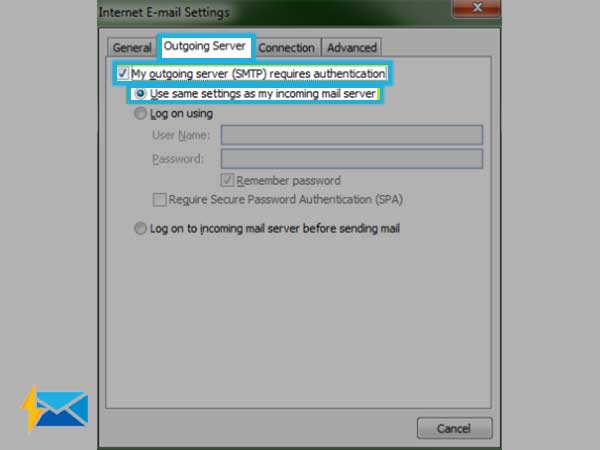
- Step 10: Now, click on “More Settings” option to open the “Outgoing Server” tab by clicking on it.
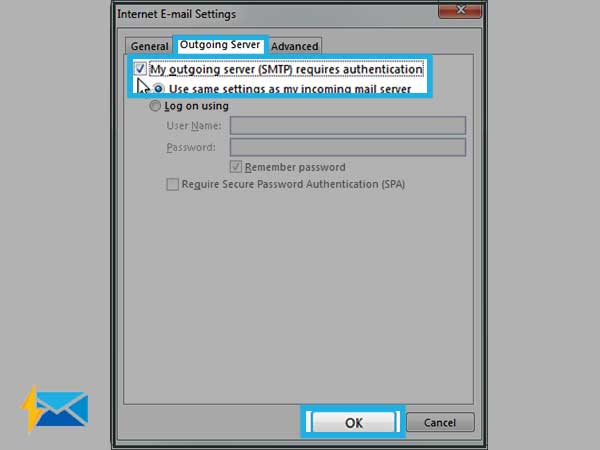
- Step 11: Under it, select the checkbox that reads—“My outgoing server (SMTP) requires authentication.”
- Step 12: Next, you’ve to just hit the radio button in front of the “Use the same settings as my incoming mail server” option.
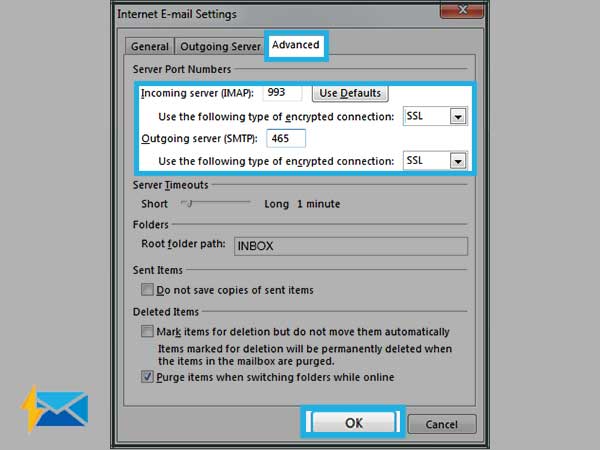
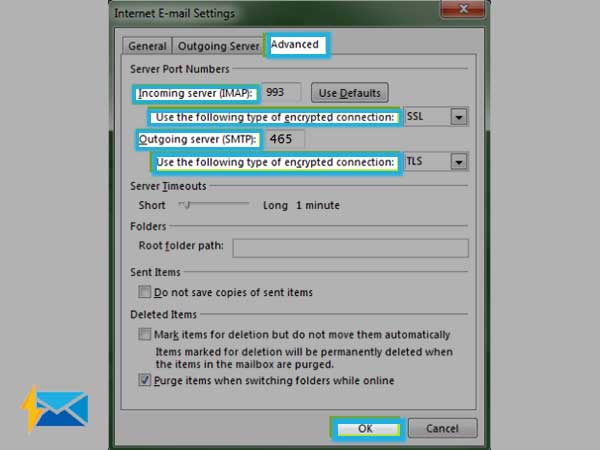
- Step 13: Further, click on “Advanced” tab and enter the following server port numbers—
- “993” for Incoming Server (IMAP)
- “465” for Outgoing Server (SMTP)

- Step 14: In addition, click on the “Use the following type of encrypted connection dropdown arrow” and choose “SSL” option for both ‘Incoming server (IMAP)’ and ‘Outgoing server (SMTP).’
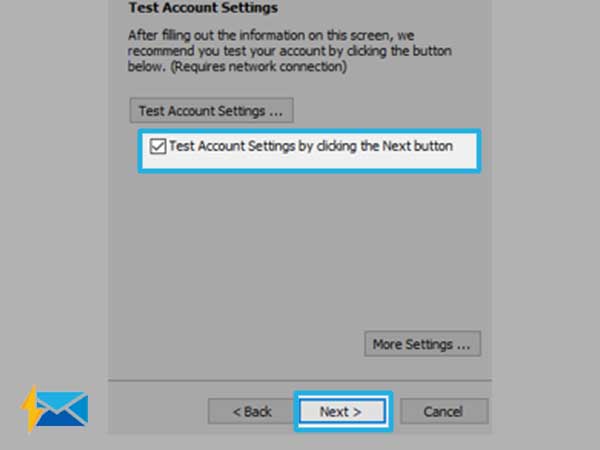
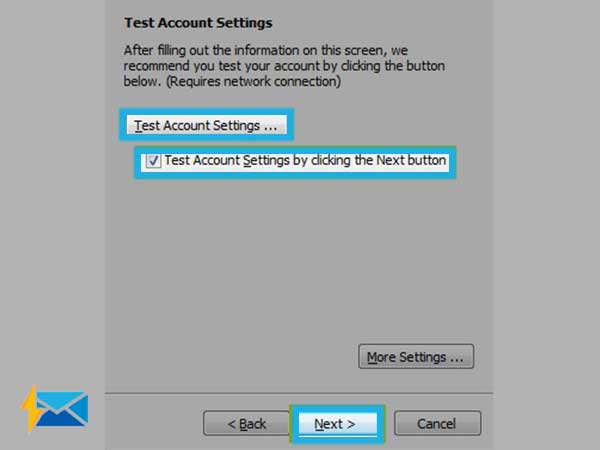
- Step 15: Now, click on the “OK” button to return onto the previous window and there, hit the “Next” button. This action will test the account settings that you’ve entered to ensure whether everything is correct or not!
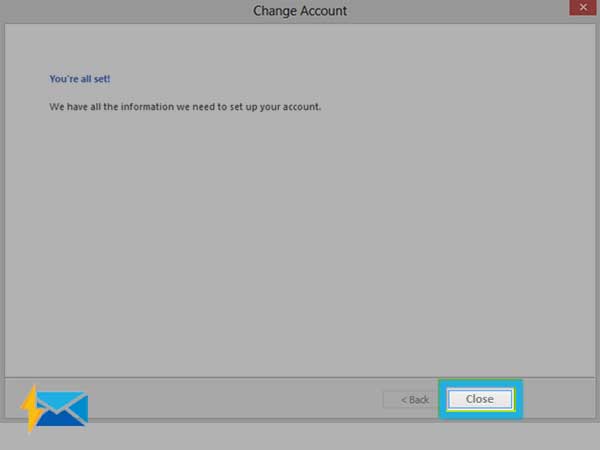
- Step 16: In the end, if the test is completed successfully, click “Close” as your Yahoo Mail account is now finally configured with Outlook.
Instructions to Setup and Configure Yahoo Mail in Outlook 2007
- Step 1: Start by launching Outlook 2007 on your PC screen.
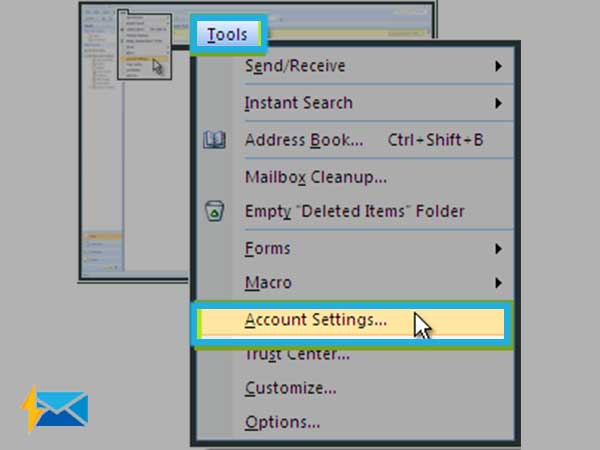
- Step 2: Once the same opens, go to its “Tools” section.
- Step 3: From it, select the “Account Settings” option.
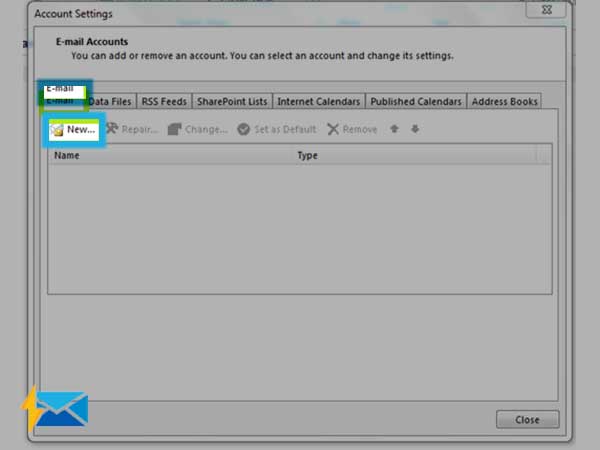
- Step 4: Then, inside the account settings window, go to the “Email” tab and click on “New.”
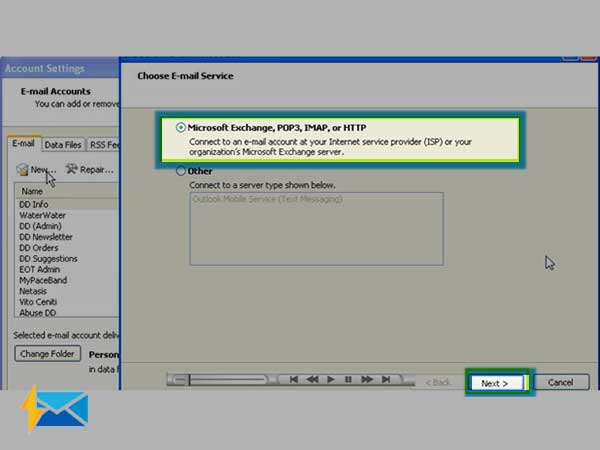
- Step 5: Further, select the “Microsoft Exchange, POP3, IMAP, or HTTP” radio button and then, simply press “Next.”
- Step 6: There on the next window, check mark the option of “Manually configure server settings or additional server types” and then, again press the “Next” Button.
- Step 7: Now, select “Internet E-mail” option from the listed options and once again, press “Next” to reach onto the “Add New Email Account” window.
- Step 8: On the same, you’ve to enter the mail server settings for your Yahoo account in the following three sections—
- User Information Section: Under it, enter your name and Yahoo account’s email address.
- Server Information Section: Under it, select “IMAP” instead of “POP” from the account-type drop-down menu to enter “Incoming Mail (IMAP) Server” as ‘imap.mail.yahoo.com’ and “Outgoing Mail (SMTP) Server” as ‘smtp.mail.yahoo.com.’
- Logon Information Section: Under it, enter your Yahoo Mail account’s username and sign-in password or app password (if you’ve enabled two-step verification for your Yahoo Mail account).
- Step 9: And, once you’re done with entering the required details, click on the “More Settings” option to get access to the “Internet E-mail Settings” screen.
- Step 10: There, click on the “Outgoing Server” tab to check mark/select the following two options—
- “My outgoing server (SMTP) requires authentication” &
- “Use the same settings as my incoming mail server.”
- Step 11: In continuation, click on the “Advanced” tab and inside the same, check the box that reads—“This server requires an encrypted connection (SSL)” for both the Incoming and Outgoing Server.
- Step 12: Next, enter the “993” and “465” server port numbers in the ‘Incoming server (IMAP)’ and ‘Outgoing server (SMTP)’ text box respectively.
- Step 13: Now, click on the “OK’ button to get back to the previous window and there, hit the “Next” button to simply test whether the settings you’ve entered are correct or not!
- Step 14: In the end, if everything seems fine, click “Close” to access your Yahoo Mail in Outlook as the same has been successfully added.
Instructions to Setup and Configure Yahoo Mail in Outlook 2003
- Step 1: On your PC, launch MS Outlook 2003 by clicking on its icon from the desktop.
- Step 2: Then, click on the “Tools” tab to select the “Email Accounts” option from its menu.
- Step 3: In doing so, a wizard box will open in front of you. On the same, select the “Add a new email account” option and hit the “Next” button.
- Step 4: Now, you’ve to choose “IMAP” as the type of server your Yahoo account will work with.
- Step 5: After that, press the “Next” button to reach onto the new window where all you need to do is enter the following Yahoo Mail account and server details—
- Name: Your name that you want to appear in messages you send.
- Email Address: Your Yahoo Mail email ID.
- Username: Your Yahoo username.
- Password: Your Yahoo account sign-in password or your app password (that you generated using two-step verification to secure your account)
- Incoming Mail Server (IMAP): imap.mail.yahoo.com.
- Outgoing Mail Server (SMTP): smtp.mail.yahoo.com.
- Step 6: Once you’re done entering these details, click on the “More Settings” link to reach onto the next window.
- Step 7: There, click on the “Outgoing Server” tab and inside the same, check mark the box that reads— “My outgoing server (SMTP) requires authentication.”
- Step 8: In continuation, select the “Use same settings as my incoming mail server” option.
- Step 9: Afterwards, switch to the “Advanced” tab and for both the ‘Incoming Server’ and ‘Outgoing Server’ check mark the box that states—“This server requires an encrypted connection (SSL).”
- Step 10: And then, enter “993” in the Incoming server (IMAP) text box, and “465” in the Outgoing server (SMTP) text box.
- Step 11: Now, click on the “OK” button to return to the previous “Internet Email Settings (IMAP) Settings” window.
- Step 12: There, hit the “Next” and “Finish” button respectively to complete the process of Yahoo Mail configuration in Outlook.

That’s all! This is how based on the version of your Outlook app, you can execute the setup instructions correctly to setup and configure your Yahoo Mail account in MS Outlook email client using the Yahoo IMAP and POP3 Mail server settings.
However, if you want to set up your Yahoo Mail in Outlook using its POP server settings then, check out the below-given table. Also, in regard to the same, you may also like Three Popular Ways for Successfully Syncing Yahoo Mail (Data) with MS Outlook!
| POP Mail Server Settings of Yahoo Mail | SMTP Mail Server Settings of Yahoo Mail | Yahoo Account’s Login Information |
| Incoming Server Host Name – pop.mail.yahoo.com | Outgoing Server Host Name – smtp.mail.yahoo.com | Email Address – Your full Yahoo email address |
| Incoming Mail Server Port – 995 | Outgoing Server Port – 465 (with SSL) | Password – Your Yahoo account’s sign-in password or app-generated password (in case two-step verification is enabled) |
| Requires SSL Encryption – Yes | Requires SSL Encryption– Yes | —- |
Requires Authentication – Yes | Requires Authentication – Yes | —- |
Share