PACBELL.NET POP, IMAP, And SMTP Email Settings To Configure It On Different Platforms.
The PACBELL.NET email account is known for its versatility and flexibility as it can be set up on multiple web platforms namely Outlook, Thunderbird, Mailbird, Apple Mail, and more. But without the right knowledge of the setup process, you might feel it difficult to complete the configuration, thus we have especially designed a guide that will help you set up your Pacbell.Net Email using Incoming (IMAP) and Outgoing (POP) settings so that you can log in to PACBELL.NET email account on any device of your choice.
Now, let’s get started with the ways to set up a PACBELL.NET email account, but first note the PACBELL.NET IMAP, POP, and the SMTP settings.
PACBELL.NET Incoming (IMAP) Mail Server details
| Account Type | IMAP |
| User Name | Your Email Address (For Ex: user@domain.com) |
| Password | Your Email Account Password |
| Server hostname | imap.mail.att.net |
| Server Port | 993 |
| Required Authentication | Yes, Email account Username and Password |
| SSL/TLS | YES |
PACBELL.NET Outgoing (SMTP) Mail Server details
| Account Type | SMTP |
| User Name | Your Email Address (For Ex: user@domain.com) |
| Password | Your Email Account Password |
| Server hostname | smtp.mail.att.net |
| Server Port | 465 |
| Required Authentication | Yes, Email account Username and Password |
| SSL/TLS | YES |
As now we are aware of general PACBELL.NET Incoming and Outgoing mail server settings, we now need to look into the ways how we can set up a Pacbell.net email account on different platforms.
We will be discussing PACBELL.NET email account setup instructions for:
| Setup on Android Phone |
| Setup on Iphone |
| Setup on Apple Mail |
| Setup on eM Client |
| Setup on Entourage |
| Setup on Incredimail |
| Setup on Mailbird Lite |
| Setup on ThunderBird |
| Setup on Outlook 2007 |
| Setup on Outlook 2010 |
| Setup on Outlook 2013 |
| Setup on Outlook 2016 |
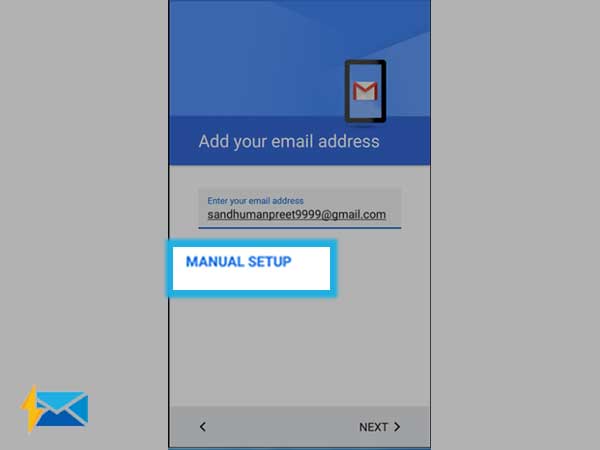
Manual Setup of PACBELL.NET email account on Android Phones
Step 1: Begin with tapping the Mail icon from your smartphone and click “Add Account”.
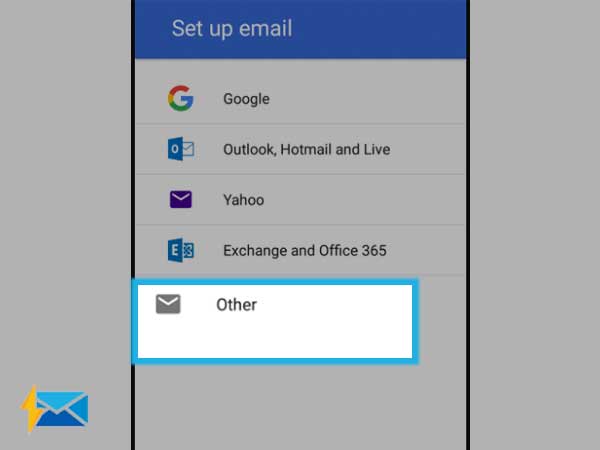
Step 2: Then, select the Email service provider from the given list. In the case of PacBell, you have to select “Other”.
Step 3: Now login with email address and password, then select “Manual Setup”.
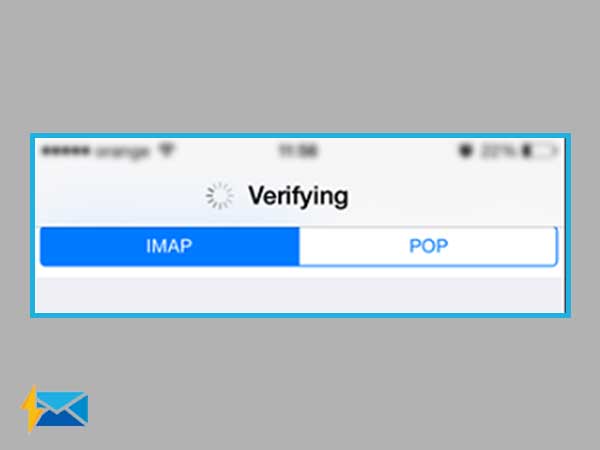
Step 4: Choose IMAP.
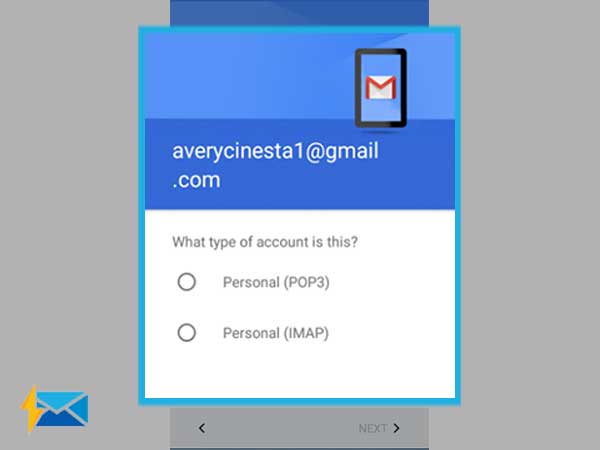
Step 5: Then, type in your email password.
Step 6: Make sure to enter underneath settings in case you select the IMAP option
- IMAP Server: imap.mail.att.net
- Security type is None
- 993 in Port section for IMAP
- Secure – Port: 993 and Security Type: SSL/TLS (Accept all certificates)
- Insecure – Port: 143 and Security Type: None (Accept all certificates)
Step 7: For outgoing SMTP Settings in PACBELL.NET set underneath settings and press the Select option and hit “Next”.
- SMTP Server: smtp.mail.att.net
- Security type is None
- 465 in Port for outgoing SMTP
- Outgoing (SMTP) Secure – Port: 465 for and Security Type: SSL/TLS (Accept all certificates)
- Outgoing (SMTP roaming server) Secure – Port: 587 and Security Type: SSL/TLS (Accept all certificates)
- Outgoing (SMTP) – Port: 25 and Security Type: None (Accept all certificates)
- Outgoing (SMTP roaming server) Insecure – Port: 587 and Security Type: None (Accept all certificates)
Step 8: Click on Done.
Now you are done with the server settings in your PACBELL.NET email account on your Android phone. You can use it for regular usage.
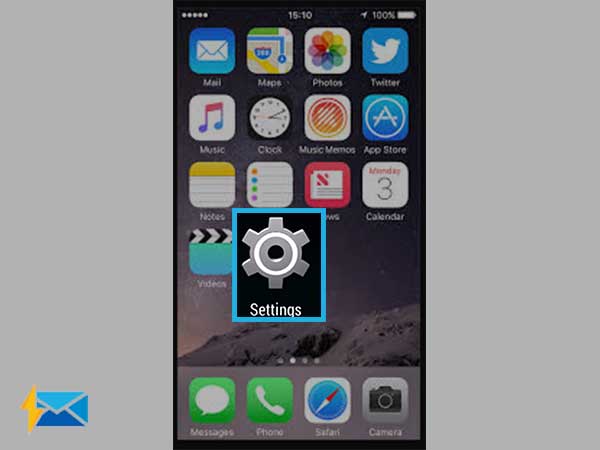
Manual Setup of PACBELL.NET email account on iPhone
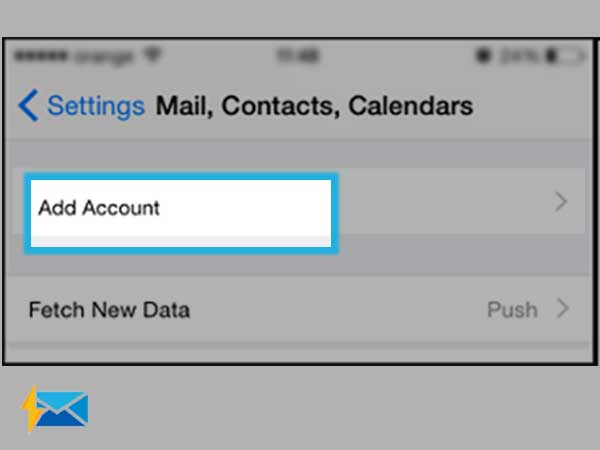
Step 1: At first, begin tapping on the Settings menu
Step 2: Select Mail or Mail Contacts and Calendars.
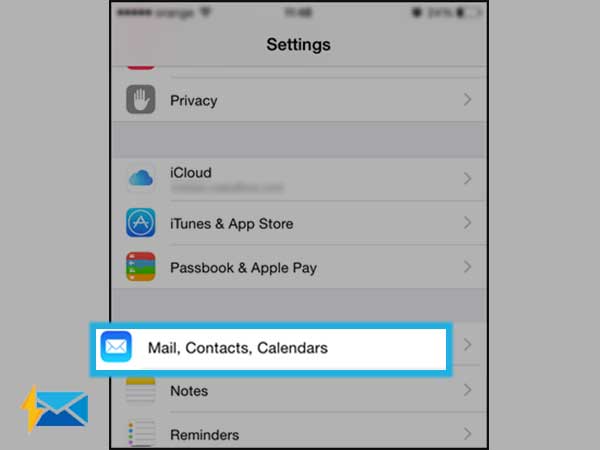
Step 3: Tap on Accounts
Step 4: Now tap on Add Account
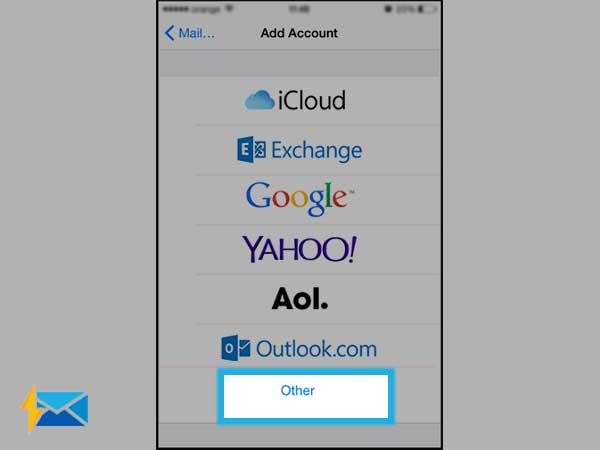
Step 5: Choose the “Other” option from the menu.
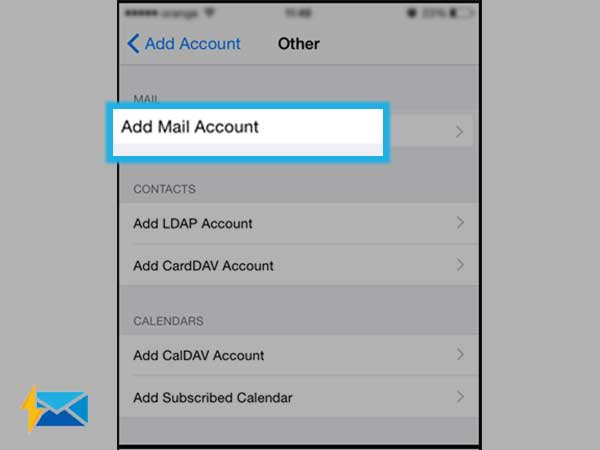
Step 6: Now tap on Add Mail Account.
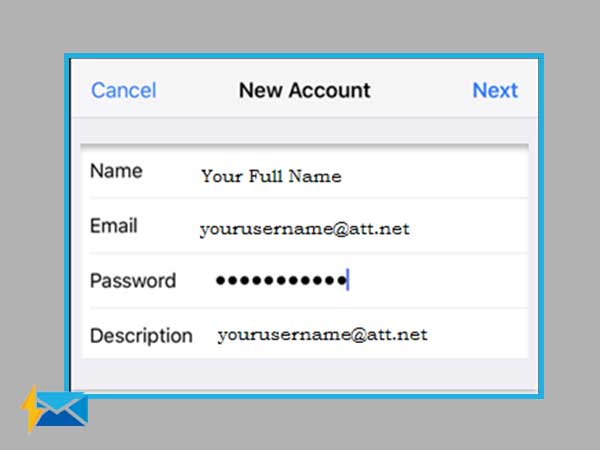
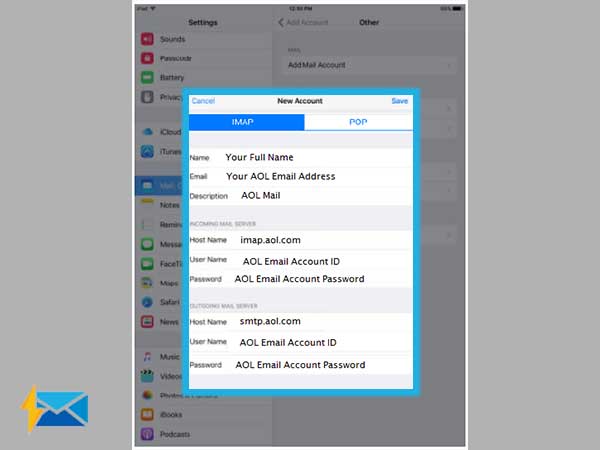
Step 7: Enter your Name, Email & Password, and then tap on Next.
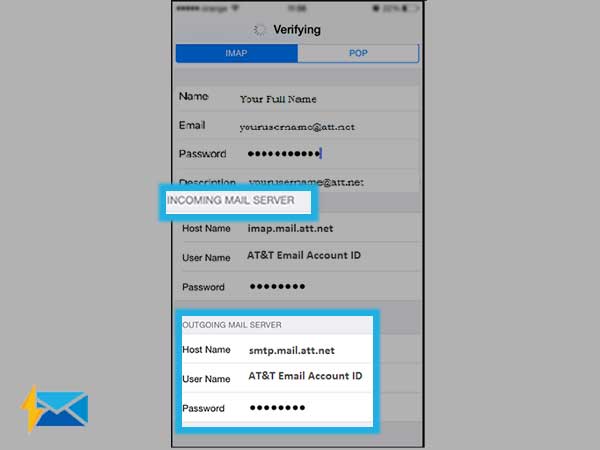
Step 8: Select IMAP, go to the Incoming Mail Server option and enter details like Host Name, User name, and password.
Step 9: On the Outgoing Mail Server, enter the same details then click on Next. Type below details in the Host Name field;
- Incoming Mail Server Host Name is imap.mail.att.net
- Outgoing Mail Server Host Name is smtp.mail.att.net
Step 10: Now a message will pop up on the screen to verify the server identity, tap on “Details” and then on “Trust”.
Step 11: Tap on Save
Step 12: Select the new account
Step 13: Select the SMTP server
Step 14: Verify the SMTP settings given below;
- User Name: Full PACBELL.NET email address
- Password: Your email password
- Use SSL is On
- Outgoing (SMTP) Secure – Port: 465 for and Security Type: SSL/TLS (Accept all certificates)
- Outgoing (SMTP roaming server) Secure – Port: 587 and Security Type: SSL/TLS (Accept all certificates)
- Outgoing (SMTP) – Port: 25 and Security Type: None (Accept all certificates)
- Outgoing (SMTP roaming server) Insecure – Port: 587 and Security Type: None (Accept all certificates)
- Authentication is Password
- Server Port is 465.
Step 15: Now tap on “Done” to finish the process
That’s all, you are ready to use the PACBELL.NET email account on your iPhone device.
Manual Setup of PACBELL.NET email account on Apple Mail
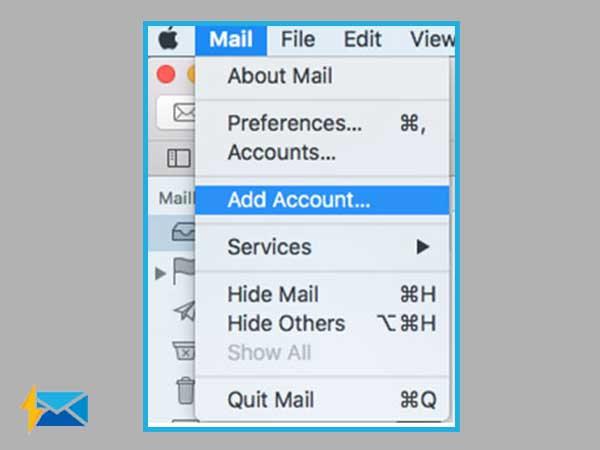
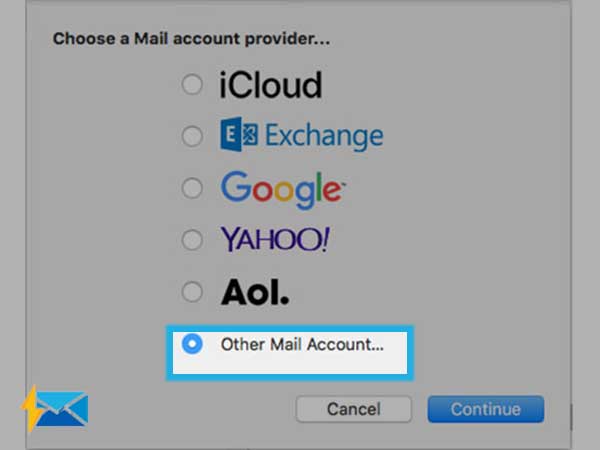
Step 1: Open the Apple Mail app using the toolbar and select Mail and Add Account.
Step 2: Now select the automatic configuration of the email account, otherwise select “Other Mail Account”.
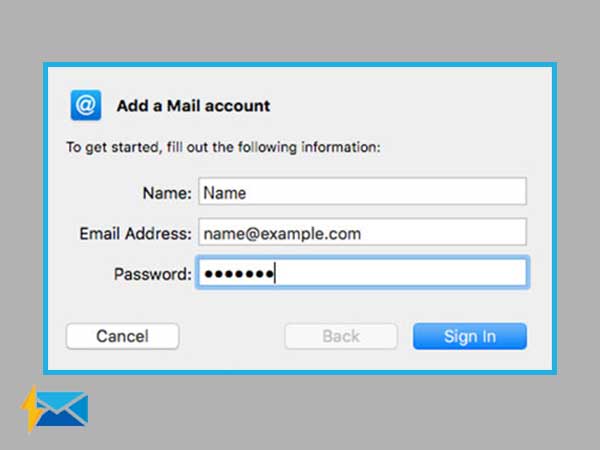
Step 3: Provide your email details mentioned below and click Sign-in.
- Your name: Type your name. This is the name of the sender in email messages that you send from this account.
- Email address: Full PACBELL.NET email address
- Password: Email account password
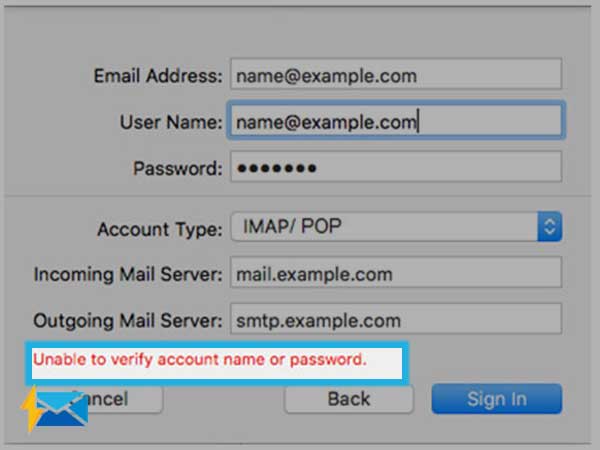
Step 4: Enter the settings given below and select Sign-in.
- Email Address & User Name: Your full PACBELL.NET email address
- Password: Your PACBELL.NET password
- Account Type: IMAP or POP as per your preference (IMAP is the default).
- Incoming Mail Server Host Name: imap.mail.att.net
- Outgoing Mail Server Host Name: smtp.mail.att.net
- For domains that are still on the transfer, or propagation, you are advised to use the IP Address instead of using Incoming & Outgoing Mail Server
- Avoid “Unable to verify account name or password”.
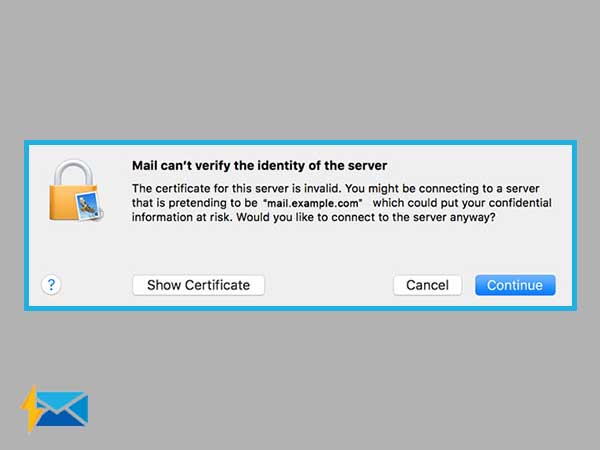
Step 5: Now, ignore 2 server identity messages >> Continue. You can add the certificate to your trust settings so that you won’t see the message again.
Step 6: Select the apps you want to use and click “Done”.
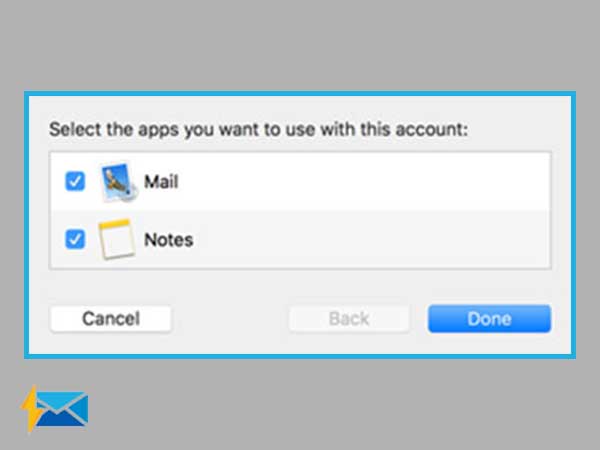
Congratulations! Now, your account Pacbell.net email account has been set up on the Apple mail.
Manual Setup of PACBELL.NET email account on eM Client
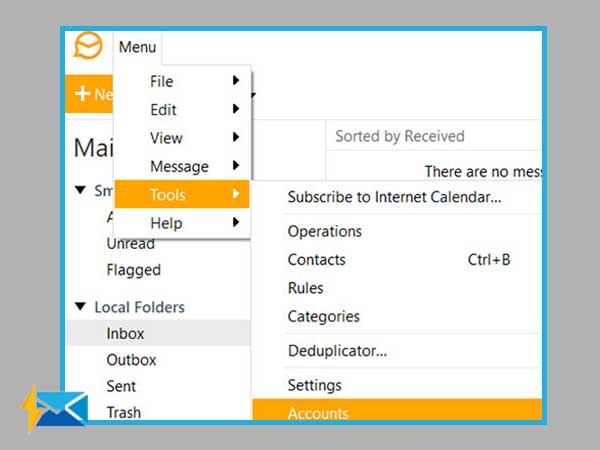
Step 1: Start by launching the eM client on your device and click Menu>>Tools>>Accounts.
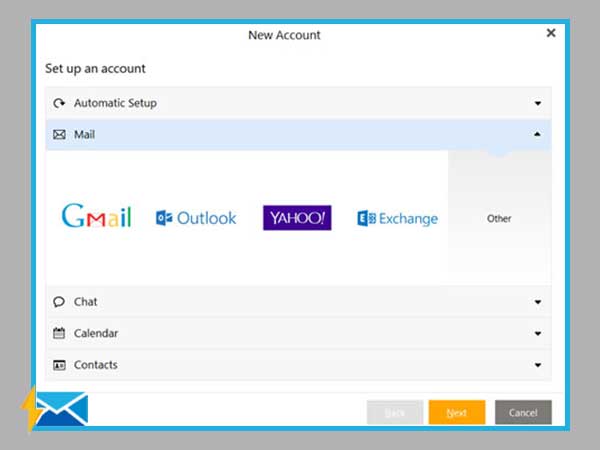
Step 2: Now, go to Mail Section. Either select automatic configuration or select the email service provider, for PacBell select “Other” and click “Next” to pursue manual setup.
Step 3: Type in your PACBELL.NET email address.

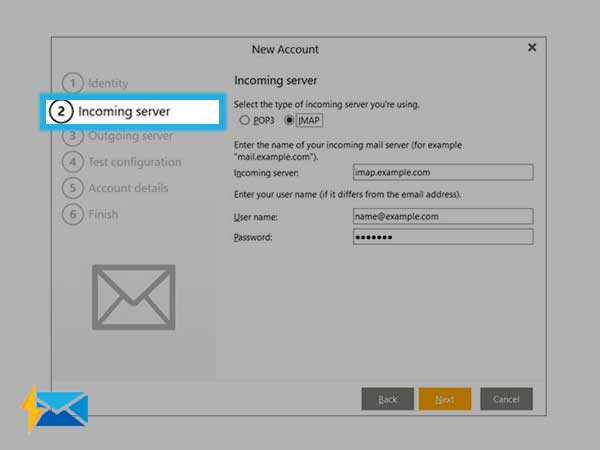
Step 4: Now, you have to enter the below-given details, first select IMAP or POP. (IMAP is recommended).
- Your name: Type your name. This will be the name of the sender in email messages.
- Email address: Full PACBELL.NET email address
- Password: Email password
- Incoming Mail Server Host Name: imap.mail.att.net.
Step 5: Type-in your outgoing mail server details. If required changed the auto-populated fields, and click Next.
- Outgoing Mail Server Host Name: smtp.mail.att.net.
Step 6: If there are failed configuration tests, select “Fix” to get rid of errors and click “Next”.
Step 7: Type in your name and email address.
Step 8: Click Finish to complete the email configuration.
Now, it’s all done and you can use your PacBell account on the eM client.
Manual Setup of PACBELL.NET email account on Entourage Client
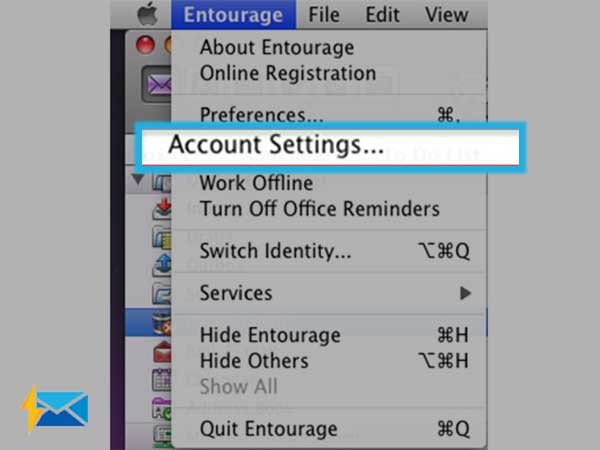
Step 1: Open Microsoft Entourage on your device and click Account Settings.
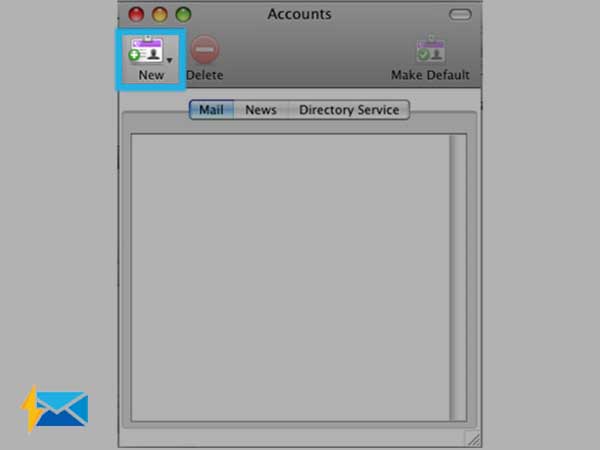
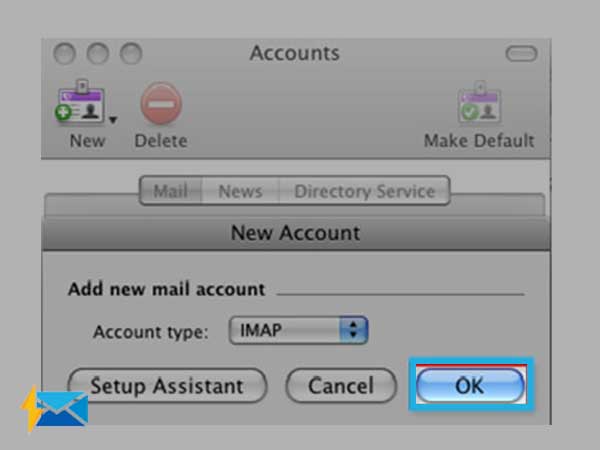
Step 2: Click on “New” from the Account Window.
Step 3: Select the email account type from IMAP, POP, or Exchange. (IMAP is recommended).
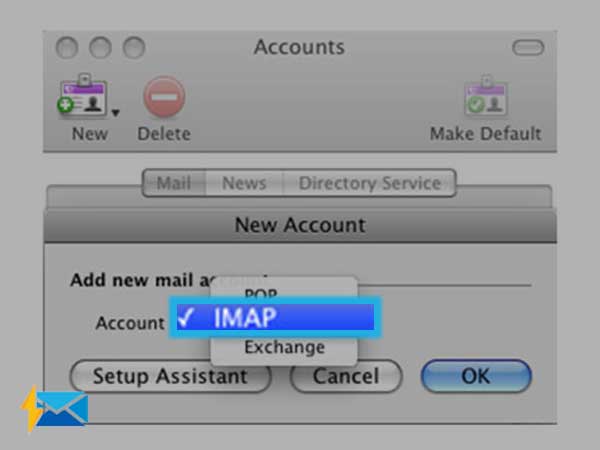
Step 4: Click Ok to Continue.
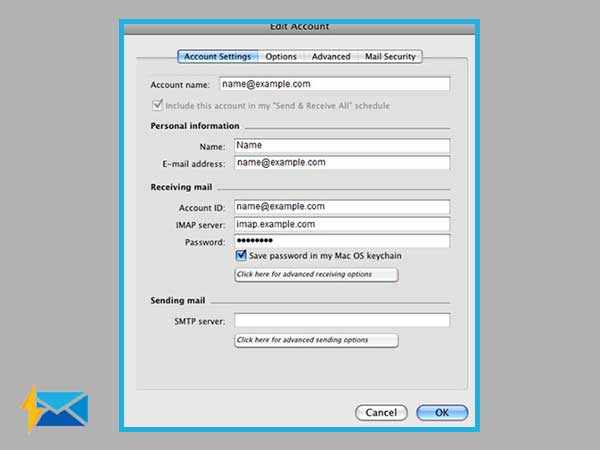
Step 5: After typing the required information, select “Click here for advanced receiving options”.
- Choose an account name: name of the account for the Microsoft Entourage.
- Type Name: This is the name that will be displayed to people when you send mail.
- Type E-mail address. Enter PACBELL.NET email address.
- Enter your full PACBELL.NET: e-mail address will be used as Account ID.
- Incoming (IMAP) mail server: imap.mail.att.net
- Enter Password for your PacBell email account.
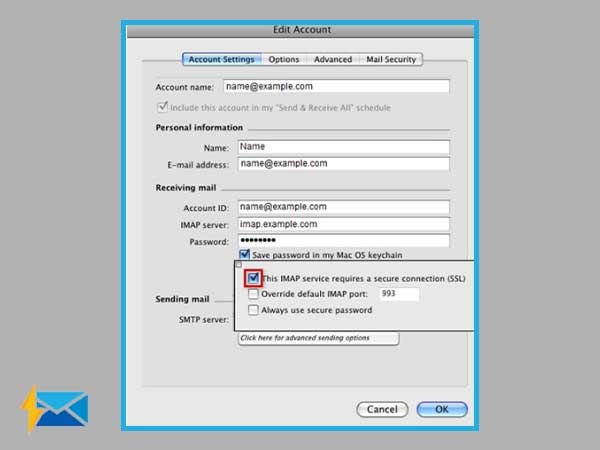
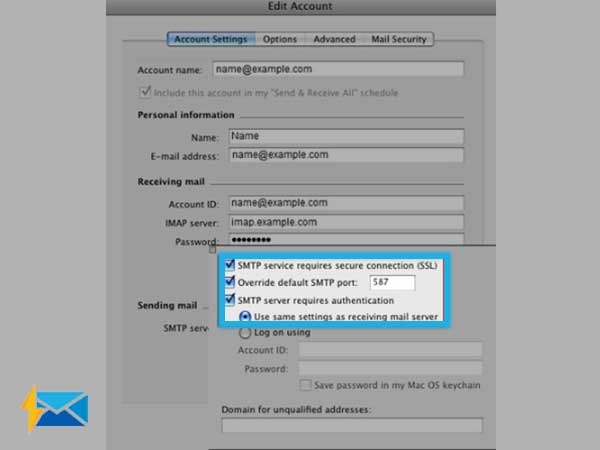
Step 6: Now select “This IMAP service requires a secure connection”. Now, click anywhere on the screen and click on “Edit Account”.
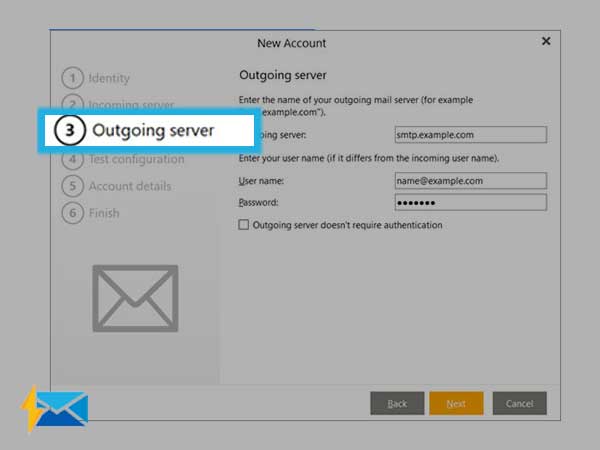
Step 7: In the Outgoing mail servers click on the option named “Click here for advanced sending options”.
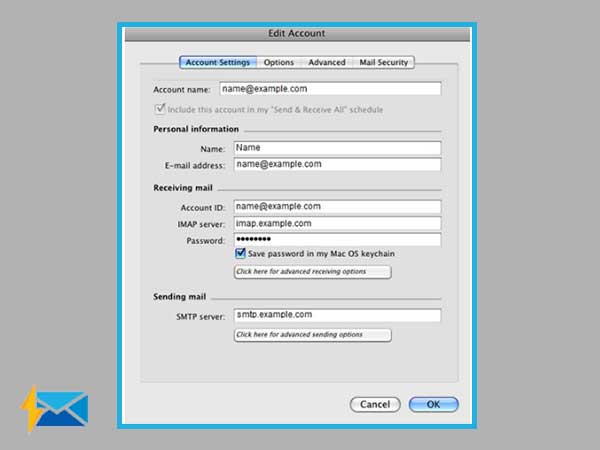
- Outgoing mail server for PACBELL.NET: smtp.mail.att.net
Step 8: Select all the following options.
- SMTP service requires a secure connection (SSL).
- Override the default SMTP port and enter port 587 or 465. Here are the general SMTP settings to use.
- Outgoing (SMTP) Secure – Port: 465 for and Security Type: SSL/TLS (Accept all certificates)
- Outgoing (SMTP roaming server) Secure – Port: 587 and Security Type: SSL/TLS (Accept all certificates)
- Outgoing (SMTP) – Port: 25 and Security Type: None (Accept all certificates
- Outgoing (SMTP roaming server) Insecure – Port: 587 and Security Type: None (Accept all certificates)
- SMTP server requires authentication and then choose “Use same settings as receiving mail server”. Now tap anywhere on the “Edit Account” option in the background.
Step 9: Click OK
Now, as it’s all done and ready to use your email account on Entourage.
Manual Setup of PACBELL.NET email account on IncrediMail Client
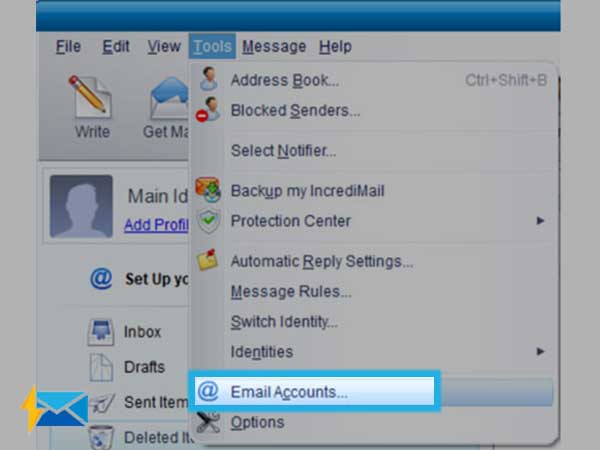
Step 1: Open IncrediMail on your device and go to Tools using the top menu. Then, select “Email Accounts”.
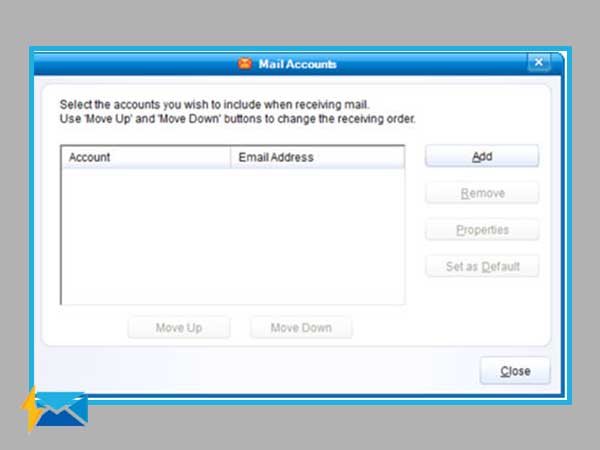
Important note: For first time users, it is recommended to start from step 4:
Step 2: Click Add.
Step 3: If you don’t want to go with automatic configuration, however for the manual configuration select “Other” from the list of email service providers.

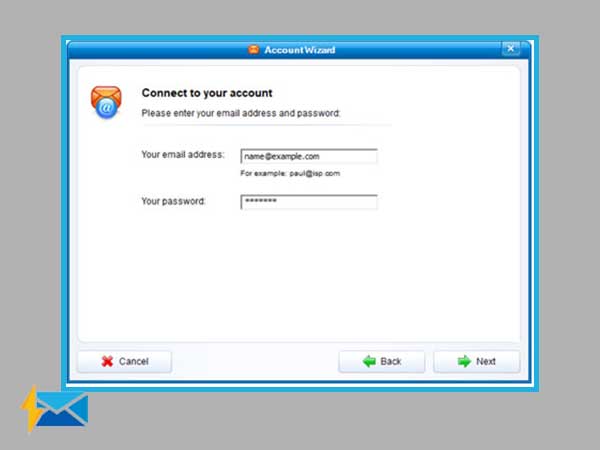
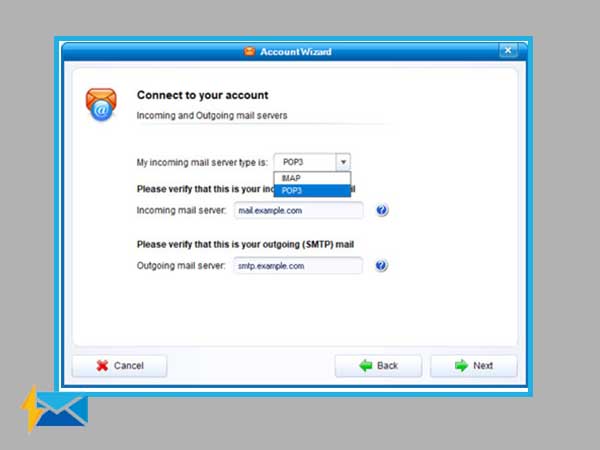
Step 4: Now, type your email details using the “AccountWizard” and click Next.
- Provide PACBELL.NET email address
- Provide email account password
Step 5: Now, you need to enter the below-mentioned settings for Incoming (IMAP) and Outgoing (SMTP) mail servers. And, hit “Next”.
- Account type: Choose IMAP from the dropdown
- Incoming mail server (IMAP): imap.mail.att.net
- Outgoing mail server (SMTP): smtp.mail.att.net
- General server port settings for incoming and outgoing:
- Outgoing (SMTP) Secure – Port: 465.
- Security Type: SSL/TLS (Accept all certificates)
- Outgoing (SMTP roaming server) Secure – Port: 587
- Security Type: SSL/TLS (Accept all certificates)
- Outgoing (SMTP) – Port: 25
- Security Type: None (Accept all certificates)
- Outgoing (SMTP roaming server) Insecure – Port: 587
- Security Type: None (Accept all certificates)
Step 6: Click OK to finish
You are now ready to use your Pacebll.net email account on IncrediMail!
Manual Setup of PACBELL.NET email account on MailBird
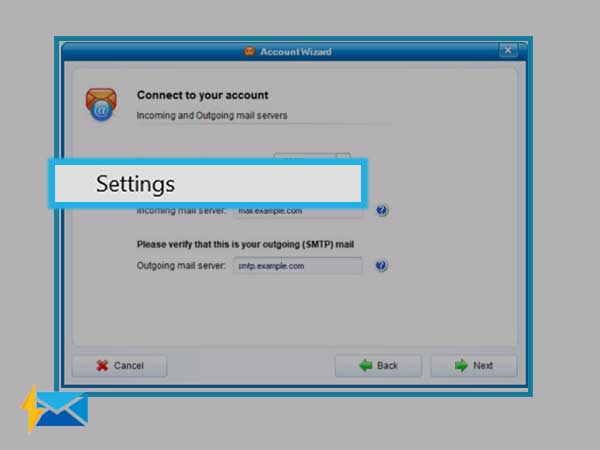
Step 1: Open MailBird lite and click on the three parallel lines icon from the top left corner and then open “Settings”.
Note: If you are adding an email account for the first time, start from step 4.
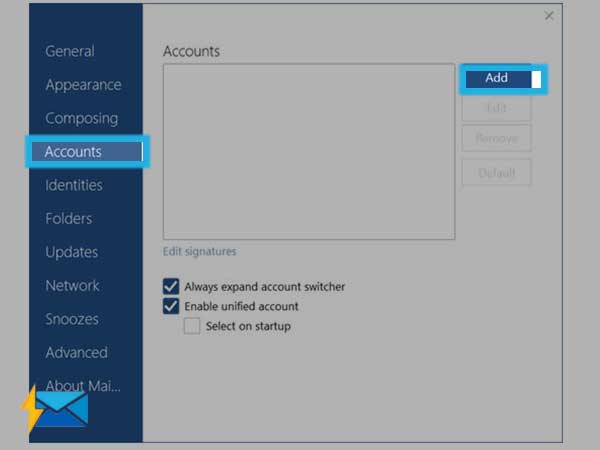
Step 2: Now, go to the Account tab and tap on the “Add” button.
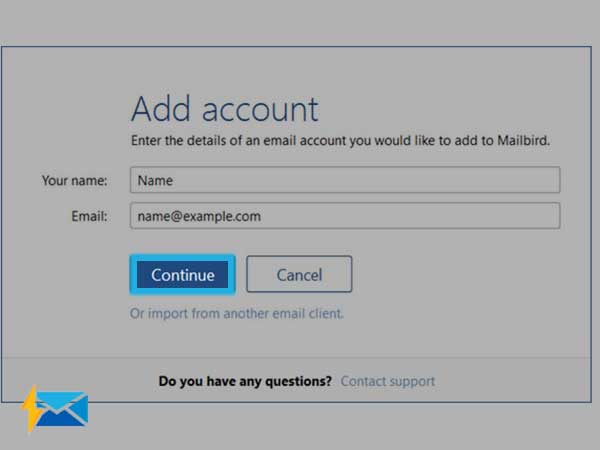
Step 3: Type in your account details in the “Add account” section and then select “Continue”.
Step 4: If Mailbird already has the “IMAP or POP3 settings” for your email account in its database, then Mailbird will update it automatically. To continue with the same settings, you need to enter your password in the respective text field. However, you can edit your settings very easily by selecting “Edit Server Settings“.
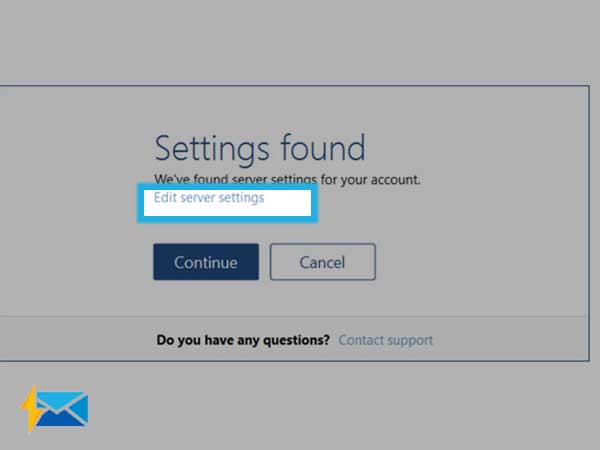
Step 5: If Mailbird can’t find settings or if you want it manually, click on “Edit Server Settings”. Then, on the displayed window, type in your server details on the screen and click “Continue”. Server settings that you need to enter are these:
Note: If you want to use the Secure SSL / TLS Settings, choose the corresponding Encryption in the respective field.
- Incoming Server type : select IMAP
- Incoming Server name: imap.mail.att.net
- Username for PACBELL.NET – your full email address
- Password for PACBELL.NET – your account password
- Outgoing Server name: smtp.mail.att.net
- Provide the PACBELL.NET email address and password for username and password fields respectively.
- The port details for incoming and outgoing servers are:
POP
- Secure – Port: 995 and Security Type: SSL/TLS (Accept all certificates)
- Insecure – Port: 110 and Security Type: None (Accept all certificates)
IMAP
- Secure – Port: 993 and Security Type: SSL/TLS (Accept all certificates)
- Insecure – Port: 143 and Security Type: None (Accept all certificates
SMTP
- Outgoing (SMTP) Secure – Port: 465 for and Security Type: SSL/TLS (Accept all certificates)
- Outgoing (SMTP roaming server) Secure – Port: 587 and Security Type: SSL/TLS (Accept all certificates)
- Outgoing (SMTP) – Port: 25 and Security Type: None (Accept all certificates)
- Outgoing (SMTP roaming server) Insecure – Port: 587 and Security Type: None (Accept all certificates)

Step 6: Tap on the “Close” button and it’s done!
You are all done and your Pacbel.net email account is now added to Mailbird Lite.
Manual Setup of PACBELL.NET email account on Thunderbird
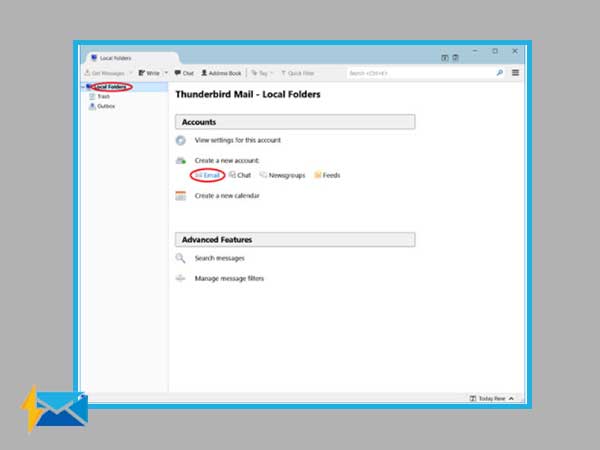
Step 1: Open the interface of Thunderbird and then click Local Folders > Email.
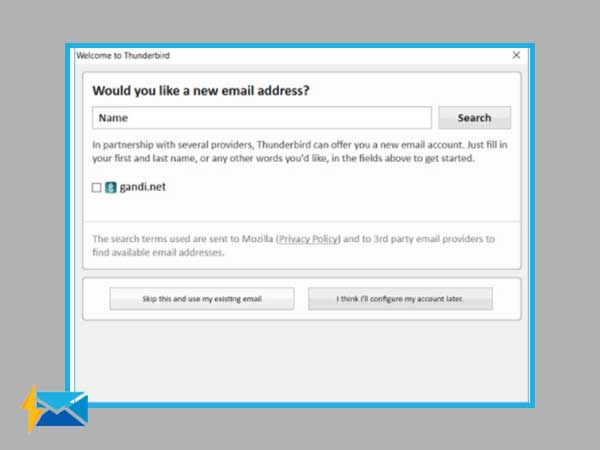
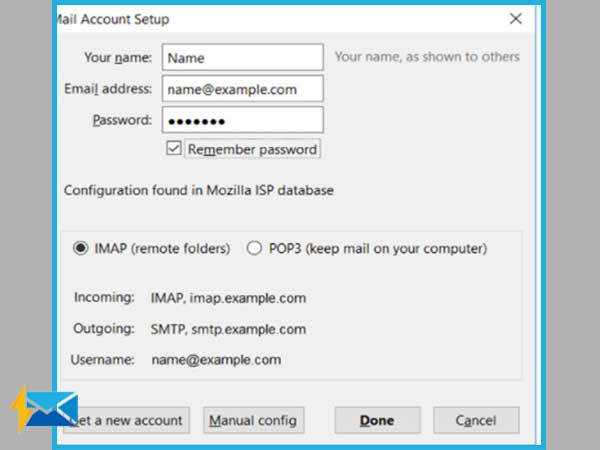
Step 2: Click on “Skip this and use my existing email”.
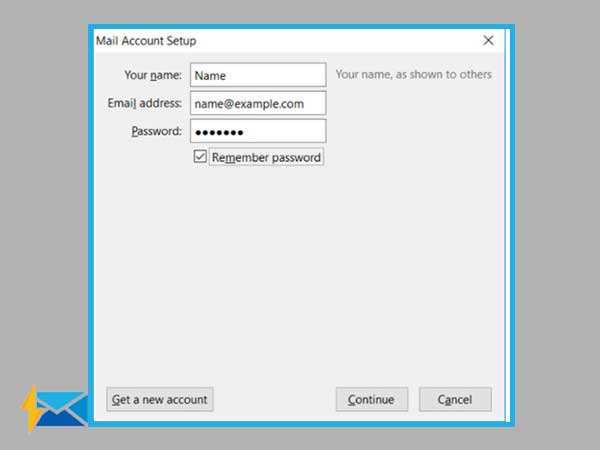
Step 3: Now, type the following information and then click Continue
- Your name: Type the name that you want to display in your outgoing messages.
- Email address: Your full PACBELL.NET email address
- Password: Your PACBELL.NET email account password
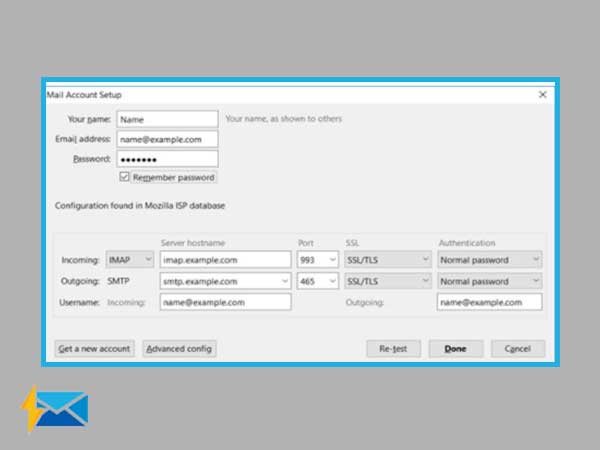
Step 4: Select your email account type from (IMAP or POP). If you want to use Secure SSL / TLS Setting, select “Normal password for Authentication”. You need to click “Manual Config” for adding IMAP or POP settings. The
Step 5: IMAP and POP Settings for PacBell.net is given below:
IMAP port settings for PACBELL.NET
- Incoming Port: 143, Outgoing Port: 465
- Secure – Port: 993 and Security Type: SSL/TLS (Accept all certificates)
- Insecure – Port: 143 and Security Type: None (Accept all certificates
- Not ticked: This server requires an encrypted connection (SSL)
- Use the following type of encrypted connection is None
Important Note: To use Secure SSL / TLS Settings, select “This service requires a secure connection (SSL)” for both outgoing and incoming mails.
POP port settings for PACBELL.NET
- Incoming Port: 110
- Outgoing Port: 465
- General settings for PACBELL.NET POP:
- Secure – Port: 995 and Security Type: SSL/TLS (Accept all certificates)
- Insecure – Port: 110 and Security Type: None (Accept all certificates)
- Not ticked: This server requires an encrypted connection (SSL)
- Use the following type of encrypted connection is None
SMTP port settings for PACBELL.NET
- Outgoing (SMTP) Secure – Port: 465 for and Security Type: SSL/TLS (Accept all certificates)
- Outgoing (SMTP roaming server) Secure – Port: 587 and Security Type: SSL/TLS (Accept all certificates)
- Outgoing (SMTP) – Port: 25 and Security Type: None (Accept all certificates)
- Outgoing (SMTP roaming server) Insecure – Port: 587 and Security Type: None (Accept all certificates)
Step 5: “Click” Done to continue
Step 6: Select “Confirm Security Exception”.
It’s all done, and you can use your PACBELL.NET email account on Thunderbird
Manual Setup of PACBELL.NET email account on Outlook 2007
Step 1: Open Outlook 2007 and go to “Tools” using the top menu bar and select “Accounts Settings”.
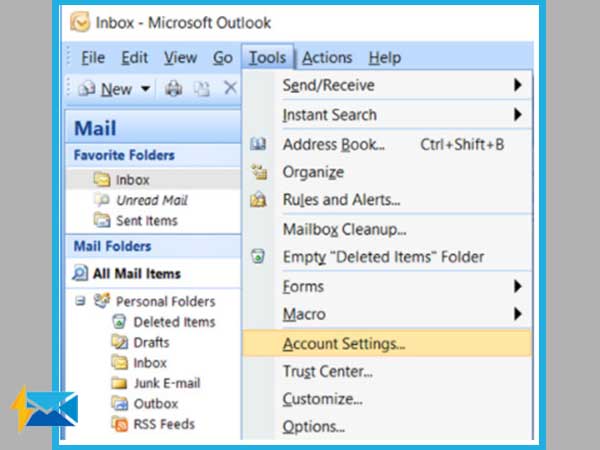
Step 2: In the “Account Settings” option, tap on “New” on the E-mail tab.
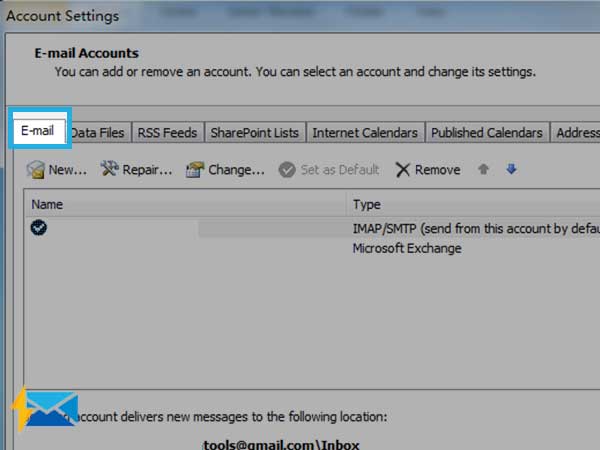
Step 3: Go to “Microsoft Exchange, POP3, IMAP or HTTP” and select “Next”.
Step 4: Select “Manually configure server settings” or “additional server types”, and tap on “Next”.
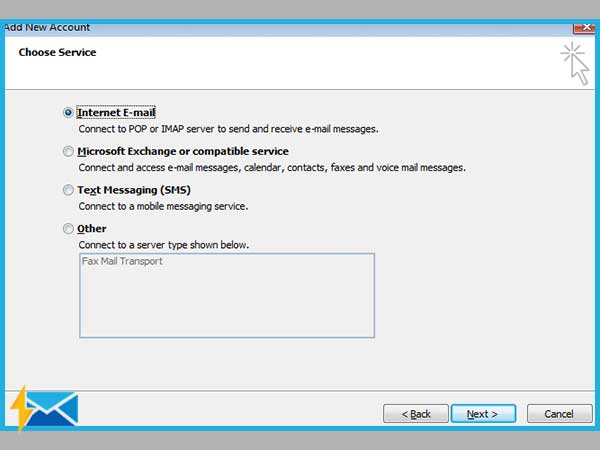
Step 5: Choose “Internet E-mail” and select “Next”.
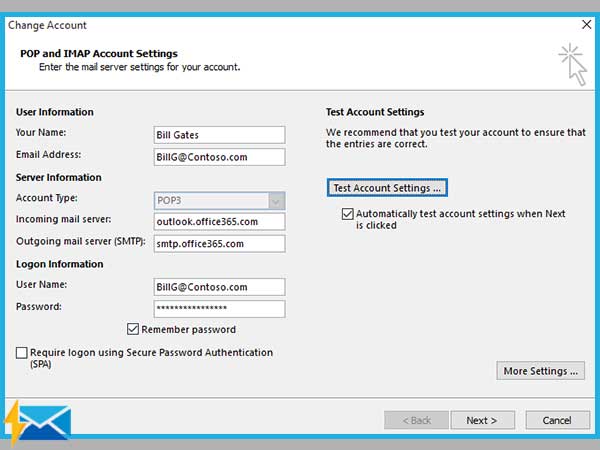
Step 6: Type in all the required details (choose either POP or IMAP according to your needs) and then click “More Settings”.
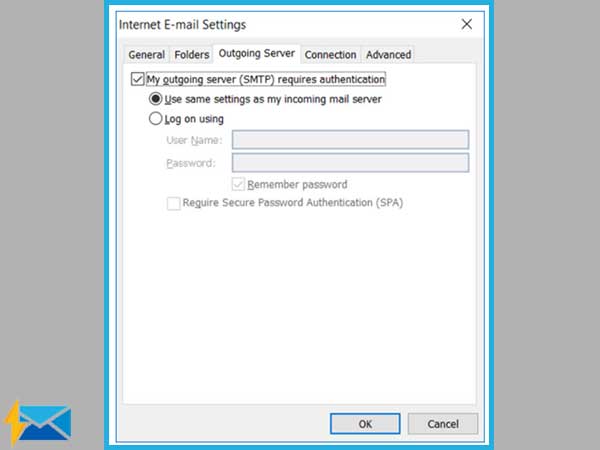
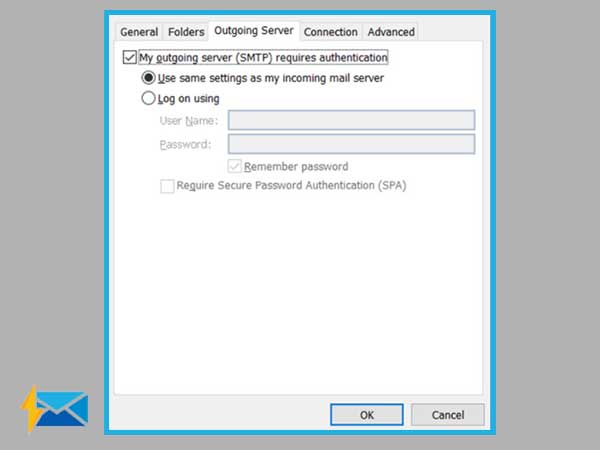
Step 7: In the “Outgoing Server” option select “My outgoing server (SMTP)” requires authentication to be selected. Also, select “Use the same settings as my incoming mail server”.
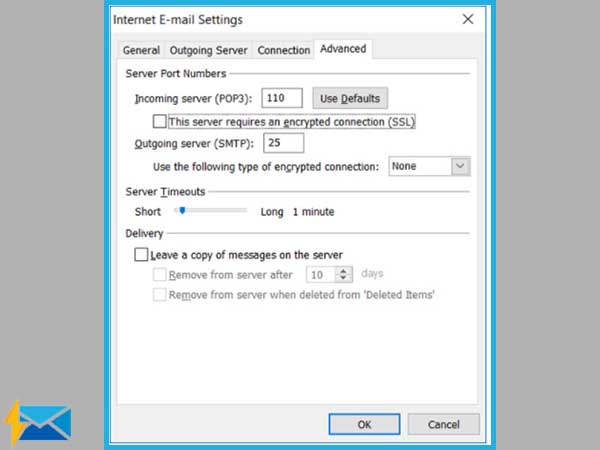
Step 8: Go to the “Advanced” tab. Ensure that yourPACBELL.NET settings should match the below-given settings for POP or IMAP.
POP port settings for PACBELL.NET
- Incoming Port: 110, Outgoing Port: 465
- General settings for POP
- Secure – Port: 995 and Security Type: SSL/TLS (Accept all certificates)
- Insecure – Port: 110 and Security Type: None (Accept all certificates)
- Not ticked: This server requires an encrypted connection (SSL)
- Use the following type of encrypted connection is None
- Setup PACBELL.NET email account on your Outlook 2007 Manual Step 8
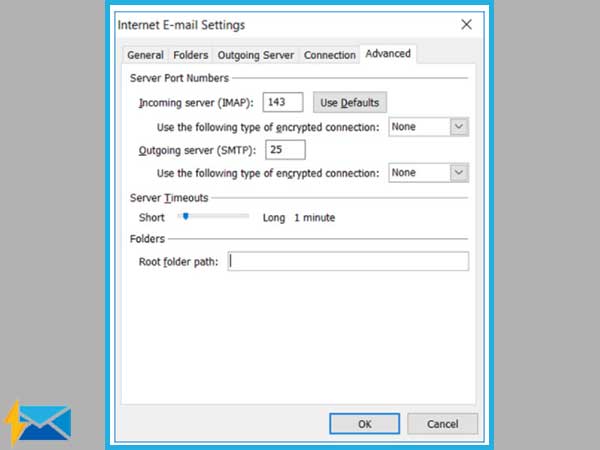
IMAP port settings for PACBELL.NET
- Incoming Port: 143, Outgoing Port: 465
- Secure – Port: 993 and Security Type: SSL/TLS (Accept all certificates)
- Insecure – Port: 143 and Security Type: None (Accept all certificates
- Not ticked: This server requires an encrypted connection (SSL)
- Use the following type of encrypted connection is None
Important Note: Select “Secure SSL / TLS” Settings, select “This service requires a secure connection (SSL)” for both outgoing and incoming mails.
SMTP port settings for PACBELL.NET
- Outgoing (SMTP) Secure – Port: 465
- Security Type: SSL/TLS (Accept all certificates)
- Outgoing (SMTP roaming server) Secure – Port: 587
- Security Type: SSL/TLS (Accept all certificates)
- Outgoing (SMTP) – Port: 25
- Security Type: None (Accept all certificates)
- Outgoing (SMTP roaming server) Insecure – Port: 587
- Security Type: None (Accept all certificates)
Step 10: Click OK to update the settings.
Step 11: Click “Next” and then “Finish”.
Now, you are done adding the Pacbell.net email account and ready to use.
Manual Setup of PACBELL.NET email account on Outlook 2010
Step 1: Open Outlook 2010 and go to “Tools” from the top menu and select “Accounts Settings”.
Step 2: In the Account Settings option, select “New” on the E-mail tab.

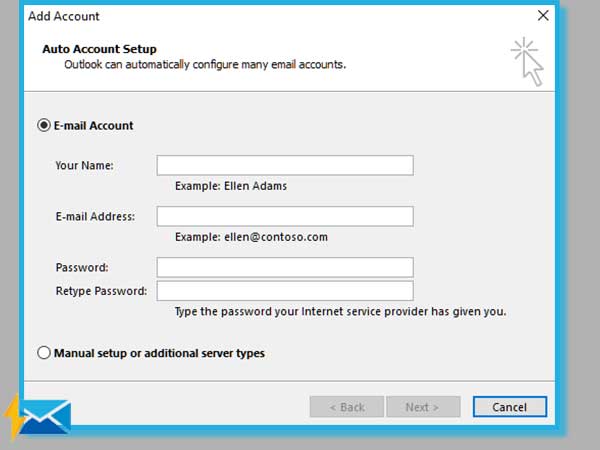
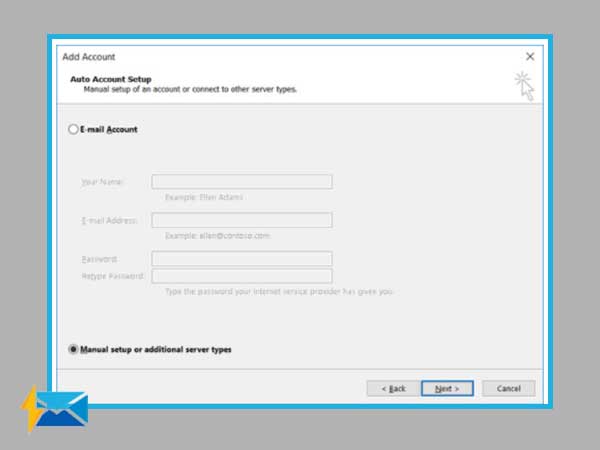
Step 3: Click on “Add New Account” and select “Manual setup or additional server types” and then “Next”.
Step 4: Click on “Internet E-mail” and then “Next”.
Step 5: Provide the required details (you can either select POP or IMAP as per your preference) and then tap on “More Settings”.
Step 6: In the “Outgoing Server” option, make sure you select “My outgoing server (SMTP) requires authentication” and “Use same settings as my incoming mail server”.
Step 7: Go to the “Advanced” tab and enter the POP or IMAP settings that are given below.
PACBELL.NET POP port settings
- Incoming Port: 110, Outgoing Port: 465
- General settings for POP
- Secure – Port: 995 and Security Type: SSL/TLS (Accept all certificates)
- Insecure – Port: 110 and Security Type: None (Accept all certificates)
- Not ticked: This server requires an encrypted connection (SSL)
- Use the following type of encrypted connection is None
PACBELL.NET IMAP port settings
- Incoming Port: 143, Outgoing Port: 465
- General settings for IMAP
- Secure – Port: 993 and Security Type: SSL/TLS (Accept all certificates)
- Insecure – Port: 143 and Security Type: None (Accept all certificates)
- Not ticked: This server requires an encrypted connection (SSL)
- Use the following type of encrypted connection is None.
Important Note: For the Secure SSL / TLS Settings, check the “This service requires a secure connection (SSL)” for both outgoing and incoming mails.
PACBELL.NET SMTP port settings
- Outgoing (SMTP) Secure – Port: 465 for and Security Type: SSL/TLS (Accept all certificates)
- Outgoing (SMTP roaming server) Secure – Port: 587 and Security Type: SSL/TLS (Accept all certificates)
- Outgoing (SMTP) – Port: 25 and Security Type: None (Accept all certificates)
- Outgoing (SMTP roaming server) Insecure – Port: 587 and Security Type: None (Accept all certificates)
Step 8: Click OK to apply these settings.
Step 9: Hit the “Next” and “Finish” buttons.
Finally your Pacbell.net email account is set on Outlook 2010 for easier use.
Manual setup Of PACBELL.NET email account on Outlook 2013
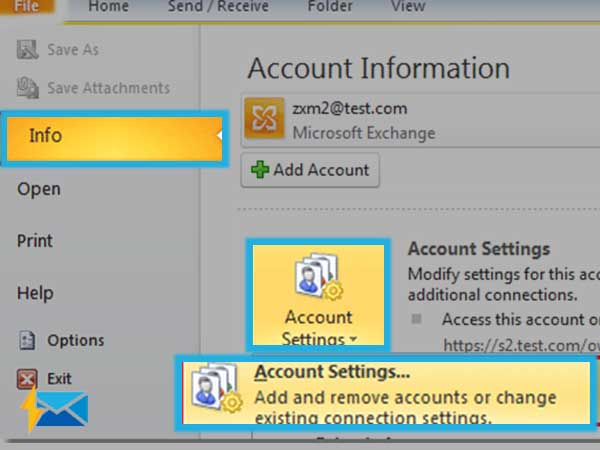
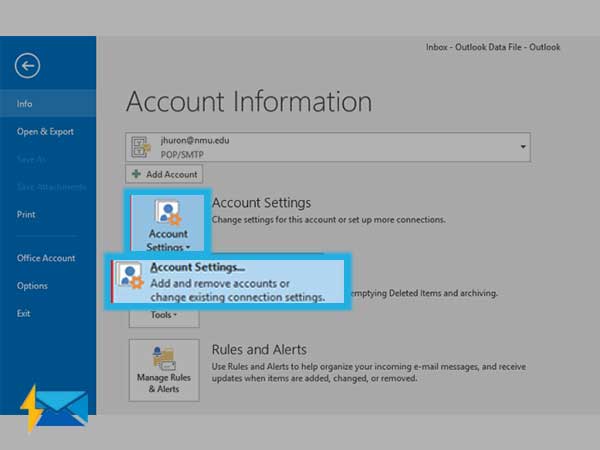
Step 1: Open Outlook 2013 and go to “File” menu from the top left menu bar. Then, Select “Info” and “Account Settings”.
Step 2: Select “Manual Setup” or “additional server types” and then “Next”.
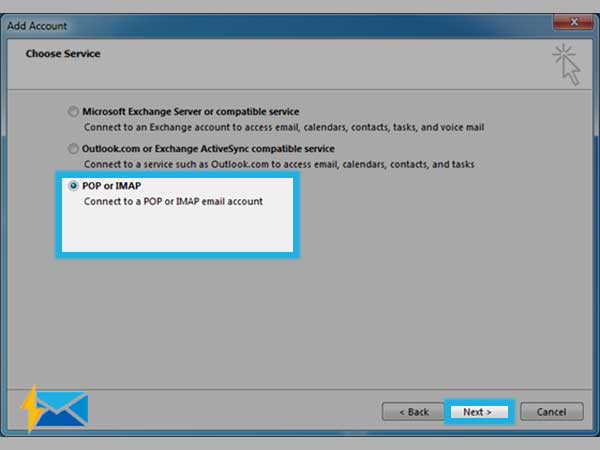
Step 3: Choose either POP or IMAP and then click “Next”.
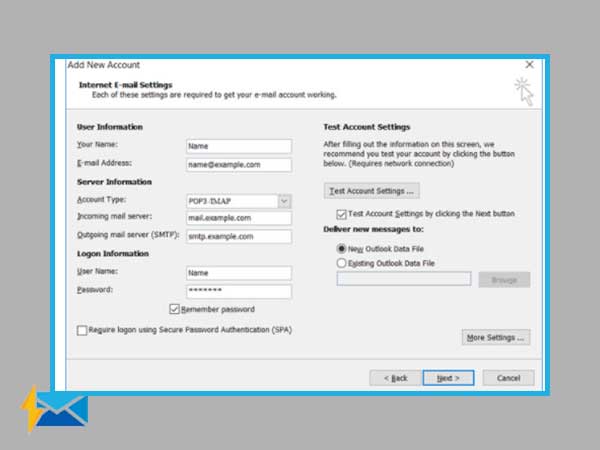
Step 4: Provide all the required details (you can choose anyone; POP or IMAP according to your preference) and then select “More Settings”.
Step 5: Select “Outgoing Server” and make sure you select “My outgoing server (SMTP) requires authentication”. Also, choose “Use same settings” for the incoming mail server.
Step 6: Open the “Advanced” tab
Step 7: These are the settings that you need to enter either POP or IMAP:
PACBELL.NET POP port settings
- Incoming Port: 110, Outgoing Port: 465
- General settings for POP
- Secure – Port: 995 and Security Type: SSL/TLS (Accept all certificates)
- Insecure – Port: 110 and Security Type: None (Accept all certificates)
- Not selected: This server requires an encrypted connection (SSL)
- Use the following type of encrypted connection: “None”.
PACBELL.NET IMAP port settings
- Incoming Port: 143, Outgoing Port: 465
- Secure – Port: 993 and Security Type: SSL/TLS (Accept all certificates)
- Insecure – Port: 143 and Security Type: None (Accept all certificates
- Not ticked: This server requires an encrypted connection (SSL)
- Use the following type of encrypted connection is None
Note: To use Secure SSL / TLS Settings, select “This service requires a secure connection (SSL)” for both outgoing and incoming mails.
PACBELL.NET SMTP port settings
- Outgoing (SMTP) Secure – Port: 465 for and Security Type: SSL/TLS (Accept all certificates)
- Outgoing (SMTP roaming server) Secure – Port: 587 and Security Type: SSL/TLS (Accept all certificates)
- Outgoing (SMTP) – Port: 25 and Security Type: None (Accept all certificates)
- Outgoing (SMTP roaming server) Insecure – Port: 587 and Security Type: None (Accept all certificates)
Step 8: Click OK to apply settings.
Step 9: Click on “Next” and then “Finish”.
Manual setup of PACBELL.NET email account on Outlook 2016
Step 1: Open Outlook. Go to “File>> Info>>Account Settings”.
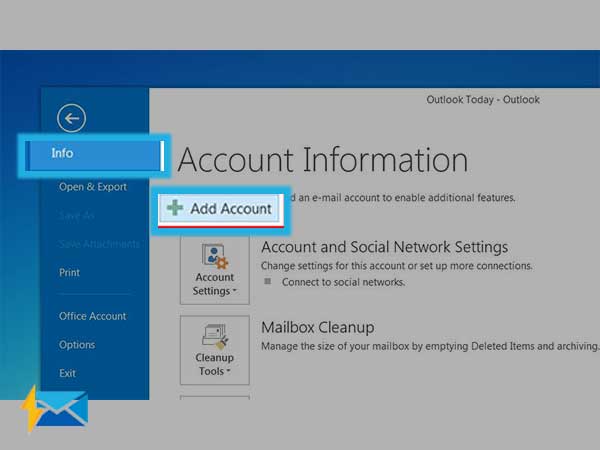
Step 2: Select Manual Setup or additional server Types, followed by Next.
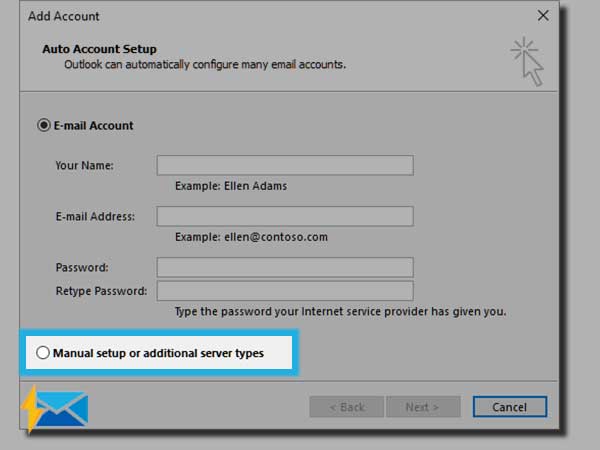
Step 3: Choose POP or IMAP > Next.

Step 4: Provide the details for POP and IMAP settings, and select “More Settings”.
Step 5: In the “Outgoing Server” tab, select “My outgoing server (SMTP) requires authentication” and “Use same settings as my incoming mail server”.
Step 6: Select the “Advanced” tab and enter the POP or IMAP settings given below.
PACBELL.NET POP port settings
- Incoming Port(POP3): 110, Outgoing Port(SMTP): 465 or 587
- General settings for POP
- Secure – Port: 995 and Security Type: SSL/TLS (Accept all certificates)
- Insecure – Port: 110 and Security Type: None (Accept all certificates)
- Not ticked: This server requires an encrypted connection (SSL)
- Use the following type of encrypted connection as “None”.
PACBELL.NET IMAP port settings
- Incoming Port: 143, Outgoing Port: 465
- Secure – Port: 993and Security Type: SSL/TLS (Accept all certificates)
- Insecure – Port: 143 and Security Type: None (Accept all certificates
- Not ticked: This server requires an encrypted connection (SSL)
- Use the following type of encrypted connection as “None”.
Important Note: Select “Secure SSL / TLS” Settings, also select “This service requires a secure connection (SSL)” box in both outgoing and incoming mails.
PACBELL.NET SMTP port settings
- Outgoing (SMTP) Secure – Port: 465 for and Security Type: SSL/TLS (Accept all certificates)
- Outgoing (SMTP roaming server) Secure – Port: 587 and Security Type: SSL/TLS (Accept all certificates)
- Outgoing (SMTP) – Port: 25 and Security Type: None (Accept all certificates)
- Outgoing (SMTP roaming server) Insecure – Port: 587 and Security Type: None (Accept all certificates)
Step 8: Click OK to apply the settings.
Step 9: Click on “Next” and then “Finish”.
Conclusion
In this article, we have discussed ways to configure Pacbell.Net email account settings on different platforms that are majorly used by the masses. Follow the given instructions carefully and you can easily add a Pacbell.Net account to the device or web platform of your choice. Also, updating email settings will help you fix various PacBell email issues.
Share