How to Clear Cache From iPhone and Free Up Some Space?
One thing about iOS devices is that they keep your data intact. Do you know how? By keeping two primary data caches; one for the browsers like Safari and Chrome and the other for the rest of your apps.
So if you feel that your iPhone or iPad has slowed down over the past few days, clearing these caches can free up some space, improving the speed and performance of your device.
Here’s how to clear the cache on your iPhone and everything you need to know for the same.
What is Cache, and How Does It Affect Our Device?
Before we move ahead, let’s comprehend what the iPhone cache is and how it can make any difference when we clear the cache on iPhone. It is basically hardware or software that collects temporary data to help other websites, apps, and browsers to load faster and perform smoothly.
When the data is saved on your device in the form of a cache, the browser/website won’t take much longer to load as it already has all the previous information. This way, the browsers/websites won’t have to redownload every bit of information that was saved the last time you visited it.
However, after visiting a lot of websites and launching the browser too many times, your device can have a cluttered cache that may lead to the slowing down of the device and can also end up taking a lot of space and let’s face it, iPhone users lack spacing/storage on their devices. This is why it would be wise to learn how to clear the iPhone cache.
Tip: Before clearing the cache on your iPhone for Safari or any other app/platform, make sure that you remember all the passwords and other login details required for it, as clearing the cache will also remove all the saved passwords. You can even transfer your data if you feel too insecure or unsure about it.
Let’s move ahead and learn how to clear the cache on iPhone.
How to Clear Cache on Safari?
Since the iPhone stores two major caches, the methods for clearing both are different as well. Let’s start with learning how to delete the cache on your iPhone, but just know that clearing your iPhone cache from Safari will clear all the saved files, images, passwords, and other scripts from Safari. Here’s how to clear the cache on iPad or iPhone:
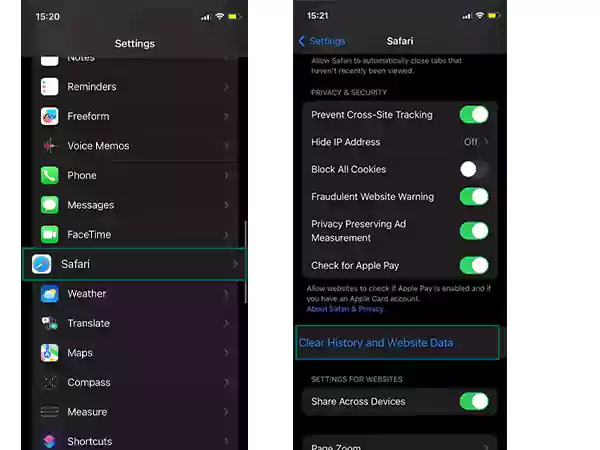
- On your iPhone, launch the Settings app and click Safari.
- There, scroll down a bit and click on Clear History and Website Data.
- Your device will ask for confirmation if you really want to clear the Safari cache or not; confirm your choice, and you are done.
Alternatively-There’s a way where you can clear the cache on Safari but keep the cookies and history by visiting the Advanced menu. Click on Advanced from the bottom of the screen, click on Website Data, and then on Remove All Website Data.
Now that you get to clear the cache from Safari and keep the cookies, you must be wondering what’s the difference between the two or if they are the same thing. Let’s find out.
Are Cookies and Cache the Same?
Cookies and cache are not the same. Cookies are basically those minimal files that save information about your online activity. Most of these cookies are functional in this way only, they keep track of what site you’re logged in to and even the preferences of your website.
There are even third-party cookies that keep a track of your activity across various sites, this includes your search history and even the links you’ve clicked on.
So this was how to clear the cache on iPhone for Safari; let’s now learn the same for Apps on iOS devices.
How to Clear App Cache on iPhone?
To clear the app cache on your iOS device, you need to offload the app. Offloading the app will free up the storage space on the app and will keep your data and other documents intact, so whenever you will reinstall the app, you will have all of your data back. Here’s how to clean app data on iPhone:
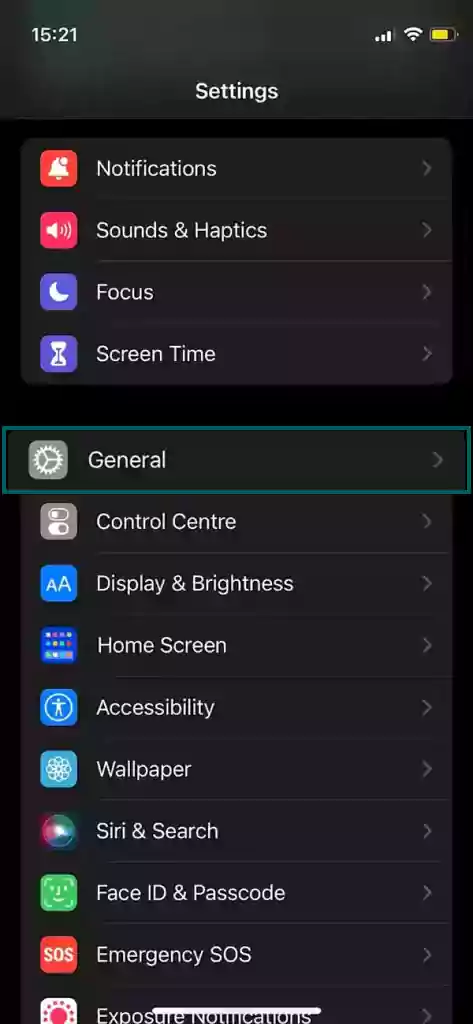
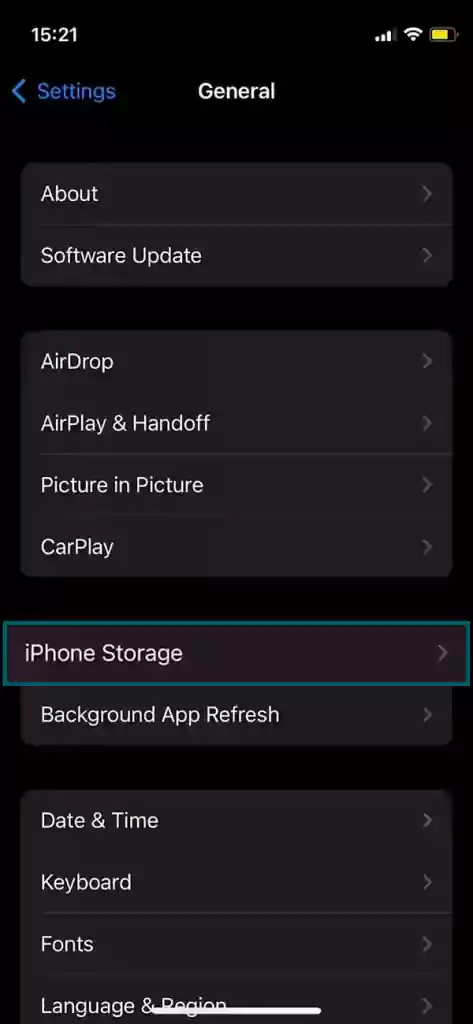
- Launch your Settings app and click on General.
- There, click on iPhone Storage.
- Wait for the whole app list to load, and then click on the one that you want to offload and click on Offload App.
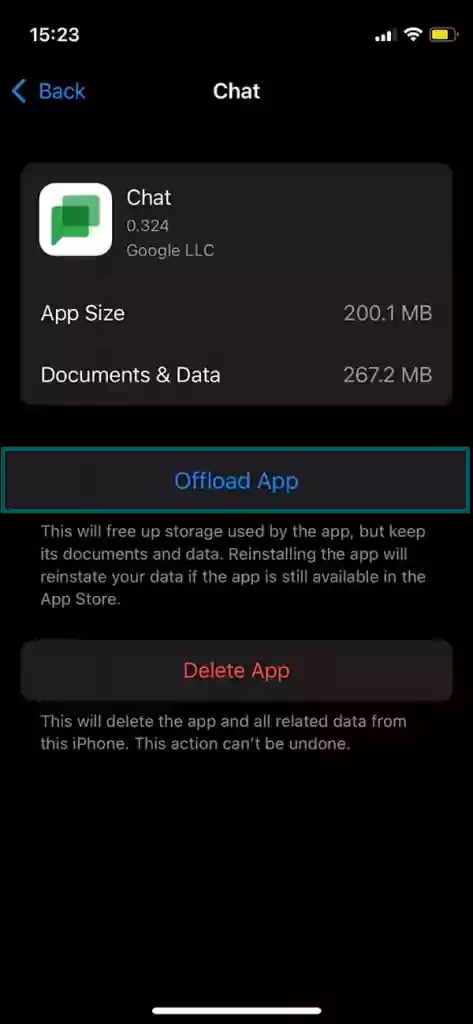
Note: When the list of apps is opened, you will see an option saying Offload Unused Apps, tapping Enable for it will automatically offload the apps that you haven’t used in a while.
So this was how to clear the iPhone cache from the apps, but did you notice that this time we offloaded the app and there wasn’t an option saying clear cache? So is there any difference between clearing the cache and offloading the apps? Let’s find out.
Difference Between Clearing Cache and Offloading the App
There’s not much difference between clearing the cache from iPhone and offloading the apps. Clearing the cache frees up some space on your device as it removes the stored data and helps the website run smoothly. Offloading the app on the other hand temporarily uninstalls the app from the device while keeping all of its data and files intact.
Both methods can help the device run smoothly and can help in freeing up some storage space from it.
So this was the difference between clearing the cache and offloading the app and the two methods to free up space on your iPhone. However, there are some of us who use Google Chrome as our go-to-go browser in place of Safari. So let’s learn how to clear the iPhone cache from Chrome.
How to Clear Cache from Other Browsers?
Here’s how to delete cache on iPhone from Chrome browser:
- Launch your Google Chrome app and click on More Icon.
- There, click on Clear Browsing Data.
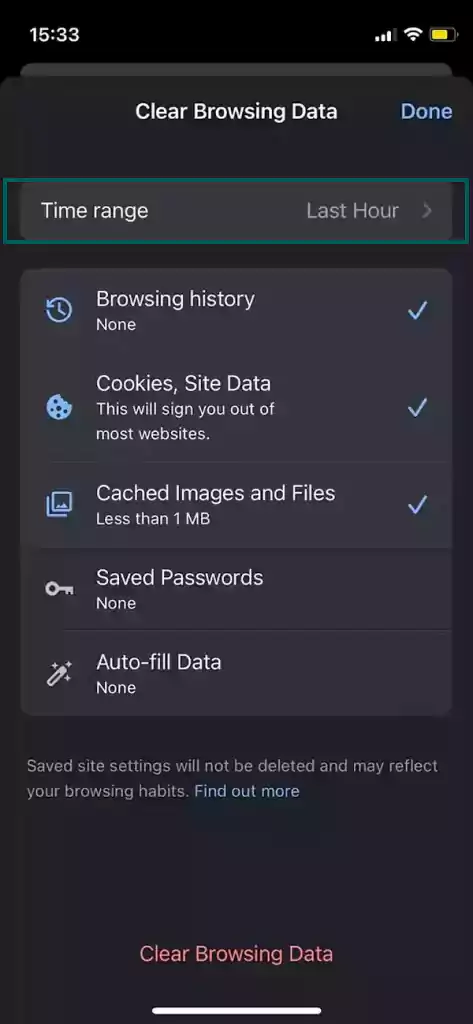
- You need to pick a time range, the options can range from the last hour to all time.
- Ensure that the Cookies, Site Data, and Cached Images and Files are checked there, once checked, click on Clear Browsing Data.

FAQs
Here are some frequently asked questions about how to clear cache and data on iPhone:
Ans: Open Google Chrome and click the three dots menu > History or press Ctrl+H to display your Google Search history.
Ans: When attempting to remove your search history, an issue with previous Chrome versions may arise. Attempt once more after updating Google Chrome.
Ans: Open Google Chrome and choose the three dots menu > History > Clear browsing data to erase your browsing history on your Chromebook. An alternative is to tick the box next to each website you want to delete, then select Delete.
Ans: Despite being deleted from your computer, the private history files can still be accessed and recovered by unauthorized users utilizing free online file recovery software.
Share