5 Practical Options for Solving Lousy Photos Problem
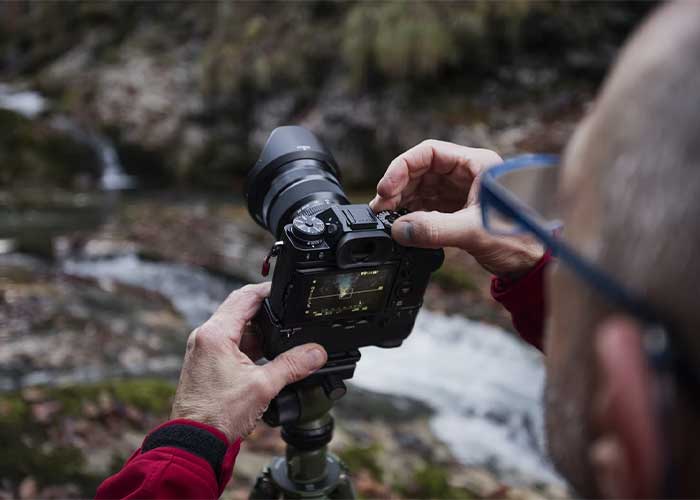
Sometimes after a whole day of working with the camera, photos can disappoint you. If you get a lot of blurry photos, you want to put down the camera and forget about it. Almost every outdoor photographer has encountered this situation at least once in his life. So do not rush to put an end to your career.
You May Also Like: Where to Get Original Photos for Instagram
Read how to take pictures and how to edit photos. You can enhance your photos before you leave the location. Explore 5 tips on how to solve the problem of failed photos.

Learn the Rules of Composition
Composition rules are the basis for creating great photos. The right approach to the structure of the frame makes a bad image pleasing to the eye. Experienced photographers build a photo composition intuitively. Remember the footage of well-known reporters from conflict zones or natural disasters. These shots are mesmerizing, though made on the go.
Learn the basic rules and use them constantly for your pictures:
- The rule of thirds. Imagine dividing your frame into 9 equal parts. Place an important element of the picture at the points of intersection and along these imaginary lines. Use the grid overlay function on the camera screen at the beginning.
- Balancing elements. If you have placed too many voids by placing the main object according to the rule of thirds, then balance the elements of the image. Balance the visual weight of the main object with other less important ones.
- Leading lines. The lines in the photos are eye-catching. Use a straight road or a winding river to create a composition.
- Symmetry. On the one hand, maintaining symmetry in the frame helps to create an eye-pleasing image. On the other hand, a special violation of the pattern brings tension to the scene.
- Viewpoint. The angle of photography is a key element for photo composition. Try several viewpoints for one image. Comparing various shots, you will notice a significant difference.
- Background. The human eye perceives individual elements better than the camera does. Therefore, instead of the expected great photos, you get a merger of the main object with the background. Look for a background that does not distract.
- Depth. Photos are two-dimensional images. Therefore, they often turn out flat compared to the real scene. Placing objects at different distances from the camera adds depth to the pictures.
- Framing. Want to know how to take pictures with natural frames? Pay attention to the trees, mountains, and surrounding buildings. These are all ready-made frames for your images with the right composition.
Don’t miss the opportunity to take a lot of shots. The era of digital technology has simplified life for the outdoor photographer. The more images, the better the chances for the same great photo.
Learn How to Adjust Exposure Compensation
The amount of light entering the camera sensor depends on the exposure settings. And it depends on whether your photos will be lighter or darker. Camera settings mostly allow you to take photos using natural light. But if you want to become a professional photographer, you should understand the indicators of exposure. Adjust the exposure by adjusting the shutter speed, aperture value, or ISO sensitivity.
- Shutter speed is the time during which light enters the sensor. To stop fast motion, set a short shutter speed. Long exposure, on the other hand, helps to transmit movement (for example, to show the flow of a stream).
- The size of the aperture is the size of the hole in the lens through which light passes. This value can be changed in a certain range. As a result, you change the focus area on the photos.
- ISO determines the light sensitivity of the sensor. It is usually recommended to choose the smallest possible value of this indicator.
Although the camera settings provide compensation for the exposure, it’s worth the pain to deal with it all in detail. Your photos will benefit from this.
Correct the Temperature Level and White Balance
Each light source has its color temperature. Sunlight is warmer than moonlight, and moonlight is warmer than clear skies. The basis is white. White balance is fundamental for photos.
Beginners often use automatic camera settings for white balance (AWB). But this does not always allow you to take quality photos. Different lighting conditions, such as fluorescent light, daylight, or clouds, may interfere with this setting. Therefore, you should pay attention to the white balance when you take a photo.
If you notice this problem too late, fix it by editing pictures.
Change the Perspective to Correct the Image
Perspective in photos is a tool for conveying three-dimensional space in a two-dimensional image. Outdoor photographer shows the depth and scale of the scene, enticing the composition and changing the angle of shooting. Try changing the angle of the camera relative to the subject and compare the resulting frames.
5 types of perspectives are most often used by photographers:
- Linear perspective. Create an optical illusion of the vanishing point of the lines in the picture.
- Forced perspective. Create fun shots by changing the actual size and distance of objects.
- Diminished scale perspective. Zoom out distant objects to convey a sense of scale as in three-dimensional space.
- Overlapping perspective. Create layers of objects and combine this technique with other elements of the photo composition.
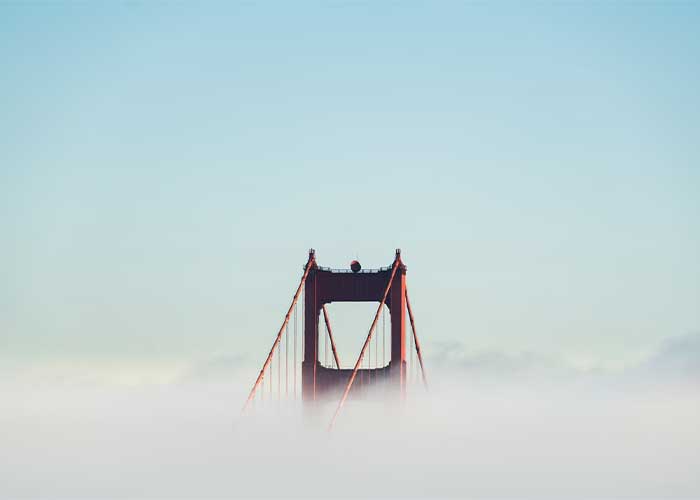
- Atmospheric perspective. A foggy morning allows you to capture the contrast between a clear foreground and a foggy background.
Experiment with perspectives in your photos to get deep emotional shots.
Edit Photos Without Losing Naturalness
Edit photos online without losing naturalness. Photo processing can remind us of the artist’s work: there is a fine line between a perfect picture and an extra layer of paint. Develop the talent to feel this limit.
If you already have your style of photo editing, share it with beginner colleagues. Create a video tutorial with the help of a screen recorder and update it with transitions, effects, text using iMovie for PC. Not only can you share knowledge but also earn extra income.
Conclusion
It takes a few things to turn your failed photos into impressive shots: knowledge, experience, and must-have accessories. Do not despair from the first unsuccessful attempts, and do not be lazy to shoot from different angles. Very soon, progress will be noticeable in your pictures. Create with pleasure!
Share