How to Set Up Your Own Email Server
A mail server works like the post office, i.e., managing the email that is received and sent from time to time. It receives them from the clients and transfers them to the recipients to ensure that every mail finds its way to the right inbox.
If you value privacy and decide to opt for more than what popular mail providers like Google or Outlook offer, you can learn how to begin setting up your private email server. With your processor, you get to enjoy safety and protection from outside influences.
For small or mid-sized companies, having a confidential one can help cut expenses, including the cost of the potential consequences of security breaches.
To set up a mail digital system, you need to have a host; a protected dedicated server is even better. So today, let’s understand the advantages as well as the procedure of having a personal mail server.
Advantages of having a personal email server
You can use your private email server for both personal and professional communication. Why create a separate one for this?
Here’s what you get with a personal email server:
Better security
With a private email server, you can implement more effective security measures, instead of relying on guaranteed security protocols from cloud-based electronic mail providers.
This includes going off the radar when it comes to targeted ads and the space they take up.
More control over your data

In the case of a private email server, your data is stored within your information processing system.
In contrast, using mail services implies that your data is stored on an information processing system that belongs to the company providing the services.
Next-level reliability and uptime
Your private email server is much more reliable than cloud-based processors and services that utilize them. It’s designed to work exclusively for you, which means that it is much less susceptible to outside influences that can interfere with its functioning.
Since your host forms a somewhat isolated environment, it’s less likely to go down; this way, your mail server promotes maximum uptime.
Cost efficiency

A private email host will save you money in the long run. You don’t have to pay for a subscription to use the services, nor do you have to pay for extra space that you might require.
Plus, you don’t need to worry about price increases with the dedicated processor.
What You Need To Set Up An Email Server
To set up an email server, you need to have:
- VPS, cloud, or dedicated host
- An active domain name for creating an electronic mail address.
The minimal requirements for a processor are 1 GB of RAM (4 GB is recommended), 5 GB of Disk Space (100 GB is recommended), and a 1 GHz processor (2 GHz is recommended).
Did You Know?
According to research by Statista, in 2019, about 3.9 billion global email users amounted, which was estimated to grow to 4.3 billion in the year 2023!
Step-by-step installation of the mail server
We’re going to divide the process into steps so that it is easier to witness the installation progress.
- Log into your server’s SSH
Put the following command in the terminal if you’re using MacOS or Linux: ssh root@server-IP
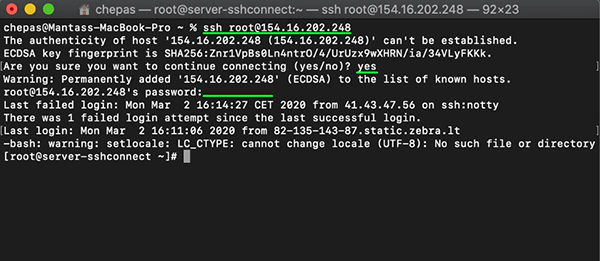
If you’re on Windows, you can download PuTTY and connect to the server’s SSH from there.
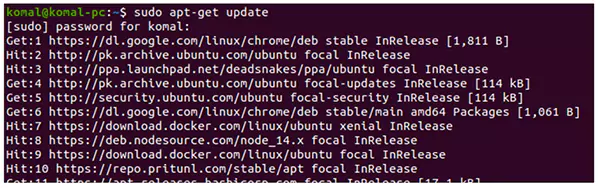
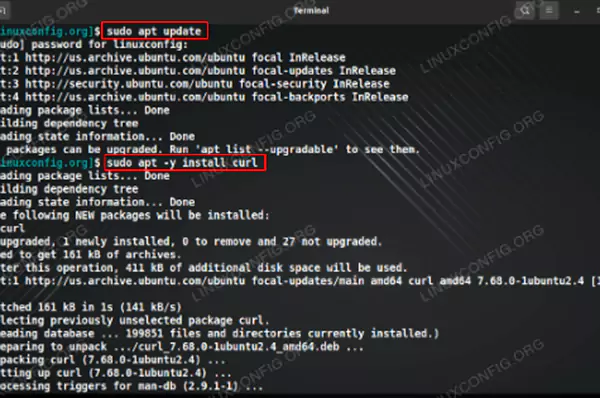
- Update system packages:
- Install Curl and Git:
and Docker: curl -SSL https://get.docker.com/ | CHANNEL=stable sh
- Download Docker components:
curl -L https://github.com/docker/compose/releases/download/$
curl-Ls https://www.servercow.de/docker-compose/latest.php/docker-compose-$
(uname -s)-$(uname -m) > /usr/local/bin/docker-compose
And update Docker’s permissions:
chmod +x /usr/local/bin/docker-compose
- Equal your unmask to 0022:
unmask
Look for output 0022.
- Set up an /opt directory:
cd /opt
- Download Mailcow files from Git:
git clone https://github.com/mailcow/mailcow-dockerized
And select Mailcow directory:
cd mailcow-dockerized
- Generate configuration files:
./generate_config.sh
Use the hostname of the server that you want to use.
- Compose images:
docker-compose pull
- Run the composer file:
docker-compose up-d
Once you complete these steps, the installation is considered finished.
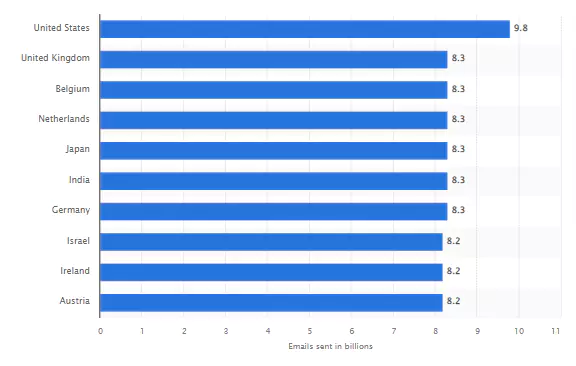
Fun Fact!
As of April 4, 2023, the United States was the country with the highest number of emails sent daily, with almost ten billion. As of April 2022, over 231 million emails were sent worldwide within one minute!
Configuration
The following is to be done for the configuration process:
- Log into your email address created for your domain name.
- From there, you can change the password by clicking the Edit button to create a new password and update domains and users.
- To configure the domains, go to the Configuration section in the top right-hand corner and click on Mail Setup to create new mail domains and addresses.
- Press Add Domain to create a new domain, and you can repeat the sequence to add more. After you have configured all of them, press restart SOGo.
- You can also add email users by going to the Mailboxes section and clicking Add Mailbox.
Now that you have learned how to set up your email server, consider trying it out for your convenience and the safety measures that it provides. Feel the difference yourself!
Share