Configure Bellsouth Email Settings for Outlook Using this Guide
Luckily those who know the procedure; finds configuring an email account on a desktop email client very easy but those who’ve no knowledge about the same, consider it as the most difficult task.
However, if you also belong to the latter case, then we suggest you to not worry at all! Well, because you can easily set up your Bellsouth email on a desktop email client like Outlook by using this particular guide.
Though many other email clients are available out there today we’ve specifically come out with this blog on “How to Configure Bellsouth Email Settings for Outlook” because most of the email users consider only Outlook as their go-to email client.
So, like many of those users, if you also want to access your Bellsouth account on Outlook email client then, without any further agitation, execute the below-given instructions to configure your Bellsouth email with Outlook in no time.
Wait! Before you start with the process, there are two things that we must have to remind you in advance. Have a look:
- On Outlook, except Hotmail email account, all other third-party email clients require a manual configuring approach of their respective incoming and outgoing servers during the setup process. So, for Bellsouth also, you cannot opt for the automatic configuration process that can sync your email account with just entering your account credentials.
- As Bellsouth has been recently merged with the AT&T email service provider, the configuration settings of the same are also updated according to this recent development hence you should log in to Bellsouth email incorrect manner. This means, whoever wants to configure Bellsouth email account in an email client, will have to use the following Bellsouth.Net Server Settings—
| Incoming Mail Server Settings | Outgoing Mail Server Settings |
| Incoming Server Host Name: imap.mail.att.net | Outgoing Mail Server Host Name: smtp.mail.att.net |
| Incoming Mail server port: 993 | Outgoing Mail server port: 465 |
| Use SSL: Yes | Use SSL: Yes |
| Incoming Mail Server Settings | Outgoing Mail Server Settings |
| Incoming Server Host Name: pop.mail.att.net | Outgoing Mail Server Host Name: smtp.mail.att.net |
| Incoming Mail server port: 995 | Outgoing Mail server port: 465 |
| Use SSL: Yes | Use SSL: Yes |
Now, as enough has been discussed what all you should keep in mind while you decide to configure your Bellsouth email account in Outlook, let’s get started to execute the actual procedure of setting up Bellsouth email on Outlook:
Instructions to Setup Bellsouth Email Account in MS Outlook—Desktop Email Client
Step 1: First of all, launch the Outlook Email Client App on your device.
Step 2 : Once the app opens, click on the File Tab which is there in the top-left corner of the app screen. [For Outlook 2010 and previous versions, instead of file tab, select the Tools option.]
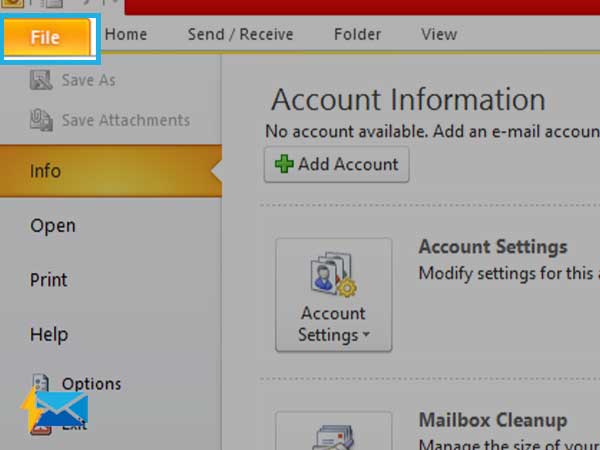
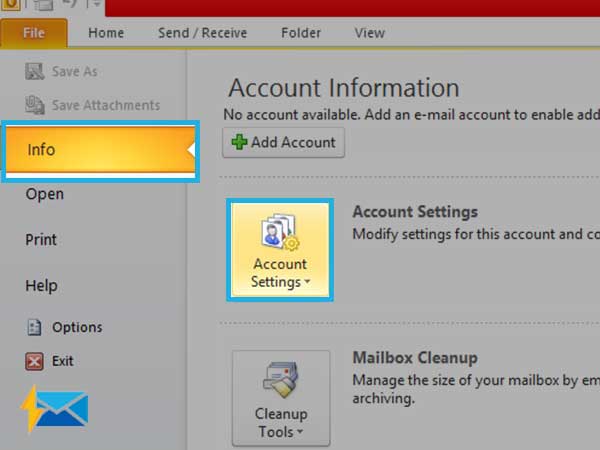
Step 3: By doing so, a drop-down File Info Group Menu will appear on the screen and from the same, select the Account Settings option.
Step 4: Inside the account setting wizard box, locate and click on the Email Tab.
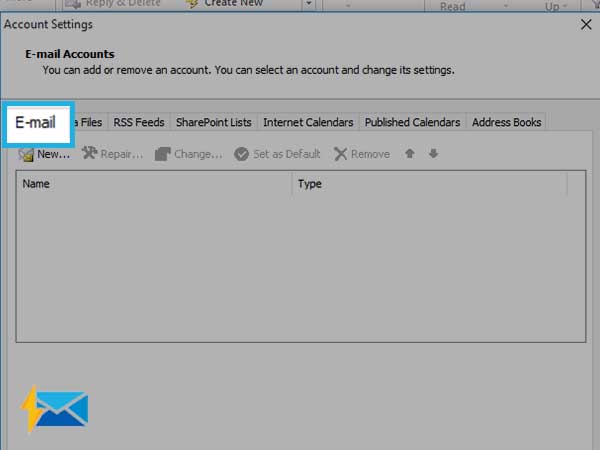
Step 5: In continuation, right from the email tab, hit the New Button.
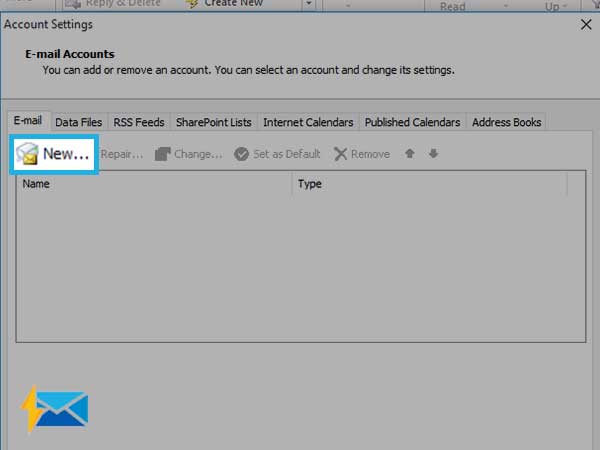
Step 6: This action will launch the Add New Email Account wizard box in front of you.
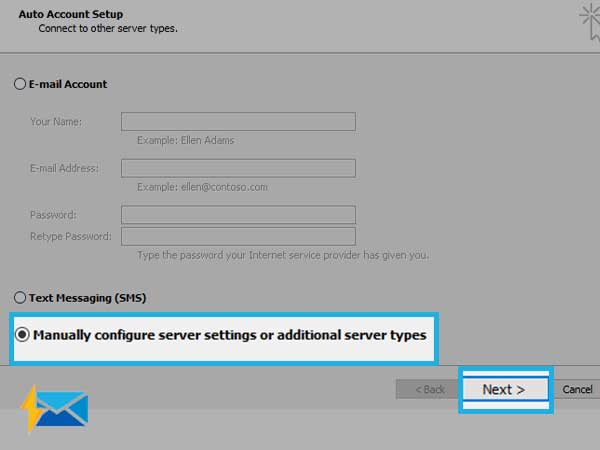
Step 7: Then, you’ve to simply select the checkbox that reads— Manual Setup or Additional Server Types by clicking on the radio button available in front of the same. Later, click on the ‘Next’ button to move ahead on the Choose Service Page.
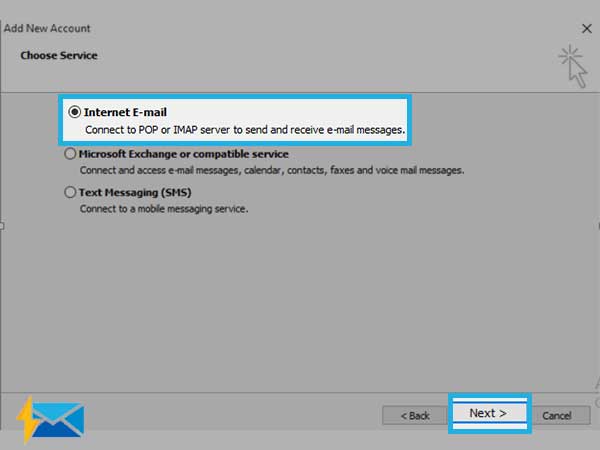
Step 8: There on the Service Page, you’ve to choose a particular service from the three available options. So, to do so, click on the Internet Email (connect to POP or IMAP server to send and receive e-mail messages) radio button. Then, again hit the Next button to navigate further onto the Internet E-mail Settings Page.
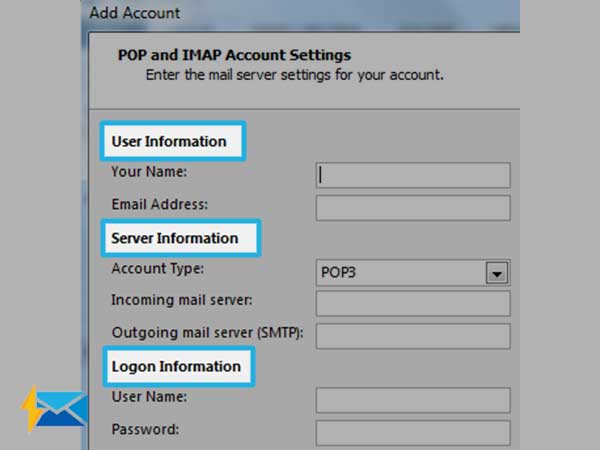
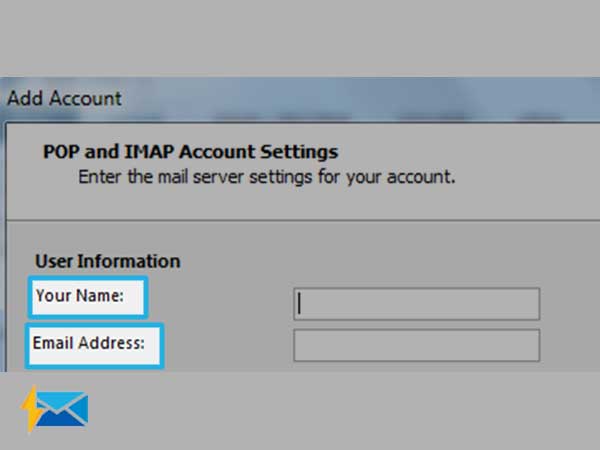
Step 9: On the Internet E-mail Settings Page, you’ve to input the below-mentioned settings of your Bellsouth account in the respective User Information Section, Server Information Section and Logon Information Section:
Step 9: (Sub-Part 1)
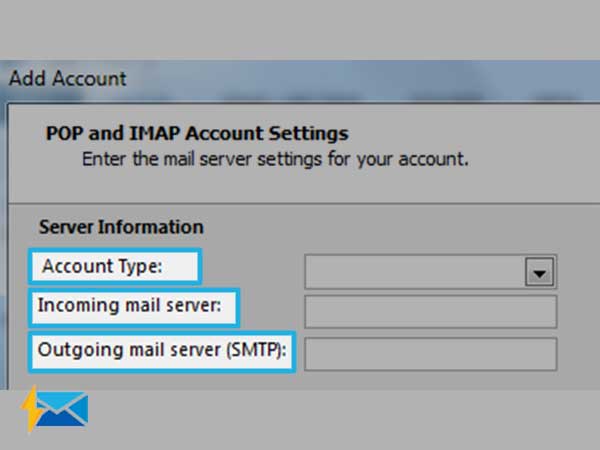
Step 9: (Sub-Part 2) Then, based on your selection, enter the following details correctly—
- Incoming Mail Server– imap.mail.att.net (if you’ve selected IMAP) or pop.mail.att.net (if you’ve selected POP3)
- Outgoing Mail Server-smtp.mail.att.net (For both IMAP & POP3)
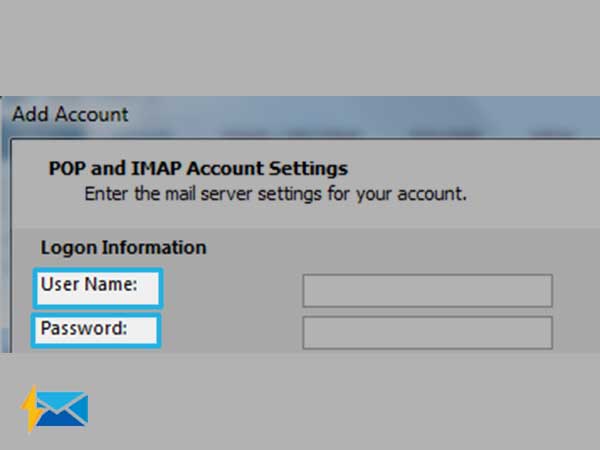
Step 9: (Sub-Part 3) Inside Logon Information Section; enter these asked login credentials details that are associated with your Bellsouth account—
- User Name– Your Bellsouth Email Account Username.
- Password– Enter your Bellsouth Account Password.
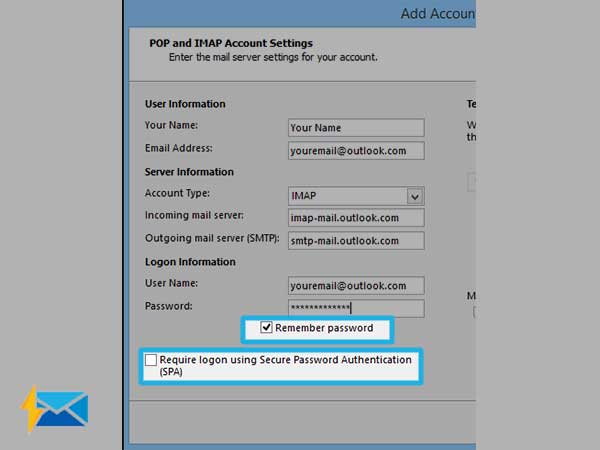
Step 10: After you finish entering these above details, move further to also tick-mark the checkboxes of these following two options available right there at the bottom of the page—
- Remember Password (to let Outlook save your Bellsouth account’s password) &
- Requires logon using Secure Password Authentication (SPA)
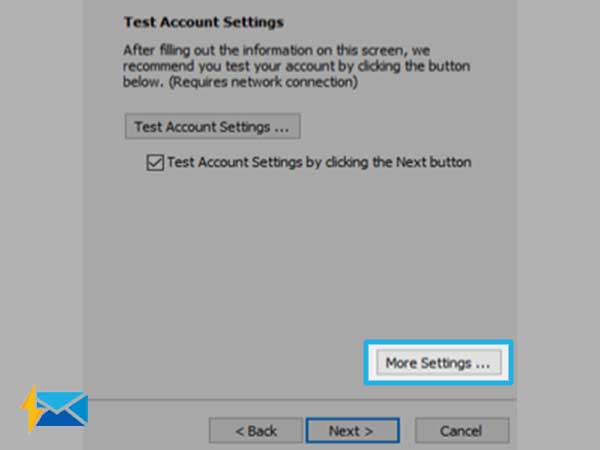
Step 11: Now, to continue with the setup process, click on the More Settings button from the lower-right side of the page.
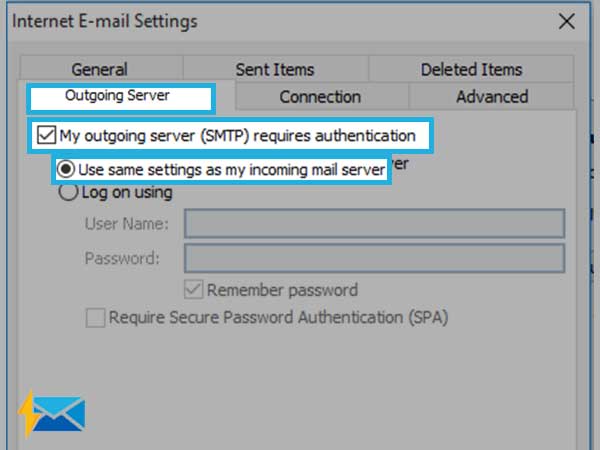
Step 12: This command will lead you to the next window where you’ve to select the Outgoing Server Tab to make sure that—
- ‘My outgoing server (SMTP) requires authentication’ checkbox is tick-marked by you.
- ‘Use the same settings as my incoming mail server’ radio button is selected by you.
Step 13: After that, click on the Advanced Tab to open the same for entering the following specific port settings under Server Port Numbers—
- The Incoming Server (IMAP) – 993
- The Incoming Server (POP3) – 995
- The Outgoing Server (SMTP) for both IMAP & POP3– 465
Then, in continuation, make sure you tick-mark ‘This Server requires an encrypted connection (SSL)’ option and at the same time also, select (SSL) for ‘Use the following type of encrypted connection’ using the drop-down menu icon.
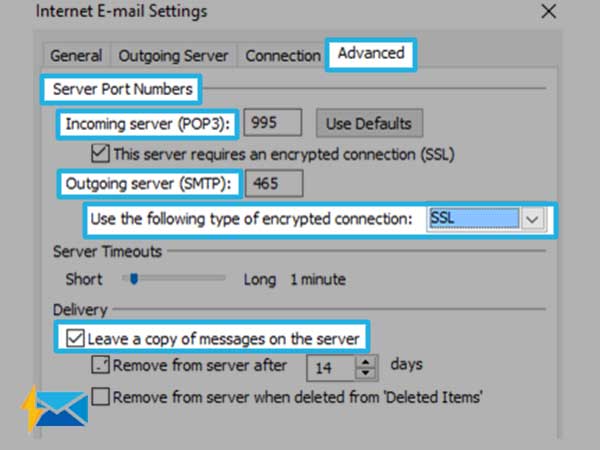
Step 14: Next, though it’s optional, if you want to access your email from multiple locations then, you can also tick-mark the checkbox for the ‘Leave a copy of messages on the server’ option.
However, if you don’t want to access your email from multiple locations then, leave it unchecked. This means, after downloading your Bellsouth emails from the server, Outlook will delete them from there.
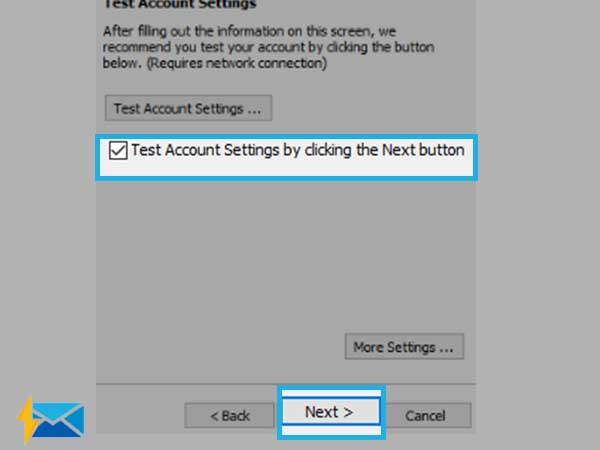
Step 15: Now, you’ve to simply click on the OK button to return to the previous window. Wondering why? Well, this is because you need to select the Test Account Settings option from there to verify whether you’ve Rightly configured your Bellsouth email in Outlook or not!
So, to initiate the same command, don’t forget to hit the Next button.
Step 16: Last but not least, if everything goes well and the test result also shows the same via this message— ‘Congratulations! All tests completed successfully’ then, click on the Close Button to finish the process of configuring your Bellsouth email account in MS Outlook email client program.
That’s all! Executing these 16 steps likewise they’re listed, will definitely help you to configure your Bellsouth.net email account in Outlook but if Bellsouth email is not working with Outlook you need to fix it immediately.
Share