8 Methods To Solve ‘Windows Live Mail Won’t Open’ Issue
After the introduction of Windows 10, many people have registered their complaints that they are no longer able to open their Windows Live Mail. This can be related to the fact that in Windows 10, Microsoft ended the support for the Windows Essential 2012 suite, which included Windows Live Mail along with several other apps of daily use.
So, it’s obvious from the aforementioned information why Windows Live Mail won’t open in your system. However, you need not worry. If you are using Windows 10 and want to use Windows Live Mail, then there is a workaround to that too.
Listed under this article are several solutions that will help you to resolve your Windows Live Mail not opening issue.
- Method-1: Change Compatibility Mode for Windows Live Mail
- Method-2: Enable ‘Try Recommended Solution’ Settings
- Method-3: Terminate Wlmail.Exe and Restart Windows Live Mail
- Method-4: Remove Windows Live Mail App Cache
- Method-5: Allow Windows Live Communication Platforms in Windows Firewall
- Method-6: Repair Windows Live Essentials
- Method-7: Temporarily Disable Antivirus
- Method-8: Last-Resort – Restore Your PC To Previous Restore Point
Method-1: Change Compatibility Mode for Windows Live Mail
Some users who were not able to open their Windows Live Mail, were able to launch it using a rather easy workaround.
The fact that Windows 10 and Windows Live Mail are off to a bad start speaks for itself, however, solving the issue is rather easy, which should be rectified by just moving to a new compatibility mode.
Particularly, it appears that this problem plaguing users of WLM can be fixed by adjusting the compatibility settings to earlier versions of Windows in which WLM was working fine.
Running the program with administrative permission should also be helpful. If you’re not sure how to do such adjustments, do as stated below:
- On your computer, open File Explorer and paste the following path into the location bar:
- C:\Program Files (x86)\Windows Live\Mail.
- After reaching the location, find the wlmail.exe file.
- Right-click on it, and select the Properties option from the menu that appears.
- In the Properties window, switch to the Compatibility tab.
- Thereafter, select the Run This Program in Compatibility Mode For option, and then select Windows 7 from the drop-down menu.
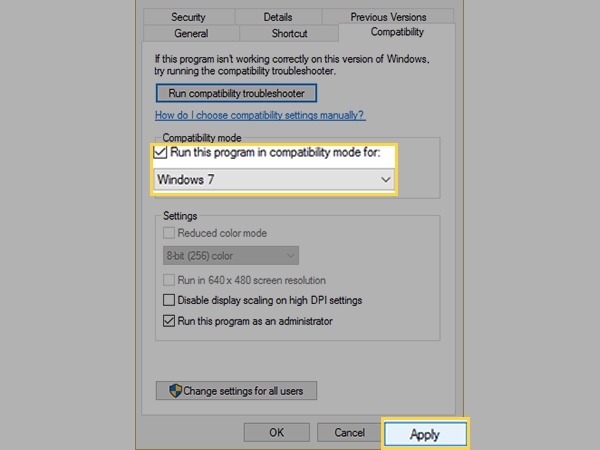
- Also, select the Run this Program as an Administrator option.
- Then, click on the Apply button and click OK to save the changes.
- After you have completed the above process, restart your computer.
- Now, again, try to open the Windows Live Mail, and see if the solution has worked or not.
Method-2: Enable ‘Try Recommended Solution’ Settings
If your Windows Live Mail is not working, and it is not opening in your updated Windows 10 or 11, then this method will surely help you.
As also mentioned earlier, in Windows 10, the support for Windows Essential Programs like Windows Live Mail was ended, and instead, new and better programs were introduced. So, it can be due to the same reason why Windows Live Mail isn’t opening in your Windows 10.
However, this issue can be resolved by changing the compatibility of the Mail, as we did in the above method. But, in it, we manually select the compatibility, while in this method we will go with the compatibility mode that the system recommends by enabling the ‘Try Recommended Solution’ setting.
So, stated below are the steps to do so:
- On your desktop, right-click on the Windows Live Mail shortcut.
- From the menu that will appear, click on the Open File Location option.
- Scroll down in the folder that will appear, and locate wlmail.
- Right-click on wlmail and select the Troubleshooting Compatibility option.
- Thereafter, click on the Try Recommended Solution option.
- Next, a window will appear stating that some changes have been made to the program, and will ask you if you want to test run the program. So, give it a try and click on the Test Program option.
- If the solution worked successfully, then Windows Live Mail will open. After that, you have to follow some on-screen instructions to complete the process.
Method-3: Terminate Wlmail.Exe and Restart Windows Live Mail
If even after the above two solutions, you can’t open your Windows Live Mail, it might be due to an error with the wlmail.exe file. If you are getting a wlmail.exe error in your system every time you try to open your Windows Live Mail, then you will have to terminate this file from running. In order to do so, follow the steps listed below:
- From the keyboard, press the Ctrl + Shift + Esc keys at the same time. This will open the Task Manager on your screen.
- In the Process tab on the Task Manager, look for the wlmail.exe file.
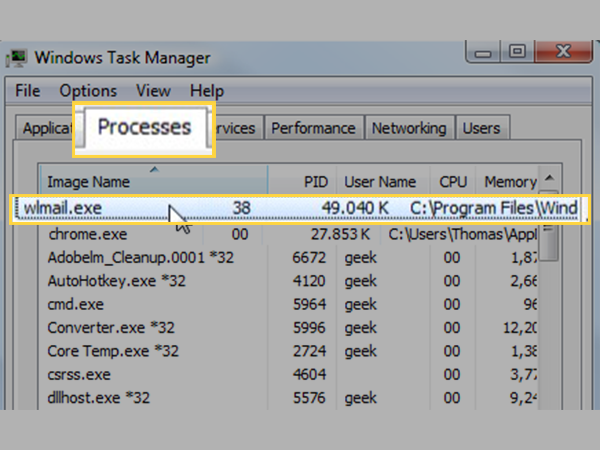
- Once you have found it, right-click on it and select the End Task option from the menu that appears.
- After doing so, close the Task Manager, restart the Windows Live Mail app on your system, and see if it is opening or not.
However, after following the method listed above, if your Windows Live Mail still won’t open, you can jump onto other methods listed further.
Method-4: Remove Windows Live Mail App Cache
Every app you use on your system stores its cache files in the memory. Every time a request is made from the user, the cache files are searched first to fulfill that request. However, if these files somehow got damaged, they can create issues in the normal functioning of an app, the same can be the case here. If Windows Live Mail isn’t opening in your system, it might be because of its damaged cache files.
In order to solve this difficulty, you need to get rid of the cache of Windows Live Mail. Don’t worry, this won’t delete any of your data, and you will be able to carry on your work just fine with the mail, alongside solving the issue you are facing with it.
So, listed below are the steps to delete these files:
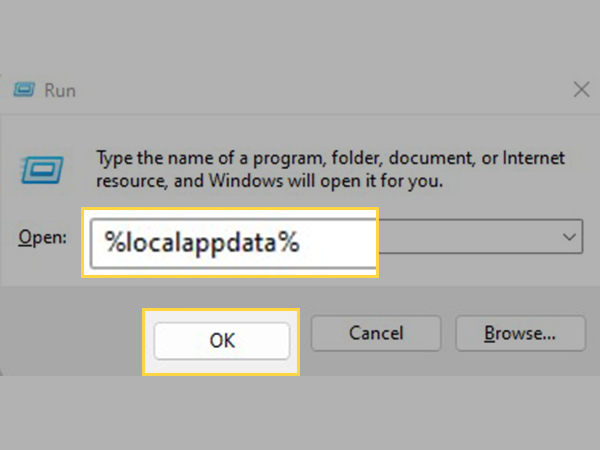
- Press the Windows logo + R keys from the keyboard at the same time.
- Then, the Run window will open where you have to type %localappdata% in the text field and click on the OK button.
- Now, double-click on the Microsoft folder to open it up.
- Inside the Microsoft folder, look for the Windows Live Mail folder and open it by double-clicking on it.
- Thereafter, look for the folder with the .cache extension. Right-click on it and select the Delete option.
- Once the folder is deleted, remove it from the Recycle Bin as well and launch Windows Live Mail and see if you are still not able to open it.
Method-5: Allow Windows Live Communication Platforms in Windows Firewall
A firewall checkup is necessary for debugging any program that depends on a connection. Make sure Windows Live Mail is permitted to connect to the server as it needs to in order to access and sync your inbox.
This crucial activity might be prevented by a firewall, probably because of which you can’t open Windows Live Mail. To enable Windows Live Mail over Windows Firewall, adhere to the preceding instructions.
However, the process varies depending on the third-party program you have installed in your system. Therefore, you have to contact your antivirus support to make the same changes to it as well.
In order to allow Windows Live Mail in Windows Firewall, do as stated below:
- Click on the Start button, type Firewall in the system search bar, and click on the Windows Firewall option from the results.
- Now, from the left sidebar of the window that will open, click on the Allow an App or Feature Through Windows Firewall option.
- Next, click on the Change Settings button.
- In the Allowed Apps And Features list, scroll down and locate the following protocols. Also, make sure that these are checked:
- Windows Live Communication Platform (SSDP)
- Windows Live Communications Platform (UPnP)
- Windows Live Communications Platform.
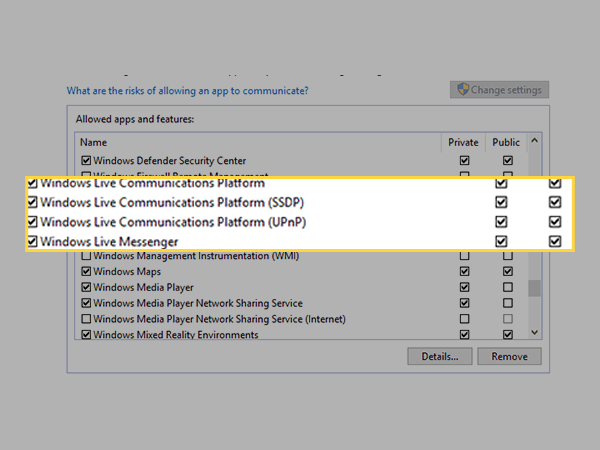
- Once done, click on the OK button to save changes.
After you have made the changes, try to open the Windows Live Mail and see if the issue still persists.
Method-6: Repair Windows Live Essentials
This is one of the solutions that experts say works best for a variety of problems. Turn to a repair function whenever you face any problem with the Windows Essential suite programs.
Repairing Windows Essentials will find and replace any damaged files that might be preventing the Windows Live Mail from opening. Thus, doing so will also help you to get rid of the wlmail.exe system error.
Here are the steps that you need to take to carry out the repairing of Windows Essentials:
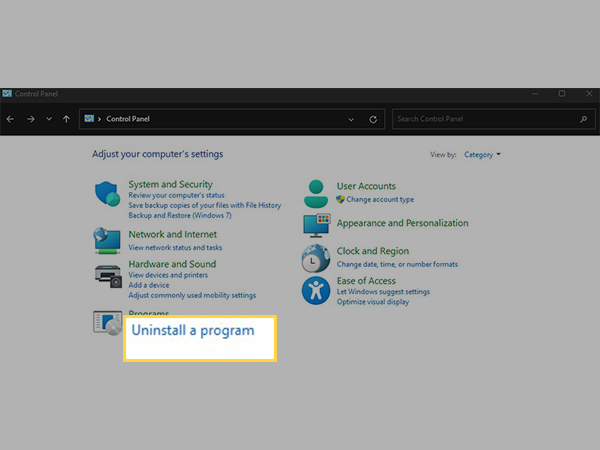
- Click on the Start button from the taskbar of your Windows, type Control Panel in the search bar, and click on the Control Panel option from the search results to open it.
- In the Control Panel window, click on the Uninstall a Program option.
- Then, look for Windows Live Essentials in the Uninstall or Change Program list.
- Then, click on it and select the Uninstall/Change option that will appear at the top of the list.
- An Uninstall or Repair Windows Essentials Program window will open, where you have to select the Repair All Windows Essentials Programs option.
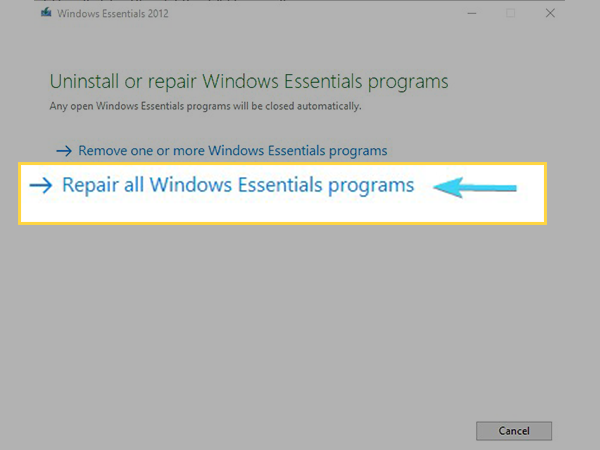
- Thereafter, you have to follow some instructions displayed on the screen and complete the repair process.
- Once the repair is done, restart your system.
After you have followed the above process, launch the Windows Live Mail app and see if you are still not able to open it.
Method-7: Temporarily Disable Antivirus
Your antivirus program can be another reason why Windows Live Mail isn’t working properly. Any third-party antivirus program installed in your system may occasionally prevent you from executing specific functions, as they may flag it as dangerous for the system.
The same can be the case here. Further, the chances of the issue with the mail and the antivirus increase when you are using an older version of the mail. Therefore, make sure Windows Live Mail is included in your antivirus’s list of exceptions so that the antivirus does not mark it as malicious.
However, if Windows Live Mail is being blocked by it, you might be able to solve the issue by turning off your antivirus program. Thus, try uninstalling or deactivating your antivirus program temporarily.
If uninstalling or disabling the antivirus software resolves the issue, then you should add Windows Live Mail to the exception list of antivirus, or this could be the ideal time to think about switching to another antivirus program.
Method-8: Last-Resort – Restore Your PC To Previous Restore Point
If you have restored your system at any previous point, then this method is for you, otherwise, you can skip this solution.
You can restore your system to a previous point when your Windows Live Mail was opening and working fine. However, to do so, you should have stored the backup of your system at an earlier point in time. Restoring the system to that point will make its configuration the same as it was at that time. This also means that any data stored, or any changes made, after that point in time will be removed.
So, if you are still willing to perform this method, then make sure to take the backup of your data stored in your system, beforehand.
Here are the steps for doing so:
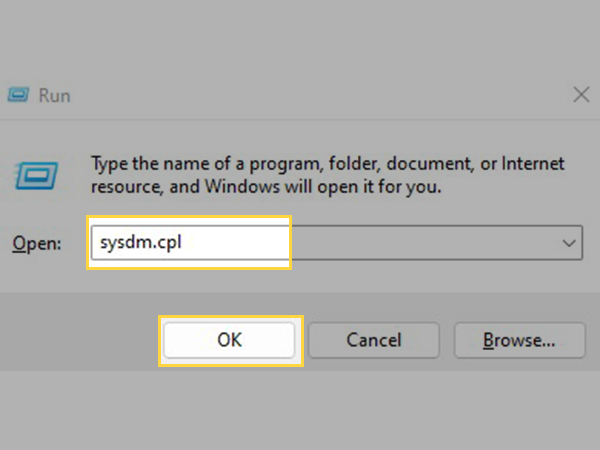
- From your keyboard, press the Windows logo + R keys at the same time.
- This will open the Run window, where you have to type sysdm.cpl in the text field and click on the OK button.
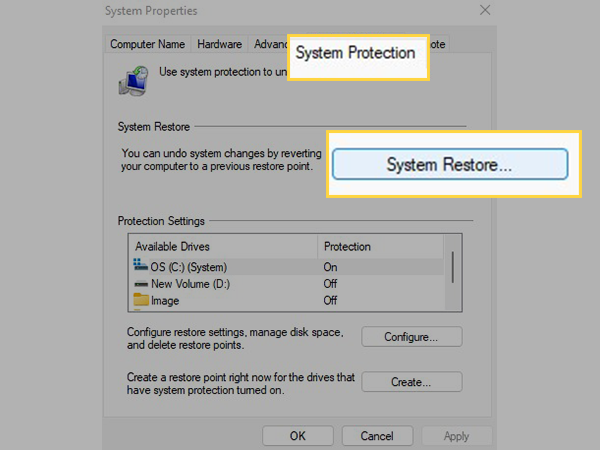
- Now, a System Properties window will open, where you have to switch to the System Protection tab.
- There, click on the System Restore button, and click Next.
- Then, select the restoration point from the list (if you have restored the system multiple times, there will be a list of restoration points. However, if you have done it only once, there will be one option, otherwise, there will be none), and click Next.

- Thereafter, follow some on-screen instructions to complete the restoration process.
Once the process is completed, the system will reboot, and your Windows Live Mail should open this time.
Hope the above solutions were able to help you resolve the issues with your Windows Live Mail, otherwise, you can contact Microsoft Support to get further assistance in the matter.
Next, you should also read: How You Can Get Rid Of Live Mail Login Issues
Share