What to Do if Windows Live Mail Is Not Working?
- Introduction
- Reasons Why My Live Email Is Not Working?
- Repair Window Live Mail with These Solutions
- End Wlmail.Exe and Start Windows Live Mail Again
- Consider Better Third-party Options
- Get Rid of the Windows Live Mail.Cache
- Turn Off your Antivirus
- Utilize Compatibility Mode When Using Windows Live Mail
- Set up a New Windows Live Mail Account
- Maintain Windows Essentials
- Put Your Computer Back to An Earlier Working Period
Email is still one of the most widely used methods of communication today, and Windows Live supports a number of email clients, comprising Windows Live Mail, as well as MSN Hotmail, and lets you download mail from a variety of different accounts. Microsoft’s freeware email program, Windows Live Mail, permits users to set up their own email accounts and take advantage of the conveniences of email communication. Outlook Express on Windows XP was replaced by Windows Mail. With Windows 7 and newer versions, Windows Live Mail is compatible.
Sending and receiving messages is made simple, as well as email management. Windows Live Mail is prone to several faults like there might be an update error, though, just like any other piece of software. Users still use Windows Live Mail even though Microsoft no longer supports it since it is still available. In this article, we will see the reasons why Windows live mail stops responding and the solutions to resolve it.
Reasons Why My Live Email Is Not Working?
There are numerous potential reasons why Windows Live Mail isn’t functioning properly on your system. The graphics card driver’s incompatibility with Windows 10, particularly following the upgrade, may be the primary cause of this problem. The graphics card consequently malfunctions as a result.
Furthermore, occasionally it seems like the Windows Live Mail cache is faulty. Windows Live Mail couldn’t be opened either. The Windows Live Mail icon says that it is loading whenever you click on it, but nothing happens even after a while. Windows Live Mail would also be unable to install properly and result in this problem if your computer’s drive is full and you are out of RAM. Incorrect installation of the software could result in these problems. The easiest approach would be to make the repairs described above to address that issue. Additionally, your system can encounter many errors. The main causes of Windows Live Mail not functioning on your PC are as follows:
- Problems With Compatibility.
- Unsuitable Account Settings.
- Limitations in Firewall Configurations.
- Insufficient Assistance for Windows Live Mail.
Repair Window Live Mail with These Solutions
If you experience a similar problem with your computer, don’t worry; we have the best solutions to help you fix Windows Live Mail Won’t Open. You can return Windows Live Mail to its previous state using these techniques.
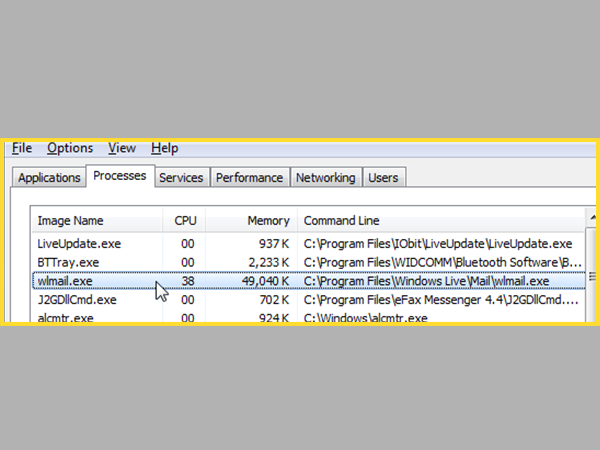
End Wlmail.Exe and Start Windows Live Mail Again
The steps to end Wlmail.Exe and start Windows Live Mail again are given below:
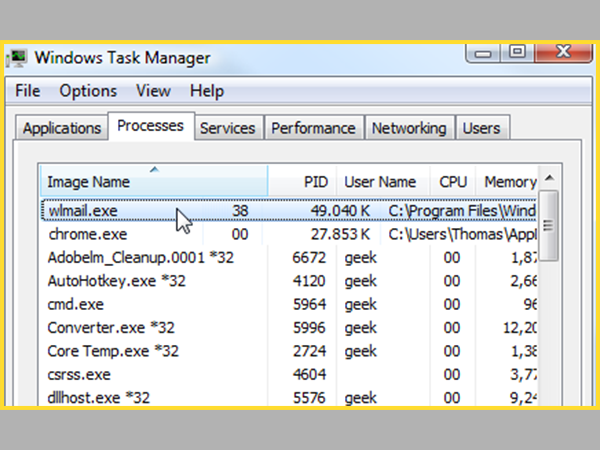
Step 1: To open Windows Task Manager, use Ctrl + Shift + Esc.
Step 2: From the list, locate wlmail.exe, then right-click on it and choose End Task.
Step 3: Next, restart Windows Live Mail once more to see if the problem with Windows Live Mail not opening has been resolved.
Consider Better Third-party Options
If the aforementioned remedy was unable to cure your Windows Live Mail problems, we urge you to forego it and look for other options. You might wish to take into account some of the fantastic email clients that are accessible. The mail client listed below is our top recommendation right now, though. It may satisfy all of your mailing management needs because it is a market leader.
The fact that it collects all accounts in one location has capabilities for Signature Management and has an intelligently designed user experience ought to make a difference. After all, Windows Live Mail has been discontinued, just like several other products from the past. The fact that it still operates for a few users today does not ensure that it will continue to do so.
Get Rid of the Windows Live Mail.Cache
In order to get rid of the Windows Live Mail.Cache, you can follow the steps given below:
Step 1: To begin, use Windows Key + R, type %localappdata %, and then click OK.
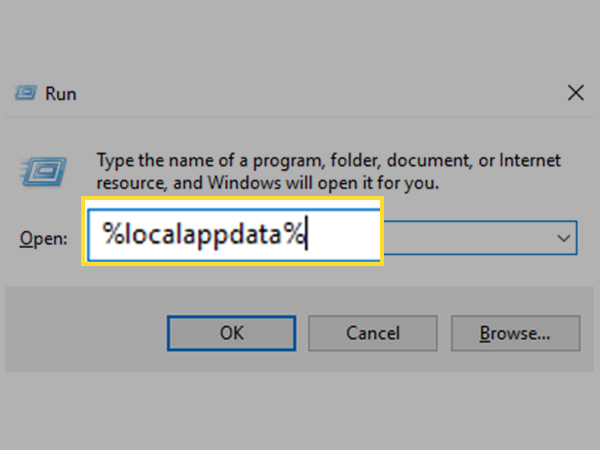
Step 2: Select Microsoft by double clicking it inside the Local Folder.
Step 3: Double-click Windows Live to open it after that.
Step 4: Find the.cache folder, then click and choose Delete from the context menu.
Step 5: Be sure to empty the Recycle Bin after the folder has been erased.
Turn Off your Antivirus
Your antivirus program can be another reason why Windows Live Mail isn’t working properly. Your antivirus program may occasionally prevent you from running a specific program. Therefore, make sure Windows Live Mail is included in your antivirus’s list of exceptions. You might be able to solve the issue by turning off your antivirus program if Windows Live Mail isn’t being blocked by it.
Try uninstalling or disabling your antivirus program if you’re having trouble running Windows Live Mail because some antivirus programs just aren’t compatible with older versions. If uninstalling the antivirus software resolves the issue, now might be the ideal time to think about switching to another antivirus program.
Utilize Compatibility Mode When Using Windows Live Mail.
The steps to utilize the compatibility mode while using windows live mail is given below:
Step 1: Go to the following location to access Windows Live Mail: C: Program Files (x86).
Step 2: Locate the wlmail.exe file, right-click on it, and then choose Properties.
Step 3: Go to the Properties Windows Compatibility tab.
Step 4: Select Windows 7 and check the box next to “Run this program in compatibility mode for.”
Step 5: After selecting Apply, select OK.
Step 6: For the modifications to be saved, restart your computer.
Step 7: Verify whether the Windows Live Mail Won’t Open problem has been fixed.
Set up a New Windows Live Mail Account
Resetting the options for your Windows Live Mail account is another simple fix. Back in the day, using older versions of Windows was simpler; however, Windows 10 came with a host of problems. Specific issues arose as a result of the disagreement between the recently released Mail and Outlook programs and Windows Live Mail. To prevent the conflict, one can reconfigure the Windows Live Mail for Windows 10.
Maintain Windows Essentials
You can easily maintain your window’s essentials by following the given steps:
Step 1: Start by pressing Windows Key + X, then choose the Control Panel.
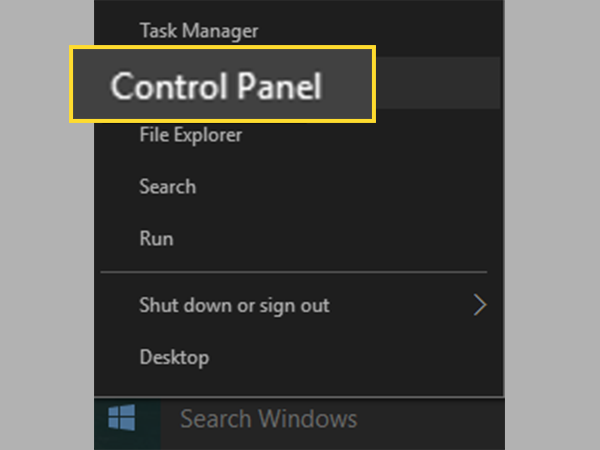
Step 2: Click Remove a Program.
Step 3: From the list, locate Windows Essential, then right-click on it and choose Uninstall/Change.
Step 4: Select the repair option in the uninstall box that appears.
Step 5: To finish the Windows Essentials Repair Process, adhere to the on-screen instructions.
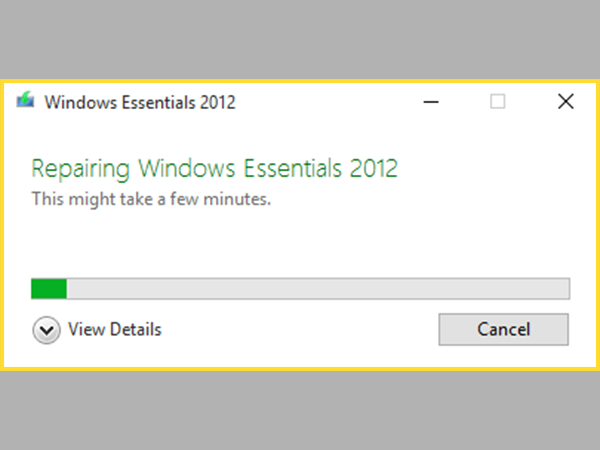
Step 6: Put everything away, then restart your computer.
Step 7: Verify whether or not the Windows Live Mail Won’t Open issue has been resolved.
Put Your Computer Back to An Earlier Working Period
Step 1: Type “sysdm. Cpl” into the Run box by pressing Windows Key + R, then click OK.
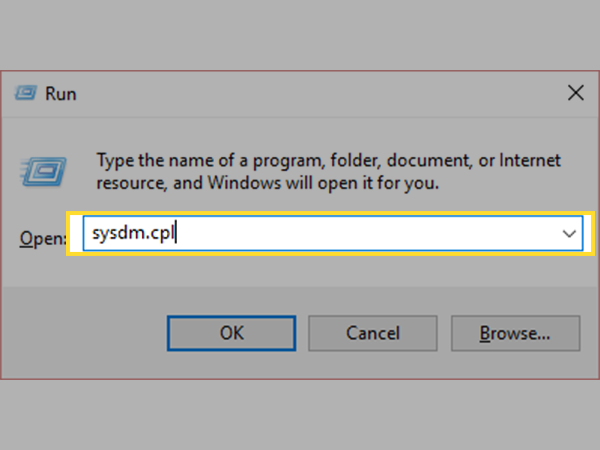
Step 2: Click System Restore under System Protection.
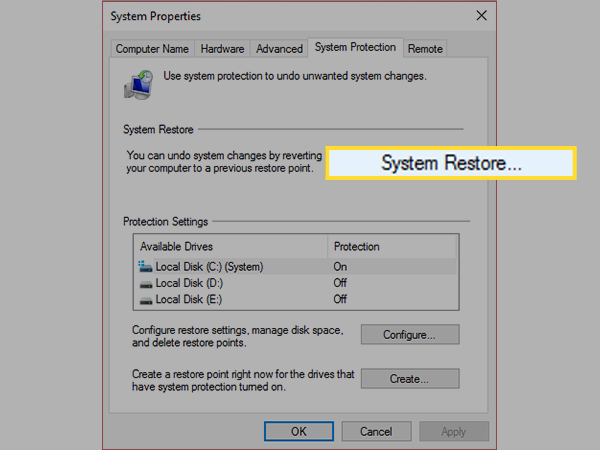
Step 3: After clicking Next, select the appropriate System Restore point.
Step 4: To finish the system restore, adhere to the on-screen instructions.
The Windows Live Mail Won’t Open problem should be resolved after a restart of your computer. Additionally, this will resolve any Windows 10 Random Restart Errors on your computer.
Due to its simplicity, Windows Live Mail is still utilized by many individuals. However, WLM frequently makes it complicated for people to utilize due to some problems. The repairs given above are the best and most effective solutions to your Windows Live Mail Won’t Open issue. There are numerous potential causes for this issue, but these methods almost address every one of them and leave no room for error.
We remind you to carefully follow the steps before attempting any solution, regardless of the action you decide to take to address the problem. Be cautious when carrying out these patches because even the smallest error can harm your machine. In case something goes wrong, we advise you to make a restore point. However, it is doubtful, and using the aforementioned solutions, the issue might be readily remedied. We hope that using these solutions enables you to address the problem.
Share