Solutions For iCloud Mail not Working in Outlook and its Contacts & Calendar are not Syncing
Is your iCloud not working with Outlook? Or have you been facing iCloud Mail, Contacts, and Calendar syncing issues with Outlook?
Whatever be the case, do you know that some features of iCloud work differently in Outlook, than they do on other Apple devices? If you do not know this, then you can have trouble working with your iCloud account added in Outlook.
Well, read this out:
- The VIP Senders folder that is available in iCloud on Apple devices is not available in Outlook. Further, all mail rules that you set or create in Outlook cannot be seen in Mail on other devices as well as on iCloud.com. Additionally, if you have created your mail signature in Outlook, you won’t see it on other devices because they are saved locally on your device.
- From a vCard set of contacts, Outlook will only integrate the first contact. However, if you need to upload all of them to Outlook, then import the vCard set directly into iCloud.com or macOS Contacts, and all the contacts will be individually added to your Contacts in Outlook.
- And, when you add calendar attachments to Calendar in Outlook, it won’t be visible in Calendar on your other iOS or macOS devices, and vice-versa.
If you already knew all of this and are still having problems with iCloud working in Outlook, then your situation is different, and I am certain that it will be handled by following the methods outlined further in this post.
Basic Workarounds
There are a few basic things to consider that you may have neglected while searching for a solution when your iCloud Mail is not working in Outlook.
These are minor checks and solutions, that are frequently overlooked but can resolve the issue without doing much:
- Check if your PC meets iCloud System Requirements: In order to use iCloud in your Windows system, here are a few things that your system must contain that Apple recommends for the best working of iCloud:
- Windows Version: Microsoft Windows 10 May 2019 update or later
- Outlook Version: Outlook 16 or later
- Make sure your system is connected to the internet: If messages are disabled on your iCloud, then the loss of connection with the internet can be the reason for it. Make sure that your internet is working fine, and that there is no technical glitch.
- Ensure to use the correct Apple ID: If you have multiple Apple IDs that you use with iCloud, then ensure that the correct email ID is added to Outlook.
- Check iCloud Server Status: It is sometimes the case that you are attempting more advanced solutions when the servers of iCloud are out of service. If the servers of iCloud are in their downtime, then no matter what you do, all would be in vain. In such a case, you can do nothing but wait till they are working again. To check the server status of iCloud, visit Apple System Status Page, look for iCloud there, and see if there is some issue with it.
- Correct Date and Time: Apple suggests that if iCloud is not working in Outlook, it can be due to incorrect date and time of your computer. Thus, make sure that both of these are correctly configured in your system.
- Restart your PC: Restarting your system will terminate all the pending programs in the background which might be interfering with Outlook due to which iCloud is not working in it.
When iCloud Mail is not Working with Outlook…
Method-1: Correctly Configure iCloud Mail in Outlook
Before looking into other troubleshooting methods to resolve issues with iCloud Mail when it is not working in Outlook, it is important to make sure that you have added your iCloud Mail in Outlook by configuring it correctly.
For the same reason, here are the detailed steps that will let you know if you have accurately set up your iCloud Mail in the Outlook app.
Further, in order to manually set up your iCloud email account in Outlook, you first have to generate the app password for Outlook. The steps for doing so are stated below:
Generating App Password:
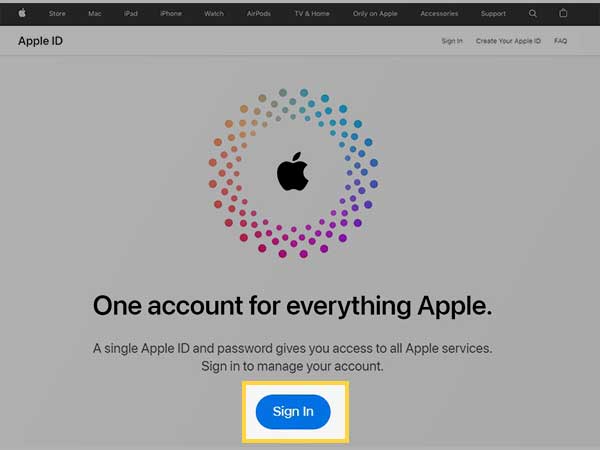
- First, open your browser and visit the Apple Account Page.
- There, click on the Sign In button.
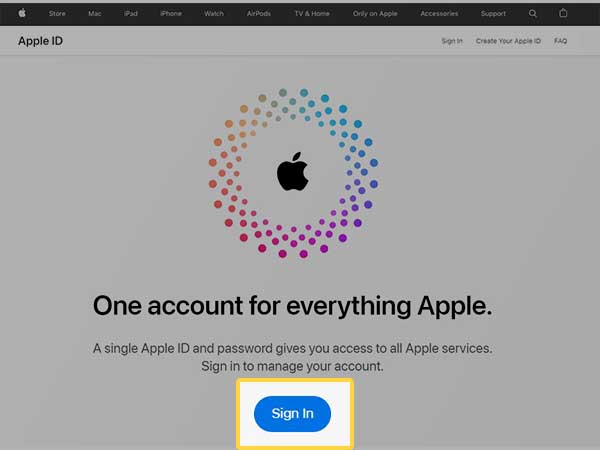
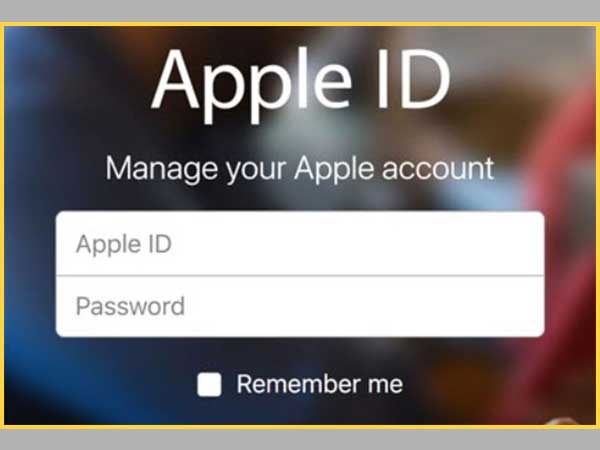
- Fill in your Apple ID login credentials, and log in to your iCloud account.

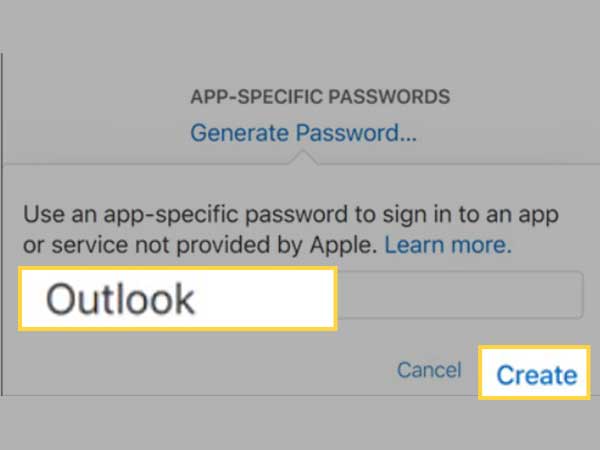
- On your Apple ID page, scroll down till you see the Security section. Click on the Generate Password link under the APP-SPECIFIC PASSWORDS option.
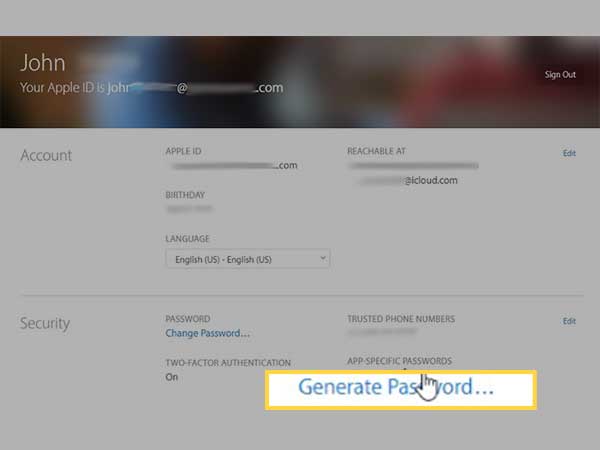
- In the small box that appears, type in the name of the application for which you want to create the app password. In this case, type Outlook, and click on the Create button.
- Next, the password will be generated. You have to copy that password, save it in a safe place, and click Done.
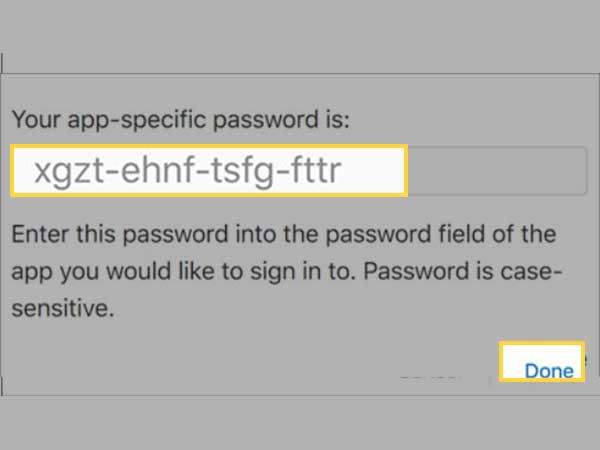
Note: It is important to note down the password and save it in a safe place before you click Done, as you won’t be able to access this password later.
Now that you have generated the app password, head over to the steps of adding and setting up an iCloud email in Outlook and see if you have configured your iCloud Mail incorrectly because of which it is not working in Outlook.
So, here are the steps:
For Outlook 2013 and Outlook 2010:
- To begin with, open the Outlook app on your device.
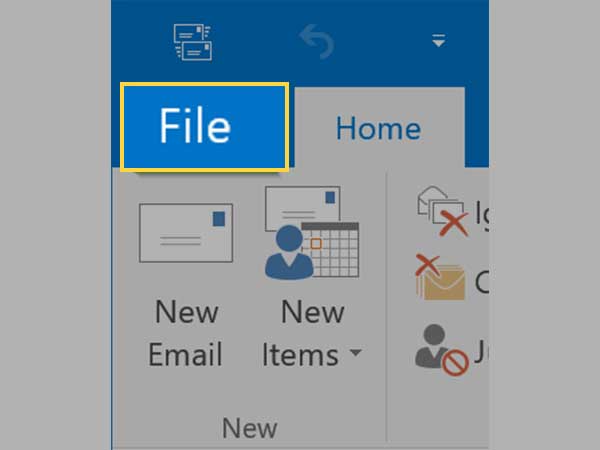
- From its home screen, click on the File menu option present in the top left corner.
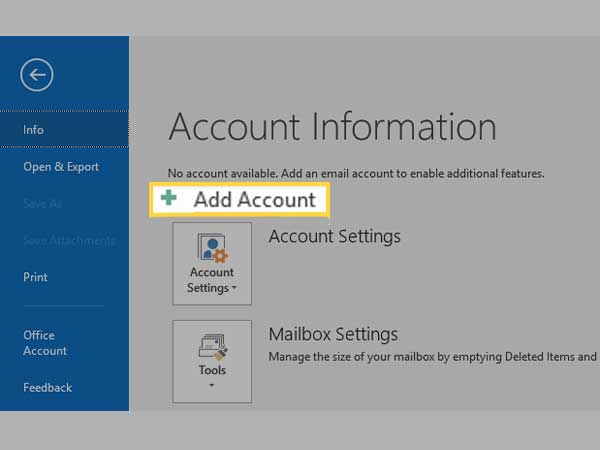
- Now, click on the Add Account button from the next window.
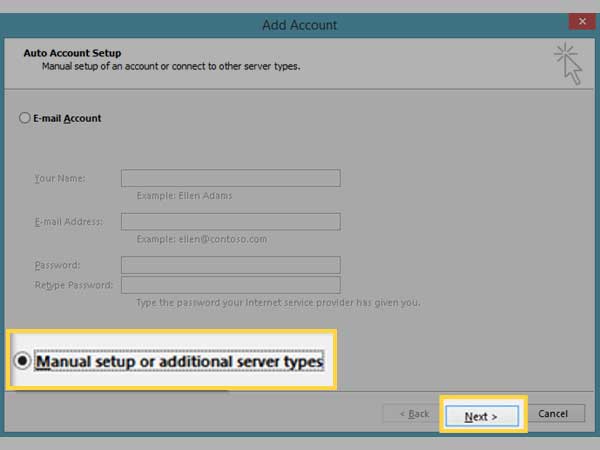
- On the next screen, you have to select the Manual Setup or Additional Server Types option and click on the Next button.
- Then, select the POP or IMAP option, and again, click on the Next button.

- Thereafter, fill in the details mentioned below:
- Your Name: Enter your full name
- Email Address: Provide your iCloud email address
- Account Type: IMAP
- Incoming Mail Server: imap.mail.me.com
- Outgoing mail server (SMTP): smtp.mail.me.com
- User Name: The name in your iCloud email address before ‘@icloud.com’ (If the error appears, try entering the full email address)
- Password: Enter the app password, generated above.
- Check the Remember logon using the Secure Password Authentication (SPA) option
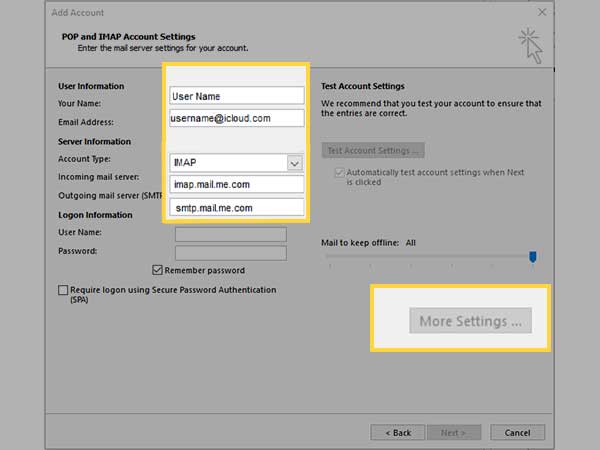
- Click on the More Settings… button.
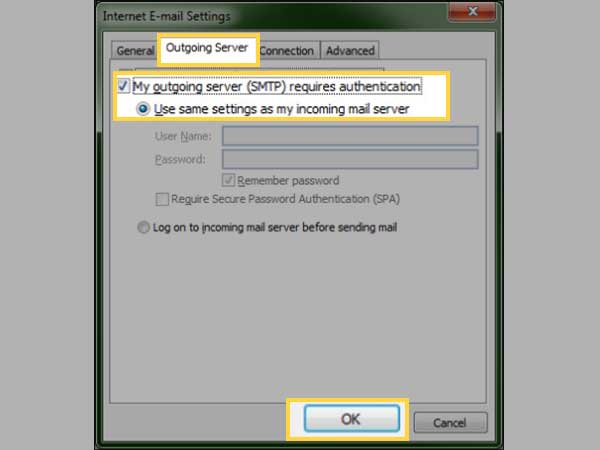
- Switch to the Outgoing Server tab on the following window. Check the My Outgoing Server (SMTP) Requires Authentication option, and click on the ‘Use the same settings as my incoming mail server’ option. Click OK.
- Next, switch to the Advanced tab, and fill in the following information under the Server Port Numbers section:
- Incoming server (IMAP): 993
- Use the following type of encrypted connection: SSL
- Outgoing server (SMTP): 587
- Use the following type of encrypted connection: SSL or TLS
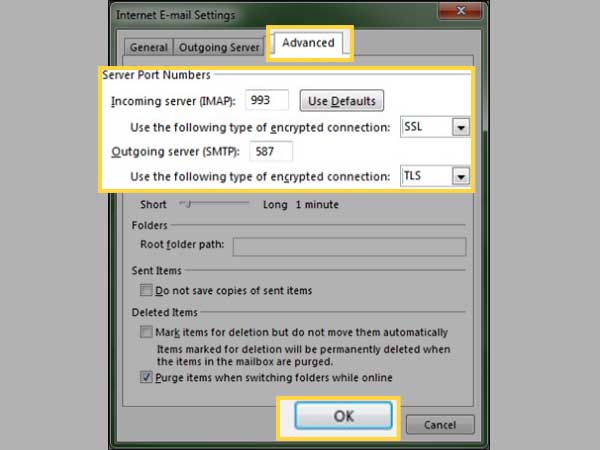
- Finally, click on the OK button, then click NEXT, and click Finish.
For Outlook 2016 and Outlook in Microsoft 365:
- Open the Outlook app on your system, and select the File menu option from the top right corner of the screen.
- Click on the Add Account button in the next window.
- Now, fill in your iCloud email address in the text box visible on the screen.
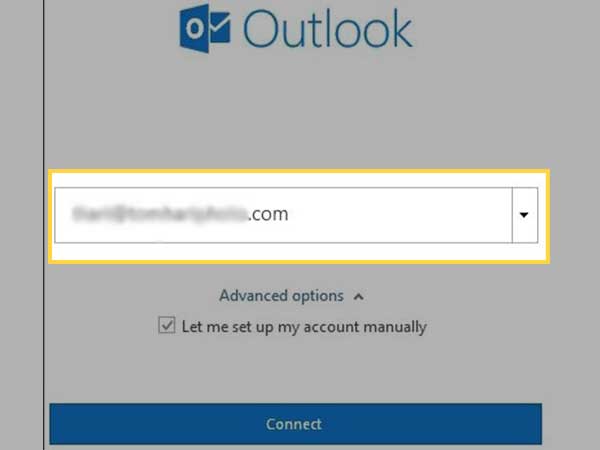
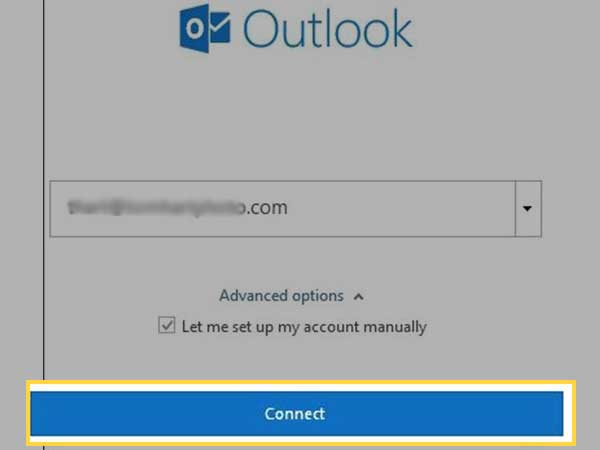
- For manually setting up the account, click on the Advanced Options, and select the Let me Set up my Account Manually option.

- Then, click on the Connect button.
- From the next screen, select IMAP as the Account Type.
Note: iCloud does not support POP. So make sure you only select IMAP.
- Next, the Account Settings screen will appear, which will be prefilled with the account information you need. To make sure they are correct, match the respective settings with the information provided in the 6 and 9 steps of the above method.
- Once you are satisfied, click on the Next button.
- Finally, enter your iCloud email password and click on the Connect button.
Method-2: Check if 2-factor Authentication is Enabled
After making sure that you have followed the correct steps to configure your iCloud Mail in Outlook, and it’s not the reason why iCloud is not working in it; the next thing you should check is whether you have enabled two-factor authentication for that Apple ID or not.
If you have turned on the two-factor authentication for the Apple ID which you use in your iCloud, and are currently facing issues with, then you have to generate the app-specific password and use that only to log in to third-party applications, like Outlook.
To check if two-factor authentication is enabled, follow the steps listed below:
- First, open your browser and visit the Apple Account Page.
- Upon reaching there, click on the Sign In button.
- On the next screen, fill in your login credentials of the Apple ID you use with iCloud, which is currently not working in Outlook.
- On your following account page, scroll down to the Security section.
- Check if the TWO FACTOR AUTHENTICATION option is On or Off.
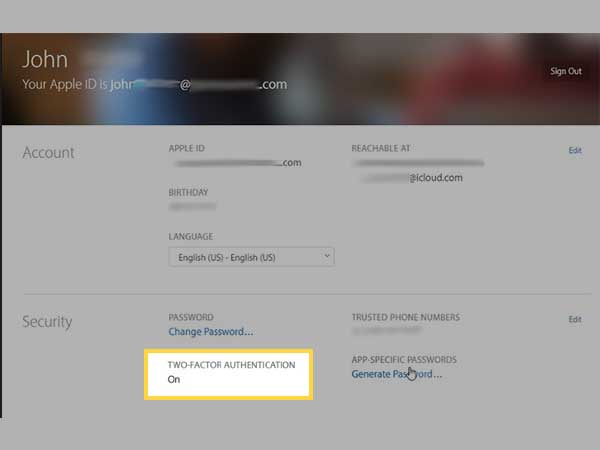
If the required setting option is turned on, then generate the app-specific password for Outlook (refer to the above method), and use it to log in to iCloud Mail via Outlook.
It is more likely to solve the issue. However, if still, you cannot merge your iCloud Mail with Outlook, then move on to the next method.
Method-3: Ensure Outgoing Server (SMTP) Authentication is Enabled
Make sure that your iCloud Outgoing Mail Server (SMTP) authentication is turned on. Some email services, like iCloud Mail, need SMTP server authentication. If you’ve checked your account settings and still messages in your iCloud account are disabled, and it’s not working, try enabling SMTP authentication.
To do so, go through the steps stated below:
- Click on the Tools option in the Outlook app, and select the Accounts option from the expanded menu.
- On the left side of the Accounts page, select the iCloud account for which the messages or mails are disabled, and click on the Change button.
- Next, switch to the Outgoing Server tab.
- Select the My Outgoing Server (SMTP) Requires Authentication option.
- Then, click either on the Use Same Settings as my Incoming Mail Server option or Log on Using option. For the latter one, provide your iCloud Username (username is the part before ‘@icloud.com’. If it gives an error, enter your full email address), and Password (enter your app-specific password here).
- Once it is done, click on the OK button, and Finish.
When iCloud Mail, Calendar, & Contacts are not Syncing with Outlook…
Syncing iCloud with Outlook
If you are facing the syncing issue of iCloud Mail, Contacts, and Calendar, with Outlook, then in the first place, make sure that you have followed the steps stated below to sync them:
- First, you need to download iCloud for Windows on your PC.
- Once iCloud installation is done, open the iCloud app, and log into your account using your Apple ID and password.
- Next, within the iCloud app, choose the option to sync Contacts, Calendar, Mail, and Reminders, and then, click on the Apply button.
- After the above step is processed, open the Outlook app. Now, your iCloud Mails, Calendar, Contacts, and Reminders must be automatically synced with your Outlook.
However, if you have followed the above steps correctly and still your iCloud Mail, Calendar and other things are not able to sync with Outlook, then proceed with the methods listed further.
Method-1: Turn off Sync and Turn it Back on
You can try turning off the sync of iCloud with Outlook, by following the steps mentioned below:
- Open the iCloud app that you have downloaded for Windows.
- Now, deselect the Mail, Contacts, Calendar, and other things that are causing syncing issues with Outlook, and click on the Apply button.
- Close the iCloud app, and wait for a few seconds. Open it again, select the aforementioned options to sync with Outlook, and click on the Apply button.
- Now, open the Outlook app, and see if iCloud Contacts, Mails, and Calendar are syncing or not.
Method-2: Remove iCloud from Outlook’s Default Data Files
If you have set iCloud as your default Outlook account, then remove it and make another email account the default account. To do so, here are the steps:
- Open the Outlook app on your PC.
- Click on the File menu option present in the top left corner of the screen.
- From the left side pane of the window that appears, select Info.
- Next, select the Account Settings option, and then click on the Data Files option.
- Now, check if iCloud is set as the default account in the Comments column. To deselect it, select another account, and click on the Set as Default button.
Method-3: Refresh the Outlook App
If your iCloud Mail, Calendar, etc. is still not syncing with Outlook, you can try refreshing the Outlook app. You can simply do so by clicking on the small round refresh button in Outlook. This refresh button (consists of a round arrow) is present across the ‘Folders’ on the left side pane of the mailbox page.
However, if you do not see the round button, then inside Outlook, go to the Send/Receive tab, and click on the Send/Receive all Maps option. This way you can manually refresh the mailbox, and see if new emails are received, then your iCloud Mail is synced to your Outlook and the issue is resolved.
You can add this shortcut to the toolbar by right-clicking on the Send/Receive all Maps and selecting the Add to Quick Access Toolbar option.
Method-4: Make Sure iCloud Outlook Add-in is Active
Ensure that you have enabled the iCloud Outlook add-in to eliminate the iCloud Mail, Contacts, and Calendar syncing issue with Outlook. To check it, or turn it on, follow these steps:
- Open the Outlook app and click on the File option present in the top left corner of the screen.
- From the left side pane of the screen that appears, select Options.
- Next, the Outlook options window will open up, where you have to click on the Add-ins option present on the left side pane.
- Inside the Active Application Add-Ins section, look for iCloud Outlook Add-in. If it’s there, but not selected, then select it, and if it’s not there, then install it.
Common & Advanced Troubleshooting Methods
The methods mentioned above were specific to when iCloud is not working with Outlook or when iCloud is not syncing with Outlook. However, there are some common and advanced troubleshooting methods that when performed can take care of any problem related to Outlook. Stated below are these solutions.
Method-1: Repair Data Files of Outlook
Your iCloud messages might be disabled, or Mail or Calendar or Contacts, may not be syncing with Outlook if its Data Files are damaged. To repair them, follow the instructions below:
- Close the Outlook application.
- In the File Explorer, go to the following location according to your Outlook version:
| OUTLOOK VERSION | LOCATION |
| Outlook 2019 | C:\Program Files (x86)\Microsoft Office\root\Office16 |
| Outlook 2016 | C:\Program Files (x86)\Microsoft Office\root\Office16 |
| Outlook 2019=3 | C:\Program Files (x86)\Microsoft Office\Office15 |
| Outlook 2010 | C:\Program Files (x86)\Microsoft Office\Office14 |
| Outlook 2007 | C:\Program Files (x86)\Microsoft Office\Office12 |
- Upon reaching the stated location, double-click on the SCANPST.EXE to open it.
- Select the Browse option to select the Outlook Data File (.pst) you want to scan.
Note: To locate Data Files, follow: In Outlook, select File > Account Settings > Account Settings > Data Files tab > All Outlook Data Files (.pst) and Offline Data Files (.ost) are listed along with the account name to which they are associated.
- Click on the Start button to begin the scan process.
- If there is an error, the scan will display it. To resolve the issue, click on the Repair button to proceed with the fixing.
- When it’s done, open Outlook and visit the iCloud account with which you were facing syncing issues and check if the problem is resolved.
To get more information on the process above, visit the article.
Method-2: Update Outlook
If iCloud Mail is not working in Outlook and also its Calendar and Contacts are not syncing, then updating the Outlook application on your system can resolve the problem.
Here’s what you need to do:
- Open the Outlook app and click on the Files option.
- Select the Office Account option.
- Next, under the Product Information section, select the Update Options, and then click the Update Now option.
- Wait till Outlook checks for updates and is done installing them.
Note: If the Update Now option is not visible, you may need to click the Enable Updates option first.
Method-3: Repair Microsoft Office Application
If your iCloud Mail is still not working in Outlook, or it is not syncing with Outlook, one other thing you can do is repair your whole Microsoft Office Application.
Listed below are the steps that will walk you through the process:
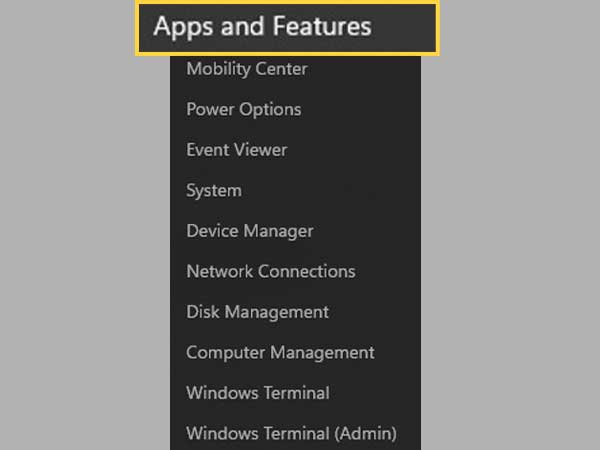
- Right-click on the Start button of your Windows, and choose the Apps and Features option present at the top of the menu that appears.
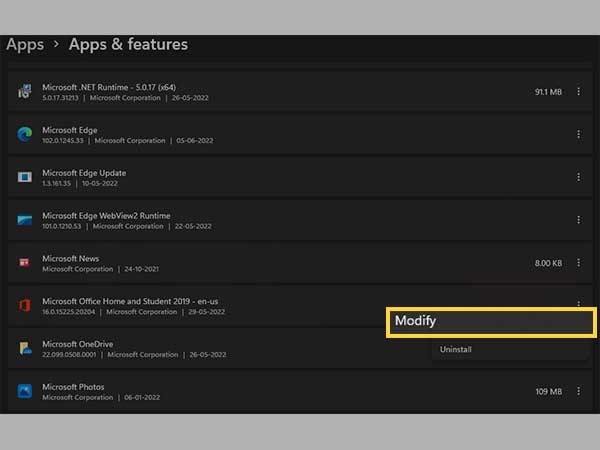
- Look for Microsoft Office in the list of apps, and click on the menu icon (three dots) next to it.
- From the expanded menu, select the Modify option.
- Click on the Yes button when a window, asking to allow the app to make changes, appears.
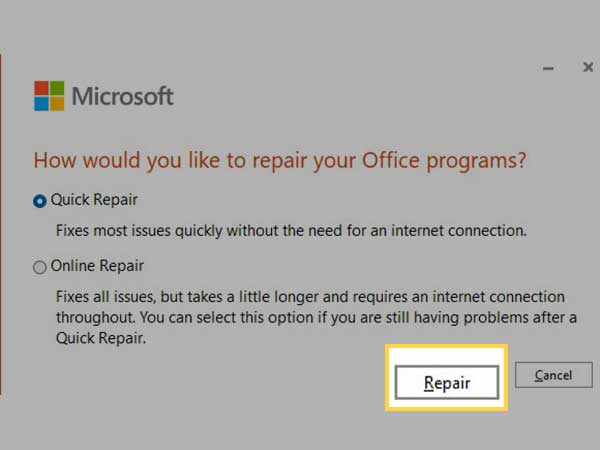
- You can select either the Quick Repair or Online Repair option. Quick Repair is fast and requires no internet, while Online Repair takes time and needs to use the internet.
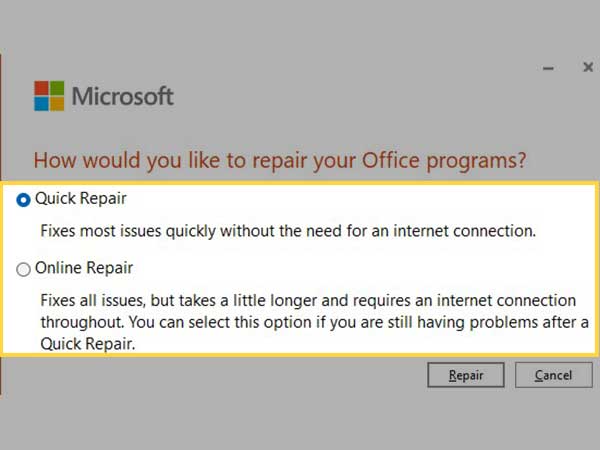
- After selecting the option, click on the Repair button.
- Thereafter, follow some on-screen instructions and complete the process.
If you have performed the repair, but the problem still exists, then visit the MS Support page to look for the process that you need to perform if the repair didn’t help.
Share