How to Change the Email on the Xbox Account? 10 Steps to Change Xbox Email
Want to know how to change your Xbox email? Well, it’s no rocket science in that, it’s simpler than you would think to alter an Xbox account’s email address. You don’t have to dive deep into your Xbox menus and settings, instead, you just need to swiftly make the changes by entering into your Microsoft account connected to your Xbox account.
However, you need to keep in mind that any adjustments you make will have a larger impact. You are updating your Microsoft account details as a whole when you do so, and not simply changing the email on your Xbox account.
Changing email can sometimes be necessary like you have lost access to the previously added email address or you no longer want to use the present email address because it’s becoming too flooded with spam, or you might just have changed your mind. There can be numerous good reasons for you to do this. But, we are not here to discuss those.
So, without wasting further time, let’s just see the steps that will let you know how to change your email on your Xbox account, for which we are actually here!
Steps to Change the Email Address on Your Xbox Account
As discussed in the intro of this write-up, you will need to update the information on your Microsoft Account in order to change the old email address on your Xbox account. Regrettably, there is a connection between the two services, and Xbox doesn’t have a separate website.
So heed the warning. Any changes you make in your Microsoft Account information, in order to change the email on your Xbox account, will be reflected across all Microsoft services you access using that account, and not just Xbox.
So, if you have made up your mind to change Xbox account email, then follow the steps given below:
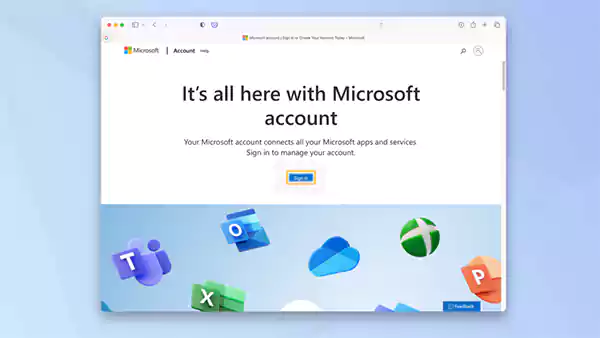
- First off, go to the Microsoft Account page and sign in to your Microsoft account.
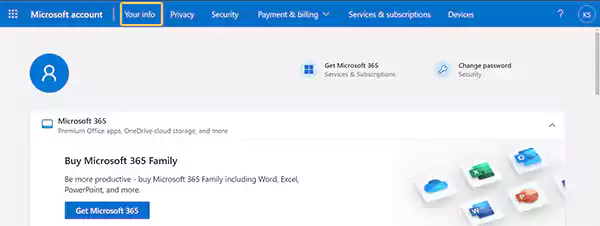
- Now, once you are in your Microsoft account dashboard, go to the Your Info tab, which you can find at the top of the page.
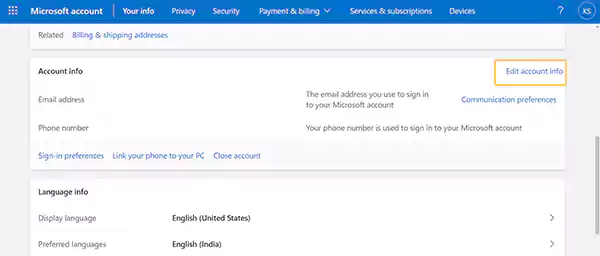
- On the following page that opens, scroll down to the Account Info section, and click on the Edit Account Info option.
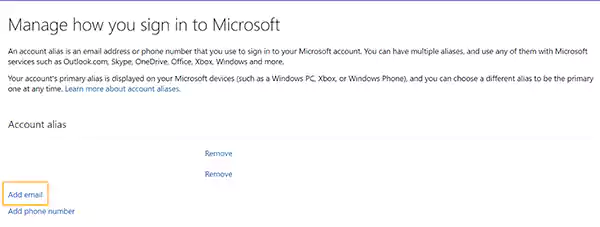
- After that, the Manage How you Sign In To Microsoft page will open, where you have to click on the Add Email option present under the Account Alias section.
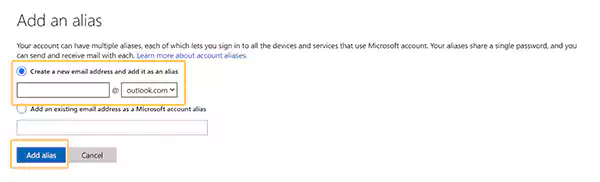
- Next, fill in the new email address in the required field, and click on the Add Alias button.
- Thereafter, you will have to follow some prompts displayed on the screen to verify the email address you just provided. If you are facing a problem in competing verification or Microsoft is not sending the verification code on the email, try resending it. You can also check different folders of your email account for the verification email.
Note: It is not possible to utilize email addresses or phone numbers that have previously been set up as aliases on another account. So, if you are not able to add a certain email address, check if it is used in any other Microsoft account or simply use another one.
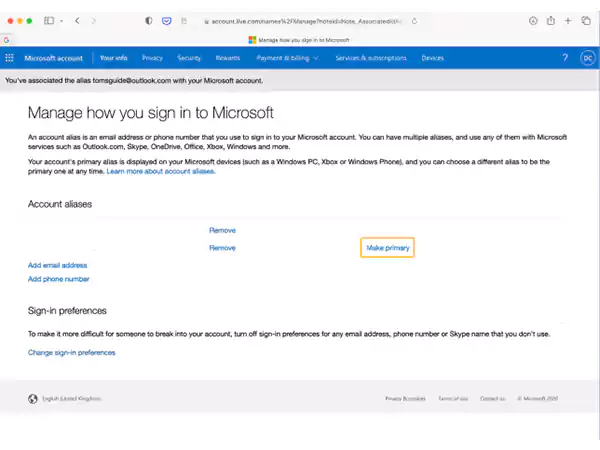
- Once you are through the verification, you have to click on the Make Primary option. This will make this newly added email address the primary one for your Microsoft or Xbox account.
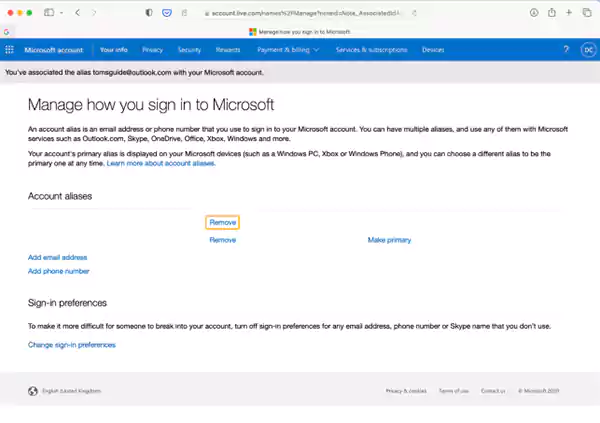
- With the above steps done, you have changed the email on your Xbox account. Now, if you want to delete the older email, you can just click on the Remove option next to it. You will only be able to delete the older email only if it is not the Primary Alias. So, first, make the newly added email address the Primary Alias.
IMPORTANT: When removing an email alias that’s connected to a Microsoft domain (such as @Outlook.com, @Hotmail.com, or @Live.com), that email is completely deleted from Microsoft systems and can’t be used to send or receive emails. It won’t be available for use again as an alias on another account. Microsoft doesn’t recycle email addresses, so deleted emails can’t be reclaimed at a future time. So, critically think about it and then make up your mind about removing the older email address.
- Now, to confirm the deletion of the older email, click on the Confirm option.
- After the deletion of the previous email, you now have a new email address that you can use to sign in to your Xbox account.
Change Xbox Sign-in Preference
If you have more than one email address added to your Xbox account, then you can change and choose which one of them you want to use for sign-in purposes. The process under this section will let you set email(s) that you can use to sign in to your Xbox or any other Microsoft service account.
So, in order to know how to change your Xbox email for logging-in purposes, here’s what you need to do:
- First, go to the Microsoft Account page and sign in to your account using your regular email address and password.
- Now, in order to change the email on your Xbox account, click on the Your Info tab present at the top menu ribbon of the screen.
- Then, scroll down to the next page, till you see the Account Info section, and there, click on the Edit Account Info option.
- This will take you to the Manage How you Sign In To Microsoft page. There, click on the Change Sing-in Preferences option under the Sing-in Preferences section.
- The emails you have connected to the account will be displayed next. You cannot uncheck the box of your primary email, which is always checked. Instead, you can select or deselect the additional secondary email(s). This will provide you access to your Xbox or Microsoft accounts using your secondary email(s), which you will select here.
- Finally, click on the Save button, and with that, you now know how to change your email on your Xbox account for setting up sign-in preferences.
How Can You Find a Lost Xbox Email Address?
If you take the proper steps (as stated in the above sections), changing the email associated with your Xbox account can be done quickly and effortlessly. After you log into your Microsoft account, it should be a simple procedure unless you’ve forgotten the email or password.
However, if you have forgotten the password of the account, recovering it is a simple process by visiting the Microsoft Account sign-in page, clicking on the Forgot Password link, and following the prompts thereafter. However, if you have lost the primary email address of your MS account itself, you must figure out how to get it back, before you proceed to the steps to change your email on your Xbox account.
Well, you don’t need to worry about that as well. There are certain ways by which you can know your Xbox primary email address, and then use it to access your MS account. Listed below are all these:
Xbox 360
- While using the Xbox console, highlight your Gamer Tag or Gamer ID to get your email address. If the email doesn’t appear, move on to the next step.
- In case you were not able to see your email address in the first step, you might have changed the settings to hide it. Nevertheless, to view your email address on your Xbox account, click on the Xbox button to open the Guide.
- Next, click on the Profile option.
- After that, hit the Settings option to get to your settings page.
- Then, click on Account.
- On the following page, scroll down to the Your Information section and click on the Account Security option.
- Finally, on the next screen, you will be able to see your Xbox account email on the right side.
Xbox One S/X
- First off, click on the Xbox button to open the Guide.
- Now, click on the Settings option.
- Next, select Account.
- After that, you have to click on the Sign-in, Security & PIN options.
- You may see a prompt next asking you to enter your PIN. Fill it in using the numerical pad present on the right side of the screen.
- Then, click on the Change My Sing-in & Security Preferences option.
- Finally, on the screen that appears you will be able to see your Xbox account email address present under the Show on Home option in the center column of the screen.
Xbox Series X/S
- To begin with, press the Xbox button to open the Guide.
- Click on the Settings option, and select Account.
- After that, click on the Sign-in, Security & Passkey options.
- Lastly, the Show on Home section of the following screen will display the email address of your Xbox account.
Xbox Family Group
If you’re a member of an Xbox family group, you can ask the organizer to use the Xbox Family Settings app to check your account information.
Further, it is important to note that this process will only work if you are set as a member of the Xbox family Group. The account information of other organizers in a group cannot be viewed by organizers.
So, you can connect with the Organizer, who has to follow the steps given below to provide you with the required email address:
- On their mobile device, launch the Xbox Family Settings app.
- Choose the participant whose account information is unknown.
- Now, besides the Gamertag, click on the Info bubble.
- Lastly, look into the details for the Microsoft account that is connected to their Xbox profile under the Account Email section.
After following the above steps, you must have found the email address associated with your Xbox account. Now, you can use this information to sign in to your Microsoft account and change email on Xbox account.
However, if you couldn’t find the email, look into other methods ways that are stated below:
Alternative Methods:
- Check your past communications from Microsoft, if you used a different email as an alternative alias, or if you have a second one for confirmation emails. Your main Xbox email address may appear in communications that include Microsoft billing or Xbox information.
- If by following any of the above procedures you couldn’t find your Xbox email address, then the last resort that remains is to contact Microsoft Support. Get in touch with the MS Support team, describe your case, and follow the instructions provided.
Read More:
- How to Fix Outlook Hyperlinks Not Working Error? 9 Ways to Troubleshoot Outlook in 2023
- 8 Simple Steps to Remove Yahoo Search Engine from Chrome
- Why is a Good Microphone Important for Streaming, and How to Choose One?
- Best Hacks for Playing Unavailable Games in Canada
Share